8.29.2009

Preschool

Supplies : Paper by Basic Grey, Scenic Route; Thickers and Button Flair by American Crafts; Tree and numbers elements by My Minds Eye; Red Alphas by Scenic Route; Cardstock from LSS

Another page on kraft paper! Here are a few more photos of her very first day going to school. I had take so many of her that day, and it was hard to get really good ones since for the most part she just wanted to go and not have any pictures taken. This year I've been a little lazy about getting my photos. Because I knew it would be crazy that first day I didn't take my camera for pictures yet. This last week I took Caitlyn's first day of Kindergarten pictures, even though they technically weren't taken on the first day. I don't think it matters too much though, as long as it was around the same time. I'm so glad for the weekend now. I play the chauffer all week with Caitlyn and Paul since we have just the one car and it's so nice to not have to be anywhere today. I'm totally going to be vegging out as much as possible! Have a spectacular Saturday and thanks for visiting!

8.28.2009

Uncertain

Supplies : Paper by Scenic Route; Ribbon by May Arts; Flowers by Prima; Thickers and button flair by American Crafts; Red Alphas by Scenic Route; Brad by Basic Grey; Bracket by My Minds Eye; Cardstock by CTMH

I'm finally getting around to doing Caitlyn's very first school pictures. These were back in Dec of 2007 when she first started preschool. While she was mostly excited to go to school there was a moment when we were walking to the car that she was suddenly unsure of going. I think it was because she would be leaving Audrey behind and she's been Caitie's wingman since she could walk. There has been very little that Caitlyn has done where Audrey wasn't far behind. But just starting to mention the fun stuff she would do, Caitlyn got excited again and had a blast at school that day. I thought it was sweet though, that she was hesitant for just that small moment. Thanks for stopping by and have a fabulous Friday!

8.26.2009

Closed Caption

Supplies : Paper by Basic Grey; Remarks letter stickers by American Crafts; Fox Brad by Imaginescence; Brad by Basic Grey; Flowers by Prima; Ribbon by CTMH; Cardstock from LSS;

Audrey is so funny. Whenever she gets scared while watching a show she covers her ears and keeps on watching. It doesn't matter if the scary part (which usually isn't scary, even to Cait) is on her favorite series - Avatar the last Airbender, or on a video game that Paul is playing like Mass Effect, she always does the same thing, just covers her ears. I think it's so cute. Here she was looking extra darling in Cait's PJ pants and Paul's hat. I've been loving kraft cardstock lately. It's such a great neutral and gives an earthy feel to layouts. I wish it was more available here. There's only one store I've found that has this nice shade of kraft and often times it's sold out when I go to get more so I have to stock up when I do find it there. Enjoy the page and have a wonderful Wednesday!

8.25.2009

Don't Smile

Supplies : Paper - June Bug by Basic Grey, Scenic Route; Remarks letter stickers and Button flair by American Crafts; Ribbon by May Arts; Flowers by Prima; Heart Chipboard Border by CTMH; Pearl Brads by Recollections; White gel Pen; Cardstock from LSS

I swear Audrey makes the best grumpy faces ever. I can't even photograph them all since most of the time now she's such a camera ham. Her stern brows, pursed lips, and that mad little voice.... she really just can't help being cute even when she's a grouch! Lately I've been wanting to try doing more 'condensed' layouts. I love seeing those pages where the gals have taken a sketch and kind of shrunk the whole thing to fit in just a portion of the page. There's just something about the cluster and white space that pulls me in. So with the pages I made on Sunday that's what I tried. I really like this one, though I'm still getting used to the black. Everytime I see it on other layouts I love how it makes everything stand out. Like in this layout, I love that the papers, title, and picture just pop out. I'm just so used to lighter backgrounds though, that the reverse kind of takes me off guard. Anyway, enjoy the page and have a happy Tuesday!

8.24.2009

Got Vellum?


This week the challenge on Practical Scrappers is how to use vellum. I have to say that even though this one has been the most challenging for me so far it was also one of the most fun. I stuck with winter pages because I loved these pictures and have been wanting to scrap them with something fun. And vellum just happened to be the fun for them!


Create a scene! I made some snowy vellum hills overlaying my stripe paper and sewed it in place. I used pinking scissors to edge the vellum snow and then to cut a decorate mat for two of the snowflakes. Tear, paper piece, or simply cut curves in your vellum to create a backdrop scene for your layout. Don't stop with snow either; make water, clouds, rain drops, foggy winter windows, etc. Got colored vellum? Make leaves for a tree or just use like you would cardstock for a lighter layered effect. You can also use vellum to soften bright papers. Have a plaid that's too dark? Lay some vellum over it for a lighter page or use vellum over fun bright papers for a baby layout.


Keep it simple! Sometimes I just can't find the right shade of cardstock to match my page. Here I used vellum to mat my pictures to create a very simple rustic snow layout on dark kraft paper. Use vellum to create shades on monochromatic pages or to mat a picture when you can't find cardstock to match. Love clean layouts? Vellum adds interest without adding colors, almost like texture. Vellum looks great plain or if you love the home spun look adding a hint of stitching can really make a statement! Tip : When sewing make sure to put adhesive closer to the center of your vellum piece so that the needle doesn't get stuck and tear your vellum.


Texturize it! Here I crumpled up my vellum snowflakes to give them more presence on the layout. Crumple or emboss vellum to make it stand out more on a page. It's easier if you cut or punch out your vellum before crumpling. Try dry embossing a ghost with a swirl pattern, or add some dots to mini clouds. I hope you're inspired by some of these fun ideas on how to use vellum! Check out the Practical Scrappers Blog for more examples on how to use vellum. Enjoy and have a great Monday!

8.23.2009

Have a Sparkly Christmas

Supplies : Papers - Snowed in by My Minds Eye; Stickles; Kaliedascope Embossing Powder; Rhinestone;

Thanks Alanna and Karen for your wonderful comments! I love hearing what my readers think especially about real life and I'm glad to know I'm not the only mom that feels this way about time! I did get some play time in today. Not as much as I hoped, but more than I've had all week :D I made a quick and pretty card for today's challenge. I keep finding ways to use these birds. These pieces are from the pattern paper now since I only have one little tag left with this robin on it. The sentiment mat is embossed with glitter powder, you can't see it very well in the photo, but that distressed color change around the edge is all shimmery! The bird cage was also outlined in stickles for more sparkle and I added a tiny rhinestone to the muted snowflake for a small accent. I love the simplicity of the card and the sparkle just makes it extra special! Don't forget to visit Sparkle's Blog for the challenge and other cards and thanks for stopping by! Have a wonderful night!

Christmas Card Challenge #37

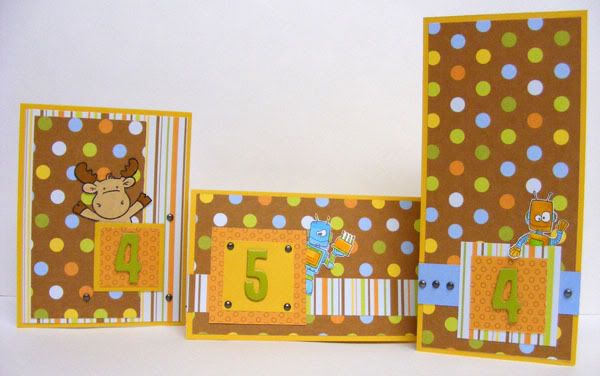
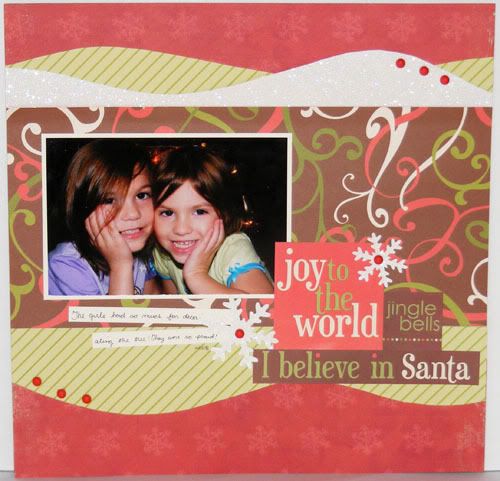
Supplies : Paper by Basic Grey; Stamps by Papertrey Ink; White Embossing powder, White Gel Pen; Black ink by CTMH; Rhinestones

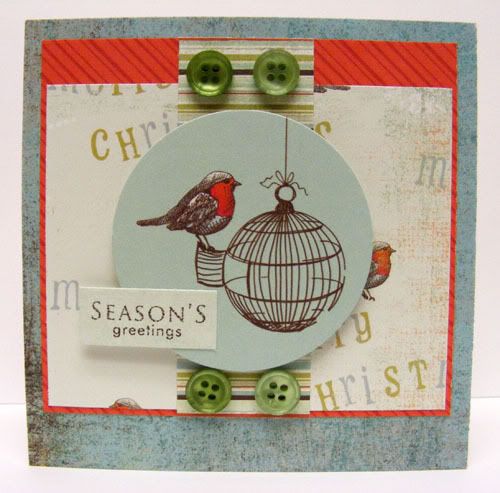
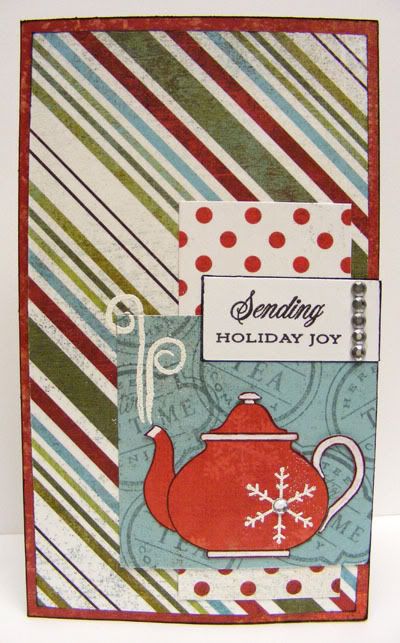
I finally got around to making my card for last Sunday's Christmas Card challenge on Sparkle's Blog. The added challenge was to make a hot cocoa or similar themed card. I did a tea theme since I've been wanting to play with my Tea for Two stamp set. I love this paper but I think I'll be happy when it's all used up since I feel like I've been using it for so long and on so many Christmas projects.

Sometimes I wonder where I find the time. Time to craft, time to watch a show with my hubby, time to organize .... with what seems to be a never ending to do list and new responsibilities cropping up like volunteering at the school, PTA, and being called as a Primary President, I really wonder - where do I find the time and do I really have this time I think I've found. I've had more work this past week with Caitlyn between her school homework every weeknight, her therapy homework, and dealing with her re-emerged tantrums than in the past month all together. Somehow even with that I've managed to volunteer at the school, organize getting the primary started for our new ward, along with all the regular hair brained things I feel I have to do at random moments like completely reorganize our room and clean out the storage closet as well as the refrigerator this past week.

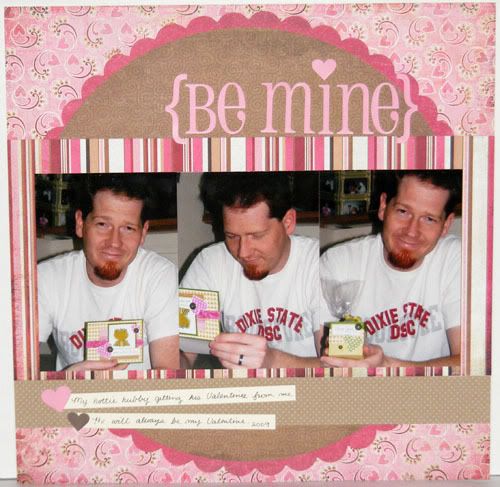
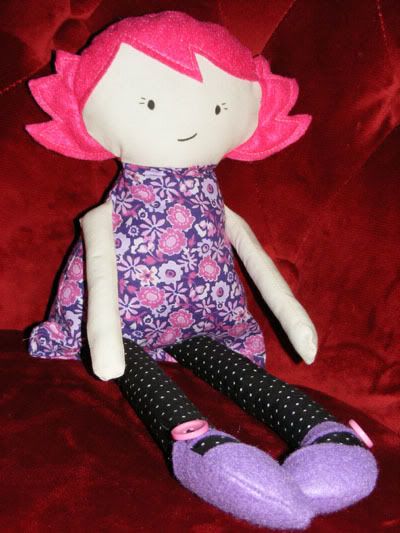
I recount the week and have found that despite my busier schedule I actually got 4 nights with my hubby to watch a show after the girls were in bed, a movie with my hubby and a friend (District 9), plus a couple layouts, two more dolls, and this card. Maybe it's all the insomnia from the stress I've been having. Getting less than 5 hours of sleep a night allows me approximately 21 more hours in the week to complete more tasks but it definitely has some mean consequences. Like the coming down with a sinus cold and a horrid stomach ache at the same time though I'm pretty sure the stomach ache is stress combined with hormones.

How do mom's find the time? Do we get some sort of dimensional time lapse to allow us enough moments to get homework and reading time done as well as play chauffer and get dinner on the table every night? Somedays I feel like I've done it all and others I feel like the day just disappeared in a black hole. Are those black hole days payment for the done it all days? And how do the mom's of more kids do all this? I just have 2 and only one of them is in school right now. I feel like I'm ready to come apart yet I see all these other moms with 4 and 5 kids running through activities like a well practiced dance routine. Will I get to that point sometime or do I look like that with my girls too and we're all just going crazy with everything that happens in our lives?

I've run out of future posts after Monday. I am hoping today I can take a day off and create though I'm sure all the other moms reading this are going "A day off? What's that?" Maybe I won't get a complete day off, but I can get as much me time as possible in. We'll see and you'll know for sure if I got that time to play if I get to post a creation for the Christmas challenge for today. Don't forget to visit Sparkle's Blog for the Christmas Card Challenge if you want to play and see the links to the other cards. Thanks for visiting, enjoy the card, and have a lovely Sunday!
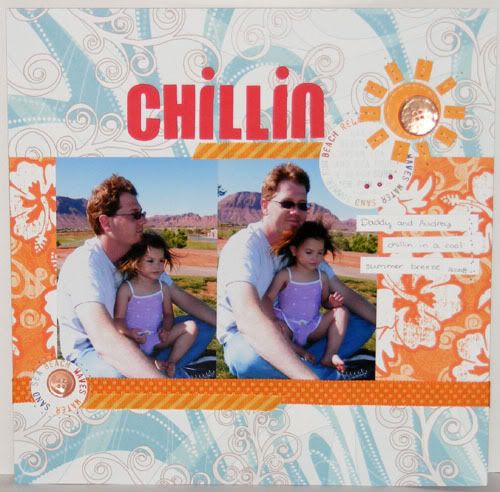
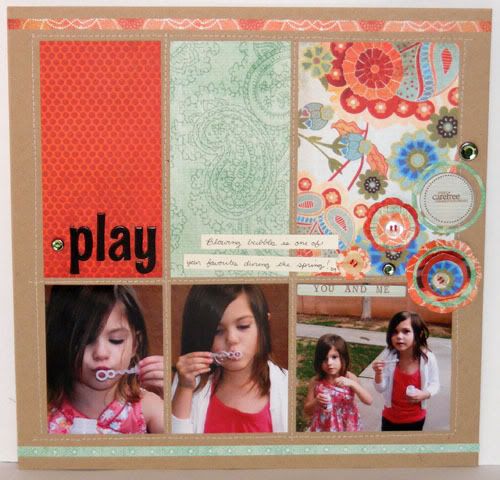
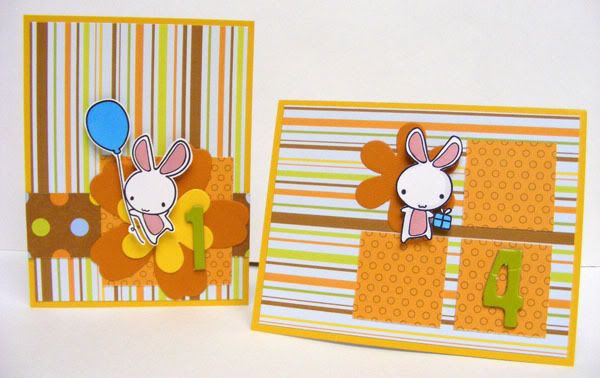
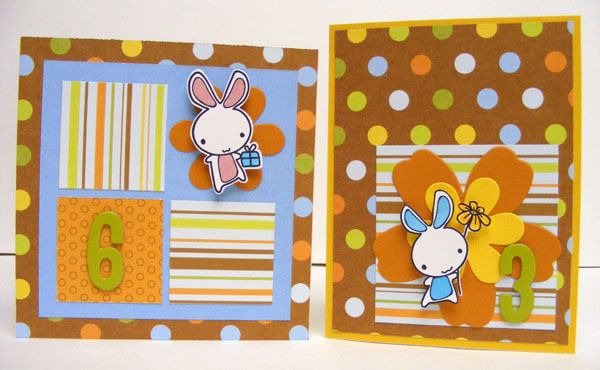
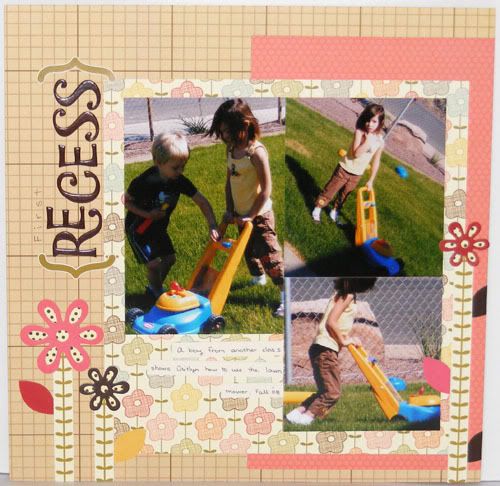
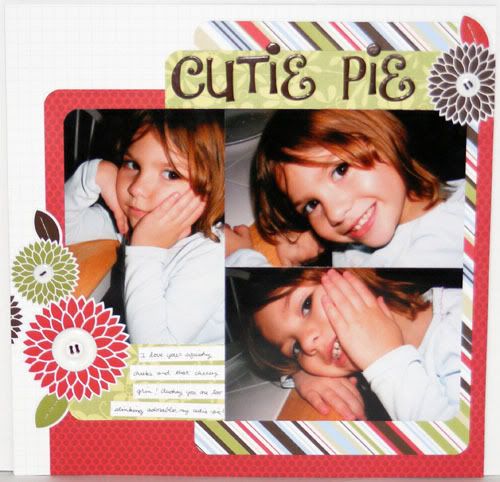
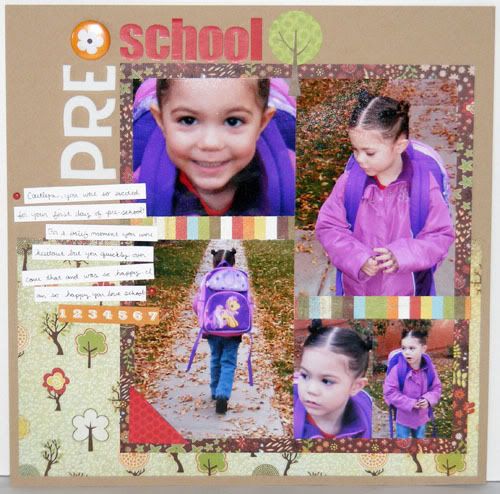
8.22.2009

Grouchy Girl

Supplies : Addison Road Paper, Diecuts, and Chipboard by My Minds Eye; Cardstock by CTMH; Thickers by American Crafts

Another layout using the Inspired Blueprints Sketches. This one is for sketch #27. I got this dinosaur paper because it was just too cute but I didn't know what I would use it with. Then I found this picture of Audrey. Even though Audrey is past the biting stage in this picture, I hadn't scrapped about her biting when she was about 18 months old. Whenever she got mad or frustrated she'd bite me, hard. One time while at the grocery store she bit through the skin in my shoulder and drew blood. Thankfully that phase didn't last more than a couple months but I'll never forget her little lock jaw! The dinosaur chipboard elements were perfect for sharing that she's a biter so I just had to use it with this grouchy photo. Now when Audrey's grumpy she makes mad faces and runs to her room to lock her door, a much better alternative to biting in my mind! Thanks for stopping by and have a wonderful weekend!

8.21.2009

Stick

Supplies : Paper, Cardstock Elements, and Buttons by My Minds Eye; Jute by Papertrey Ink; Thickers by American Crafts; Cardstock by CTMH

I love that Caitlyn has such a blast entertaining herself. Here she had found some plain sticks and spent nearly an hour hunting for other sticks and playing with them! Right now it's been too hot outside for her to want to spend more than 15 minutes outside unless we are in the pool, but during spring and fall she'd be outside all day if I let her! I made this page using the #28 Inspired Blueprints sketch and mostly My Minds Eye goodies. Enjoy and have a fabulous Friday!

8.19.2009

Chillin

Supplies : Paper - Creative Imaginations and Pebbles (the sun); Buttons by Papertrey Ink; Thickers by American Crafts; Ribbon by Pebbles and My Minds Eye; Mini Brads by Queen Co.; Embroidery Floss

I love this swirl paper, like water or a summery breeze. I'm always trying to put flowery stuff on layouts but since this one had Paul in it I tried to tone down my girly tendencies by adding the circles punched from the pattern paper and a sun that I made from a scrap of pebbles paper. Stitching adds more interest to the layout and finishes it off. I remember it was so breezy that day. You can even see Audrey's hair blowing around in the pictures! Thanks for stopping by and have a wonderful Wednesday!

8.18.2009

Beautiful Summer Girl

Supplies : Paper by My Minds Eye and Crate; Surfboard accents and title by My Minds Eye; Flowers by Prima; Brads, Cardstock, and Ribbon by CTMH;

This layout flew together in a jiffy. I did a bit of layering with some scrap papers onto the reverse side of some My Minds Eye paper I don't care for anymore. Then I layered the surf boards with flowers and the title. I think it turned out so cute! Here I loved how round her face was in the left picture. It really showed how young she still is. Sometimes I forget how little she is because it seems like she's getting so big so fast! She can still be my sun bathed baby! And no matter what she'll always be my sweet girl. Enjoy and have a terrific Tuesday!

8.17.2009

Got Scraps?


Use them up! This weekends Practical Scrappers Challenge was how to use scrap paper. Be sure to check out the site to see what Design Team B made for this challenge. Everyone organizes their scraps differently. I keep the main bulk of my scraps in two 13x13 zip bags, one for each of my main paper styles - cutesy and pretty. The rest are separated by holiday or seasonal. When I use my scraps I start with a base concept - usually one or two scraps or papers which are going to set the tone for the rest of the pile. Then I simply pull out everything from my scraps that match my concept. Usually it's a lot of scraps but I love having a lot of options. Then I go through my pictures and find what fits the papers I picked and after that whittle down the papers I want to use on the layout. And that's exactly what I did to pick the scraps to create these first two layouts.


Patch it up! Making these fun border patches or doing center patches has long been a popular design with scallop and shaped patchwork creating the newest trends. Here I kept a simple straight patchwork border. This is great for those smaller scraps you may have where there isn't enough to make a big presence on a layout. Keeping the bulk of the layout a single shade helps let the patterns in the tidbit scraps to really shine whether they make a border like mine or take center stage with your photos. I kept the center of this layout clean and separated the photos by using a ruler and drawing a line with my black journaling pen. The curved title and brads emphasize my DD blowing bubbles and some stamped lines for the journaling finish off the layout.


Do it all with scraps! This page I not only took my scraps to make big focal blocks of pattern, but I also created the floral embellishments with various scraps to accent the page. Some sewing adds subtle separation and a border. A really fun approach to using up scraps that I do all the time is to make embellishments out of scraps that aren't even a part of the paper lines used to make the layout like in my Fashionita layout where the bloom and photo corner were made from My Minds Eye scrap papers while the main layout was made with my new Marrakech Basic Grey papers. Try paperpiecing your own elements from scraps or use a die cutting machine to create a fun patterned title!


Make a rainbow! Admit it, you probably have scraps in every color and the rainbow effect is hot in crafting right now. Paper piece a cute rainbow for a card or create a rainbowed focal on your layout. Here I cut strips from my scraps to create a fun rainbow striped backdrop for the photo. I really wanted to keep the focus on the rainbow strips of pattern papers so everything else was kept neutral. A white textured base really lets the colors pop and the black stitched border gives the page a nice frame. Using black and white even for the embellishments keeps the attention on the rainbow I made and helps me feel the layout is now complete. I hope you enjoyed the layouts and are inspired to use up your scraps! Don't forget to visit the Practical Scrappers Blog for more examples and have a great Monday!

8.15.2009

Splash Pad

Supplies : Paper - Basic Grey; Flowers by Prima; Glazed Brads by Basic Grey; Thickers and Ribbon by American Crafts; Cardstock, purple brads, and chipboard tags by CTMH; Waxy Flax

I like this layout much better! Another line of collaged photos, I've been really into that stream lined look lately. Plus it makes it so easy to create a layout, just block your paper and photos then embellish! It also uses up pattern paper quickly which I love since the more paper I use, the more new stuff I'm allowed to get! More pictures of the water park, I still have so many of these from different occasions. I did better this year, though I know I want to make another photo shoot at the pool since now Caitlyn gets in the water!! That is a huge milestone for her with her PDD issues so we are so happy. Maybe next year she can even take swimming lessons. Enjoy and have a great weekend!

8.14.2009

Chilling Out

Supplies : Paper by Basic Grey; Cardstock, Silver Brads, and White Daisy flowers by CTMH; Turtle by Colorbok; Thickers by American Crafts; Glazed Brads by Basic Grey

Here's a quick and simple layout. I tightly collaged the photos together and then layered it over some Euphoria Basic Grey paper. The girls were so funny chilling out at their Nana's house after a long afternoon at the water pad. It was so hot that they were still a little pink in the face even after getting in out of the sun. But it was well worth it since they had a blast! Plus they got to go to Nana's which they love. I'm feeling a bit so-so about the layout but that's normal, I don't absolutely love every layout I make. Though I do have to admit I love a whole lot of them! Have a fab Friday!

8.13.2009

Seven Cards for Seven Kidlets


I think I've just found my new favorite way to make kid's cards! Just two sheets of double sided pattern paper and a couple sheets/scraps cardstock and I was able to make these seven darling cards. I had bought these two papers together with the intent of recreating the cute playground layout in my local scrapbook store. I even got the diecut flowers to go with it. Well, two years later and the paper and diecuts still sat unused since I couldn't find photos that I felt went with the paper. So I decided I should make some little boy cards for our nephews' birthdays which are coming up in the next few months.


Supplies : Paper by Pebbles; Cardstock and Brads by CTMH; Robots from Stamping Bella; Thickers letter stickers by American Crafts; Bunnies by Greeting Farm; Precut flowers from LSS using Bazzil Cardstock; CTMH and Copic Markers; Pop Dots;

Of course after putting together the two robot cards I thought I might as well just go ahead and make cards out of all the paper. It worked out perfectly too since I could use the flowers on the cards for our nieces and the Riley card could be used for another nephew even though his birthday isn't until March. It never hurts to have them already made, especially since I often forget until that day to make a card! My fun new discovery was simply cutting out the cute stamped images and putting them on the cards instead of doing the usual matting.


A little while back I had seen a simple birthday gift set that used the number stickers to use for ages 1-9. I thought it was a great idea to use up the numbers in my thickers set so I applied that to these cards. I noticed this also helps me remember who I have cards made for. With 8 nieces and nephews and another on the way it gets a little crazy trying to keep track of just the kid's birthdays! Anyway, I hope you enjoy my quickie kidlet cards and have a terrific Thursday!

8.12.2009

Garden Ghost

Supplies : Paper by Making Memories, Pebbles, and Scenic Route; Bazzil CS; Ribbon, buttons, brads, and white cardstock by CTMH; Glitter cardstock by Doodlebug; Flowers by Prima; Thickers and Remarks letter stickers by American Crafts; Embroidery Floss; Bloom Nestibilities

How fun that little paper pieced ghost was to make! He's glitter cardstock so that he shines like the glittered ghost on her shirt. I drew a simple ghost on the wrong side of the glitter paper and then cut him out. I even stitched around the outside of him to give him a bit more presence. The brads and stitching were added after he was stuck to the layout. The journaling talks about how Audrey has a black thumb like me, which is fitting for these pictures since she looks like a little grim gardener! Making the flowers was fun too, I freehandedly cut the leaves from the same paper I cut the flower middles from. I think that added so much pop to the rest of the layout and really helped balance out the dark shirt she's wearing in the pictures. It's funny the grouping of papers I put together. The Making Memories paper is from the Great Escape summer line, the Pebbles paper is from the Lil' Bud baby boy line, and the Scenic Route one I think came out last fall. Don't be afraid to mix up your papers, especially the ones that end up in your scrap stash, you never know how great they may coordinate! Anyway, have a happy Wednesday and thanks for visiting!

8.11.2009

Gamer Girls

Supplies : Paper - Making Memories, Pebbles, Cosmo Cricket (layout), My Minds Eye, Making Memories, Scenic Route (lollipop flowers); In Bloom stamp set by Papertrey Ink; Buttons and Ink by CTMH; Chipboard Bracket by My Minds Eye; Thickers letter stickers by American Crafts; Embroidery Floss; Circle Nestibilities

More lollipop flowers! Are you all liking the different flowers styles I'm doing with my nesties? I'm loving how easy it is to use them to make my own cute embellishments. These ones I used the plain ol' circles to make some cute flowers then for the leaves I stamped the large and small leaf from the In Bloom stamp set from PTI then cut it out. I love these pictures! Our girls love gaming as much as Paul and I do and they often fight over who gets what controller. The pictures actually aren't the norm since Caitlyn usually gets the black and Audrey always wants the pink! I was so proud of using so much scrap paper on this one. The bright pink pebbles paper and the blue cosmo cricket paper were both big scraps that I didn't cut, I just laid them on the MM paper and went from there. The flowers are my favorite, also made with scraps :D, they just add so much fun to the page! Thanks for visiting and have a terrific Tuesday!

8.10.2009

Got Stickers?


This week the Practical Scrappers DT challenge is to find ways to use up stickers. So stop on by the Practical Scrappers blog to check out all the inspirational pages created by the Team A design members! We have the option of submitting even during our off week and since I had a few stickers I wanted to get creative with, I made some fun layouts for this challenge as well.


Supplies : Paper - My Minds Eye (snowflake), Scenic Route (green stripe), Pebbles (swirl), and Doodlebug (glitter white); Candy Dots and Christmas Sentiment Stickers by Pebbles; Marvy Snowflake punches; Col White cardstock by CTMH

Create word art with your sentiment stickers! I got those great sentiment stickers for Sparkle's Christmas card challenge a couple weeks ago and wanted a way to use some of them up on a layout. Try replacing your title with a cluster of word art for a fun sticker focal point like I did here. Have smaller sentiment stickers? Use those to create word embellishments. Use them on the corners of pictures like you would with flowers and stack up a few for greater presence. Or get extra creative by cutting up and organizing word stickers for eclectic journaling!


Supplies : Paper - Collage Press (grid) and Pebbles; LinniBell (flower and leaves) and Little Miss (brackets) stickers by Pebbles; Thickers by American Crafts; cardstock by CTMH

Make a scene with your stickers! On this page I made a cute garden type scene with some flower stickers and the border that was attached to the floral paper, then added bracket stickers to bring attention to the title. These particular stickers have negative space in the petals and centers that make them look lost on the layout by themselves. To give them a more solid presence I added pattern paper to the back of the sticker, filling in those empty gaps. Combine your stickers with other elements to create a picture, like bug stickers on cut out grass or in a paper pieced jar. Try creating a zoo with your animal stickers or putting a sleepy animal on a paper cut moon for bedtime layouts. For a focal make a 'mini' scene with small stickers and place on the layout like a picture, complete with a mat for a frame!


Supplies : Paper - Pebbles (stripe) and Scenic Route; Stickers by Pebbles; Thickers by American Crafts; Buttons by Papertrey Ink; Embroidery floss

Embellish your stickers! Some stickers though cute can look pretty plain and boring by themselves on a page. Spice them up by adding buttons, brads, eyelets, rhinestones, etc. Add stitching to emphasize detail or to put some detail where there isn't any like I did on these sticker leaves. You could use brads and stitching to make a jack-o-lantern out of a plain pumpkin sticker or add metallic veins to a leaf with a glitter marker or thread. Try creating a border with your stickers - freestyle, on paper, or on ribbon! I hope some of these ideas inspired you on how you can use up the stickers in your stash. For more ideas visit the Practical Scrappers Blog and have a great Monday!

8.09.2009

Season's Greetings

Supplies : Paper - My Minds Eye (bird and stripe); Basic Grey (blue); Pebbles (red stripe); Bird Element by My Minds Eye; Buttons and Sentiment (Faux Ribbon) by Papertrey Ink; Pop Dots

Here is the card I made for the week 36 challenge on Sparkle's Blog. She had us take whatever inspiration we wanted from her card again for the extra challenge and so I took the sketch she used for my inspiration. I used her card as my example instead of going to the site though. I went with the bird theme like I have a few times in the past for these challenges and I've almost used up all of these little cuties. This sketch was perfect for using up this circle element I had and the sentiment fit perfectly in the blank corner. Another quick card since it had minimal stamping! I have been doing a lot of sewing this week (4 more dolls and a monster for gifts and a commission) so I haven't papercrafted until today. It was so nice to take a break from fabric and go back to my favorite medium :D Don't forget to stop by Sparkle's Blog for the challenge and links to the other cards. Have a lovely Sunday!

Tis the Season

Supplies : Paper - Making Memories (green snow), Pebbles (brown swirl and red stripe), My Minds Eye (red snow); Sentiment sticker by Pebbles; Buttons by Papertrey Ink; Cardstock by CTMH; Embroidery Floss

It's late but here is my card for Sparkle's #35 Christmas Card Challenge. I loved the green, red, and brown that she used in her card and began with that for my inspiration. I also used 3 buttons on my card like she did and Riley's Christmas tree spurned the idea to make big paper pieced trees. I had a lot of fun with this card. It was quick and easy - no stamping at all! I'll be posting my card for this week's challenge in a little bit here. Enjoy and thanks for stopping by!

8.08.2009

Be Mine

Supplies : Paper - Basic Grey Bittersweet, Crate Paper (circle), Making Memories; Valentines Stickers and Hearts by Pebbles; Cardstock by CTMH

Using Creative Scrappers Sketch #61 I made this quick 30 minute layout. I don't often scrapbook Paul or I unless we are with the girls and this was a fun layout for me to do since it was just of my hottie hubby. Plus it's his birthday today to it's fitting that the layout features him :D I kept it simple since the paper is my favorite part of this layout (other than the pictures of course!) Easy and quick. Too bad I don't scrap like this all the time, I'd totally be caught up! Have a fantastic weekend!

8.07.2009

I wanna say Cheese!

Supplies : Paper by Scenic Route; Ink, Cardstock, and Classmates Alpha stamp set by CTMH; Thickers letter stickers and ribbon by American Crafts; Waxy Flax; Buttons open stock at LSS; Scallop Nesties

Same sketch - totally different look. I loved that #26 sketch so much that right after finishing yesterday's layout, I created this one only I broke out from my basic grey roll. Over the past year Basic Grey has easily won out as my favorite paper company closely followed by Scenic Route which is what these papers are. Though I do have to admit I hoard my basic grey a lot more than any of my other papers. I started with these fun fall papers to go with Audrey's little camera ham pictures and then created these blossoms with the scallop nesties and prima flowers. The inspiration for these were from an item Sparkle had on her etsy months ago. They aren't there anymore but I do remember noticing some little flower button blooms on her etsy shop link and even in passing I thought it was such a cute idea. Once I got my own nesties and saw the tiny scallop circle I instantly remembered the little blossoms and had to make my own! Some ribbon posing as leaves finishes off the blooms perfectly. The journaling is simply about how Audrey is a camera ham. "I wanna say Cheese!" is her way of saying take a picture of me, Mom! Thanks for stopping by and have a super Friday!

8.06.2009

Cromartie and the Dolls

Sounds like a band! Meet Cromartie. Cromartie is my silly little voodoo pin cushion. Even though I'm an amateur, I was determined to sew a fun pin cushion for myself since I didn't have one and those simple tomatoes don't offer much in the way of inspiration. Cromartie took me way too many hours for how simple he was and I won't even show you my other failed attempts. Long story short my papercrafting and sketch skills were not enough to transcend the 2D to 3D barrier. He's much different than the doll I sketched, but in some ways he turned out even better - like the way he sits up which wouldn't have happened with the limbs I drew in his preliminary design. And I have used him a lot the past couple days as I made dolls for my girls. It's been weird to sew instead of papercraft this week!


Here are the girls' dolls together. Normally I only sew flat things - baby blankets, simple square tied quilts, pillow cases - easy stuff. But after seeing some cute dolls on Etsy and The Black Apple I thought maybe... maybe I could make something like those. I did a lot of watching youtube doll sewing tutorials and searching Etsy for more examples. You can buy patterns but I didn't want to spend that much money on someone else's pattern if I could come up with my own, especially when they seemed simple. Some of the dolls and patterns seem pricey but after creating my own I can understand why. Just making the doll pattern took me about 4 hours (with interruptions). I sketched everything first then went over with my sharpie to emphasize the correct lines before cutting out the pattern pieces.


Cromartie was so instrumental in teaching me how to sew a stuffed piece while I made him. All the strife I had creating him made putting together the dolls so much easier. Plus he's a lot smaller and I've discovered it's easier to sew a bigger doll like these than a small one like Cromartie. This doll is Audrey's. She picked out light pink hair. The hair and shoes are felt and the rest is quilting fabric. Remnants and fat quarters are my new shopping favs. Some papercrafting supplies made it onto her as well with My Minds Eye buttons embellishing her shoes and some grosgrain I had in my stash for hair bows. I know, technically those were sewing items before they were ever papercrafting ^_~


Caitie's doll is wearing her favorite color - purple. She picked out hot pink for the hair so I decided to give her rocker girl type colors with the black tights and purple shoes. This doll's hair was much easier to sew than Audrey's and I'm thinking the next time I just won't stuff the buns. I drew their faces on with a fabric marker - way easier and quicker than embroidering which was what I had originally planned. Now the best part is that they LOVE these dolls! They have never shown the interest or love in the store bought dolls as they have with these and it makes me even more proud of them because the girls cherish them so much :D Anyway, it looks like this became a triple doll Thursday instead of a triple card. I hope you enjoyed the change in crafts and have a terrific Thursday!

8.05.2009

Fashionita

Supplies : Papers by Basic Grey (Marrakech) and My Minds Eye (Tres Jolie and Bloom and Grow); Ribbon from LSS; Buttons by My Minds Eye; Cardstock and Marker by CTMH; Remarks Letter Stickers by American Crafts; Embroidery Floss; Blossom Nesties

Can you tell I've been addicted to playing with my Basic Grey papers this week? Now if someone would just get the lemonade line in town before I break down and buy it online! I used the Inspired Blueprints #26 sketch for this layout which was a 2 page sketch. I didn't have enough photos for both pages so I just did the right side. I finally got a few nesties after debating for a year and a half! Yeah, I'm so not an impulse shopper. I got just a few of the ones I think I'd use the most for right now to make sure I like using them and I love 'em! This one I used the blossom nesties to make a lollipop flower. This baby is what made the layout take so darn long to make! The first combo I cut out I didn't like the order of, I had the flower print on the outside and it just disappeared into the background. So I cut some more blossoms and then thought stitching would be cute after finding the combo I liked. Each blossom is hand stitched and I sew really s-l-o-w. I curled the edges of each blossom up for some dimension and then gave the same treatment to the photo corner on the right. I love the way this came out and I'm sure to be using these blossoms for more lollipop flowers in the future! Everything else was fairly quick. The letters are just the remarks stickers so to make them pop more on the layout I took my cocoa marker and traced around the edge. It really made so much of a difference (note to self I should start taking before/after photos). A little ribbon scrap to take the place of a flourish on the sketch and viola - a fashionable page for my little fashionita! Enjoy and have a terrific Wednesday!

8.04.2009

Affection

Supplies : Porcelain paper by Basic Grey; Shaped paper by Crate Paper; Blush and small baby pink button, green gingham, col white ricrac, and green discovery paper by CTMH; Big pink button, pink crochet ribbon, and tag elements by My Minds Eye; Flowers by Prima; Pearls by Kaiser;

A pretty layout! This porcelain paper is so gorgeous, I wish my LSS carried more of the designs. I only got the three, but maybe they will get more in soon. I used a lot of old stuff with this new stuff. The basic grey and crate paper were new and the pearls are fairly new but everything else is over a year old! I love it when I can pair my new goodies and oldies together like this. The title was hard on this one. It's getting more difficult to find new titles for sister pictures. I lucked out that I had an E left in this thickers alphabet. They need more Es, I always run out of those first! Anyway, enjoy and have a happy Tuesday!

8.03.2009

Got Eyelets?


This week the Practical Scrappers challenge is to use eyelets. Be sure to stop by there to see all the amazing ideas from both design teams on what you can do with eyelets. Here were my submissions :


Supplies : Paper - Basic Grey (Urban Prairie) and Scenic Route; Thickers Letter Stickers by American Crafts; Flowers by Prima; Buttons by Papertrey Ink; Eyelets by Making Memories; Ribbon - Blue by American Crafts, Black unknown (RAK); Cardstock by CTMH; Embroidery Floss; Nestibilities

Here I started by using eyelets to create subtle circles around some of the more sour faces Caitlyn was pulling for emphasis on my layout. Make hearts, circles, stars, squares, any shape that you like! The closer the eyelets are the bigger the shape's impact, the further apart the more subtle. To create this look use a punched out shape or open die like the Nestibilities. Using your paper piercer to mark the eyelet spots, poke evenly spaced holes around the edge of the shape making sure to leave enough space for the eyelets. Using the classic hammer with punch or a Big Bite, punch the eyelet holes right over your pierced hole markers. Add your eyelets and back the open eyelet hole area with coordinating cardstock. Here I used white to back my silver eyelets.


Supplies : Paper - Pebbles (Background), Scenic Route, My Minds Eye, Sassyfras (Button Blooms); Eyelets by Doodlebug; Buttons by Papertrey Ink; Urban Bling Stickers by Me and My Big Ideas; Embroidery floss; Nestibilities

Try creating a fun border with your eyelets. In my layout I created a fun simple border using pink eyelets, then added eyelets to a couple of the journaling strips to make the look more cohesive. Do a varigated strip by alternating eyelet colors or emphasize details on a printed or stamped border by adding eyelets to the flower centers, in the scallop hump, etc. You could even use the same technique as I did on the Not Now Mom layout by substituting a scallop or other shaped border as a template for your eyelet placement to create a shaped eyelet border. Don't want too many eyelets? Simply use them to accent a couple journaling strips.


Supplies : Paper - Basic Grey Porcelian, My Minds Eye, Cosmo Cricket, and Making Memories; Ribbon from CTMH and My Minds Eye; Eyelets from Making Memories; Thickers by American Crafts; Embroidery Floss;

Add accents to your embellishments with your eyelets. Here I created some blooms with my Nestibilities and then added some white and pink eyelets to accent the flower's centers. Accent stars, hearts, paper flowers, etc with eyelets for fun pop! I created my flowers and added the eyelets before adhering them to the layout so that I wouldn't have to back the layout with coordinating cardstock. Some leaves cut out from printed Cosmo Cricket paper finish off the blooms just right. This method also works great with those shaped eyelets. Add star eyelets to circles, heart eyelets to flowers, etc. I was actually cropping with a friend when I made these and she was so sweet to let me have some of her eyelets since all I have are the basics - silver, white, black, and brown! So if you're reading this, thanks Julie! I hope you all enjoyed the layouts and have a great Monday!

8.01.2009

Butterfly Girl

Supplies : Paper - Basic Grey, Scenic Route, and My Minds Eye; Thickers stickers by American Crafts; Chipboard butterflys by Scenic Route; Rhinestones by Kaiser; Buttons by Papertrey Ink; Ribbon and Ink by CTMH; Flourish chipboard by Rusty Pickle

I have been saving this picture and this butterfly paper by Basic Grey for months. Sometimes I get afraid to scrap certain photos because I fear I won't do them justice. I knew I wanted to use this paper, but other than that I was at a loss. Finally I decided to just do it and I pulled up my Inspired Blueprints folder and picked out the #1 sketch to use. It turned out to be a perfect setup for this picture and I love how it came out. Along with some papers from the Basic Grey Ambrosia set the mix of papers involves mostly the reverse sides of pattern papers I had gotten, which in some ways was a bummer but at the same time I love this page so much that it more than makes up for it. I added some ribbon to ground the photo and then to soften the white journaling strips I sponge inked them with bamboo and then barely edge distressed them with grey wool. I love it when layouts come together so perfectly like this! I hope you enjoy and have a fantastic weekend!