Showing posts with label Decor. Show all posts

7.05.2011

Scrappy Art Garland


Despite the lack of posts these past summer months, I have been getting a little crafting time in. Mostly sewing. This weekend I had a little time to take pictures and type up a few posts. These are a few quickie photos of the art garland I made for the girls' room. They have been wanting someplace other than just the fridge door to display their art projects (especially the funny shaped stuff), so I thought I'd pick up some clothespins from the dollar store and find some string or something to hang them up laundry line style. But I had a hard time finding thick enough string that wasn't ugly, lol.


So this last week I came across this tutorial for a storage softie garland linked via One Pretty Thing and adapted it to an art garland. The main differences are that I cut my strips 2" wide by however long my scrap was and I sewed up the strips right sides together and pressed them open for a more polished look. When braiding I simply twisted the fabric so that the zigzag seem was hidden in the back. So cute!! I love how they turned out and it was the perfect project to really whittle down my fabric scraps pile! The purple/pink one is C's since purple is her favorite color and the blue/orange one is A's since blue is her favorite color now. I let them each paint their own set of clothespins as well. They love that they have a special place to hang their art and I love that it looks way cute in their room! Enjoy and I hope everyone had a happy 4th!

2.07.2011

New Spring Decor


Every so often I feel a little rebellious when it comes to doing my homework. Not so much that I won't do it at all, but that I'll do a whole lot of other things just to avoid doing the homework for as long as possible. This weekend, after 4 tests between Thursday and Friday, I was happy to note that the only weekend school work I had was some reading with a one page reader response. But instead of getting it done and out of the way, I somehow got it in my head that I didn't want to do it, which is silly since I found the articles fairly interesting when I finally did get around to reading them. Anyhoo, I decided to kind of redecorate my girls' room instead ;) Here are some fun photos of what we did.


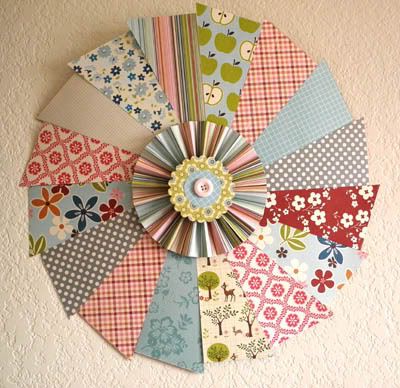
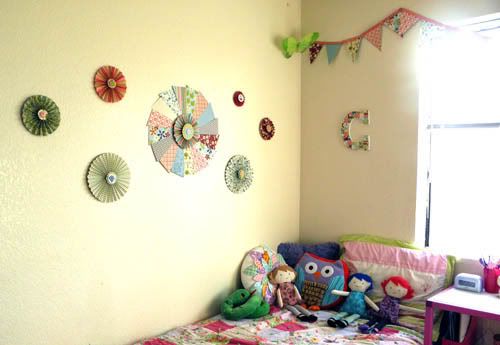
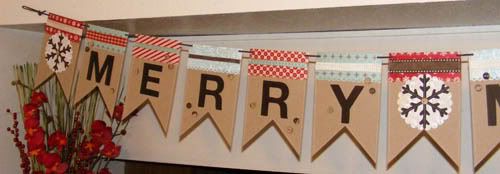
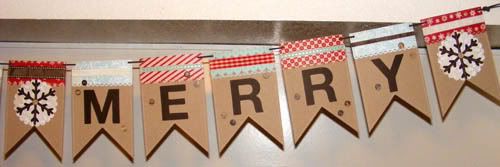
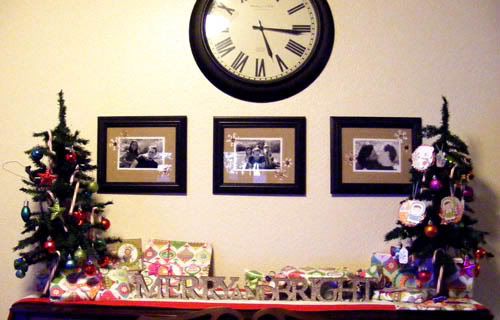
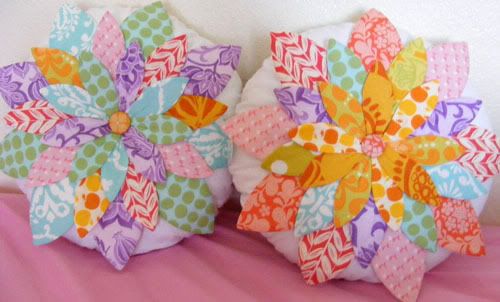
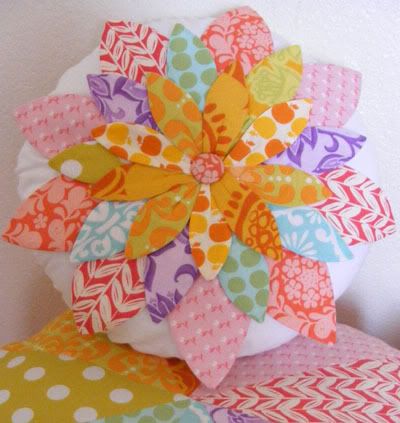
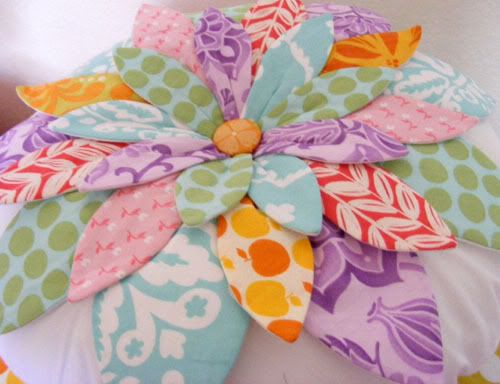
The first item was the pendant banner which you see a part of in the photo at the top of the post. It was too hard to get a decent photo with the light coming into the room, so I ended up not getting a photo of the banner itself. From there I went a little batty with paper crafting decor in their room ;) I made this big "flower" as C puts it out of the funny end pieces from the banner triangles. I love the quiltish look of it. Then I made the fun circle paper fans or whatever it is that they're called to match. C calls them "daisies, because they have lots of petals," she says ;)


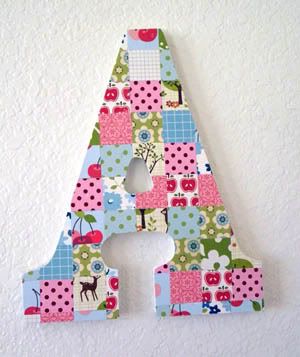
After that I couldn't leave their wooden letters out. For more over a year I've been telling myself I'd paint these white letters and just never got around to it. Friday, I sat down and cute 1" squares from scraps and covered the letters.


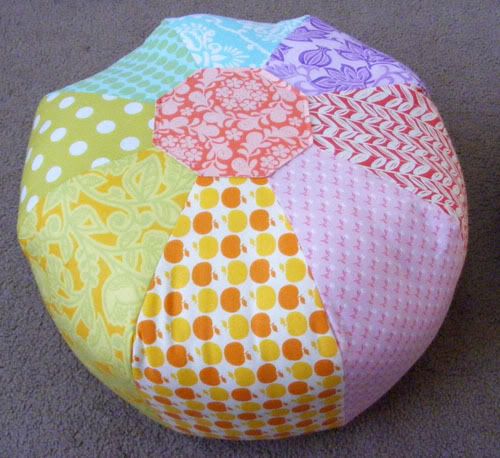
Here is A's fans. Since I only had enough leftovers from the pendant banner to make one large quilty flower thing, I made her more "daisies".


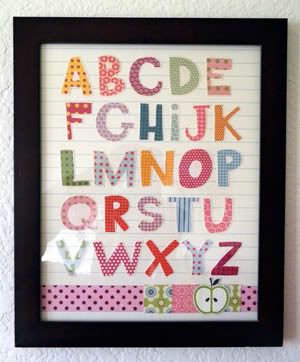
And I couldn't stop there. A while ago I saw a darling scrap page that used these Girl Friday paper letters from Cosmo Cricket. I happened to have scraps of the same alphabet and hoped I had enough to make some alpha art. As it turned out, I didn't have any Es or Rs. But I did have 2 matching Fs and a P and X that were the same pattern. So I fashioned my missing letters out of them. I put together the cute alphabet to fit a 8x10 frame, the girls singing the ABCs about 2 dozen times while I made it. The frame is one that I simply repurposed. It's been sitting in our closet with Paul's AS degree. So I put his in another repurposed frame (which had old pictures) and took this one for their room.


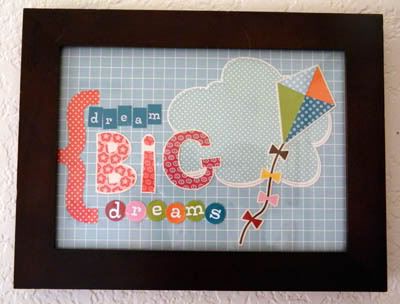
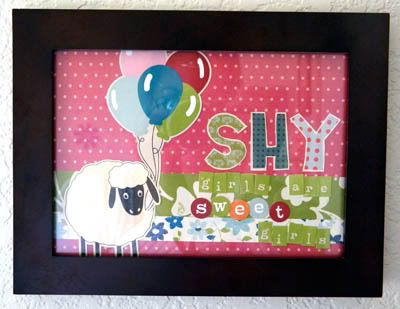
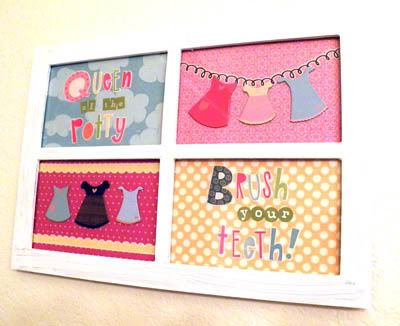
In addition to that frame I took the two 5x7 frames I had bought to go with it, but were still empty to this day. Using scraps and some fun stickers, I made some sweet papercrafted art to with everything. The left one says "Dream Big Dreams" and the sheep with balloons says "Shy girls are sweet girls". The shy one definitely describes little A ;)


I also made a quick little fun piece for their bathroom, which has been artless for quite a while. The colors match their little circo cups and towels. A big part of this piece was to use up some of the extra single letters I had left, since with the two other framed art pieces for their room, I had used up all the vowels. In this case, the extra Q and B were used.


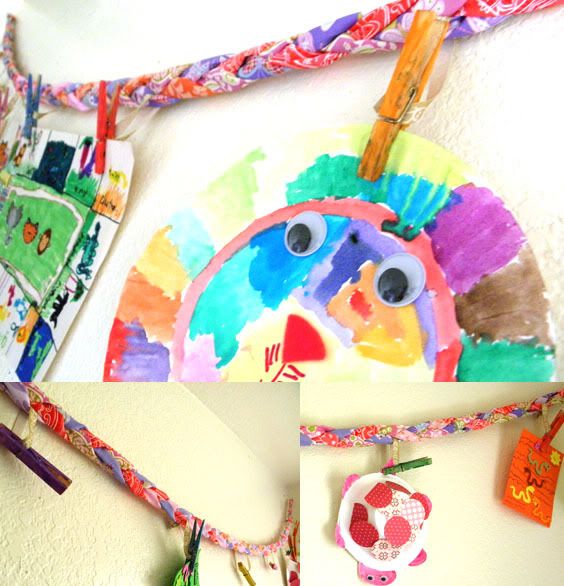
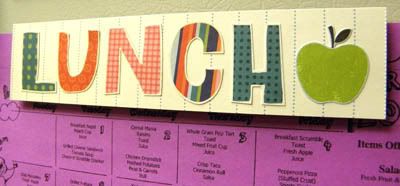
And last but not least (and before I made the bathroom art actually) I made a fun magnet for C's hot lunch menu from school. My cheapy, but super cute, kitchen magnets aren't very strong so it takes about 4 of them to hold up the menu.  So, when I saw that a few of my odd left over letters spelled out lunch, I just had to make a fun magnet! The other two words were 'big' and 'shy', then there were a string of odd consonants. Anyway, I did finish my homework, Sunday morning before I went to a friends house to crop (yay!)  I hope you enjoyed this little peek into the girls newly decorated room. Thanks for popping by!

12.18.2010

A Little More Christmas


I've been having a bit of frugal fun with decorating for Christmas this year ;) Here's our medium sized Christmas tree in the corner.


I created treat cones for the tree a couple weeks back using cardstock, paper, and ribbon I had on hand. I used Thickers for simple monograms and then punched out snowflakes for a couple generic cones. Last year I made the fun star/pompom garland out of felt, paper, and leather string.


The chipboard snowflake is from BG's Eskimo Kisses set. Just punch a hole, add some baker's twine, and viola!


I also thought it would be fun to wrap our presents to match and I created monogramed tags from the same paper set, along with a few matching bits of October Afternoon. The wrapped prezzies on the piano from a couple posts ago used up the last bit of wrapping paper from last year. This year I delved into all the saved packing paper and paper bags I stashed away just for this sort of repurposing ;)


And I tried my hand at making a banner with that cute new flag style that's been going around ;) I think it came out so cute! Enjoy and thanks for visiting!

12.16.2010

Holiday Greetings!


I just finished my last final today, YAY!! So now I have time to post the stuff I haven't had time to these past few weeks. Even though it's been hectic, I have been able to squeeze a tiny bit of crafting in here and there. These are some cute little paper ornaments I put together for the girls' mini Christmas trees. I love these little MME eskimos, they are so cute. And what's even better is that I got the fabric this week for 50% off!! It'll make such a cute Christmas quilt and pillow cases for the girls ;)


These are the mini tags I made from the little punch tags in the cutouts. They were all really quick and easy, just some 3D foam squares and a little added bling!


Here are the other two bigger ornaments, the little boy eskimo and polar bear.


This is the top of the piano decorated with the girls' Christmas trees. I thought it would be fun this season to put some fun holiday mats in place of our regular ones. These were so easy to put together, I simply punched snowflakes out of old BG Christmas paper, added PTI wooden buttons, and matted it all on kraft paper. A fifteen minute uplift for the holidays!


Here's a little closer look at the trees. This one is the one C mostly decorated. I added the tags after making them.


And here's the other side. A decorated this one. We're planning on either making more paper ornaments and/or dividing the ornaments between them again with all the colors and giving A some of the MME ones ;)


And sitting happily as well as matching nearly perfectly, is Sparkle's darling card! It's the first one to arrive this season. Isn't it so cute? Thank you so much hun! This reminds me that I need to get on the ball with sending out my Christmas cards this year too ;) That's it for today. I hope you're all having a wonderful holiday season!

7.10.2010

Rainbow Zinnia Pillows


Those rainbow gumdrops gave me a wonderful idea to do the same kind of rainbow design with Amy's Zinnia Pillow. I have been staring at this pattern, wanting to make it, being intimidated by it, and coveting the day I would actually make one for myself (note that this day still has not come since these are for my daughters and not for me). As for the camera strap cover, it will have to wait. But I did manage to get the strap on my camera just for safety sake and Audrey has been loving taking pictures, which is great because I really haven't been doing much of that this month!


This has by far got to be the most cutting intense project I've done! Each pillow has 27 petals and each petal has 3 parts - front, back, and interfacing. For two pillows that was 162 petals to cut! Though I did get to cut the backs 4 at a time since I simply used white for that, the rest were cut individually (I'm certain there must be a faster way - I'm just not that advanced to have figured it out yet, lol.) These pillows took me 3 days to make which is quite the accomplishment because for me if I don't get something done in one sitting, it usually doesn't get done at all. The first evening I pressed and cut all my petals. And then the next day I sewed them together then turned them while watching a movie, and finished pressing them before hitting the hay. The next evening I assembled the final pillows.


The finished result - darling Rainbow Zinnia Pillows! I heart them so very much and yes even though they were a lot of work I'm still planning on making one for me out of the lantern bloom fabric which will go very much faster I'm sure. I did a lot of new things with these pillows - my first circle pillow, covered buttons, pleats, and first pillow tufting (I am so glad I got that long doll needle!) I am wondering though if I should make the smaller 14" pillow which is what these are or to make the bigger pillow which is a whopping 24". The smaller size is a perfect little accent pillow so I'm debating whether the big one would be all the more fabulous or become the huge flower pillow of doom. Anyway, I hope you enjoyed. Thanks for visiting and have a lovely weekend!

7.03.2010

Rainbow Gumdrops


I have been watching Design Sponge for a few months now and one of the posts that caught my eye in May was for sewing a rainbow pouf. There was even a downloadable pattern that you could print to make the cute mini ottoman. While I probably could have used that pattern I thought, I love the gumdrop pillows so much (my big ottoman) that I could just use the smaller 18" pattern to make the girls mini rainbow ottomans using the same 1 fabric per panel concept.


You can make an 18" rainbow style gum drop using Amy Butler's pattern with 1/4 yard of fabric each for the 8 panels but they need to be cut a 1/4 yard (long and skinny) and not a fat quarter (short and fat). I used mostly 1/2 yard pieces so I could make two ottomans, one for each of my girls (there is still quite a bit of fabric left, it's just funny shaped). You can see on some of the orange-green prints that I had to use different patterns since I only had enough room to cut one panel piece from each. It was a great way to use up some of the fabrics in my little stash.


The tops were made with different fabrics so they could easily tell theirs apart and I am loving the rainbow theme. Makes me want to sew some quilts and not just the simple square to square ones which are the only quilts I've ever done ;) I'm leaning towards a pinwheel or banner design. Not sure if my sewing skills are that far yet though so I'll keep with patterns and pillows for now! Thanks for popping by and I hope you enjoy!

5.29.2010

Lantern Bloom Ottoman


I love the Gum Drop Pillows by Amy Butler and had bought the pattern a little over a month ago. During my blog hiatus I decided it was finally time to put that pattern to work and so I took out more of the Lantern Bloom fabric I had to create a custom ottoman for us! I love how it came out, so pretty!! It was actually much easier to put together than I thought it would be. Usually I'm so intimidated by patterns but this made me feel like breaking out another one and trying my hand and making some more fun goodies! The most frustrating part for me was stitching the top piece on and I think that is only because my sewing machine couldn't handle the layers very well (it's just a cheapy little guy). But even though that part gave me a whole lotta trouble I prevailed and finished it! This baby took 5 32oz packages of stuffing, and it probably could have even taken more, lol. You should have seen me stuffing this sucker, shoving my whole arm in to get the filling even, lol.


I now have to make the smaller one so that the girls leave mine alone, hehe. I guess that means I'll be making two smaller ones ;) I also have plans to make at least one of her zinnia pillows with this line of fabric for our living room and maybe some patchy zinnias for the girls room. We'll see what I get around to making first. I also need to finish a baby quilt I've been making for our new niece. A little over a month ago I mentioned Paul's sister getting near to having her baby. Beth never did get to find out whether she was having a boy or girl through the ultrasound since the baby moved so much, but now that the baby is here we know for sure that she's a girl and can start making and sending baby stuff ;) I started a garden quilt for the crib using some repurposed fabrics from when Cait and Audrey had their room garden themed. It's looking so cute! I just have to decide now to quilt or to tie it and then make and put on the binding. Too many projects, too little time!

4.18.2010

A Little Redecorating


I'm so bad when it comes to getting before/after pictures because I never remember to take the before ones, lol. Anyway, this little project came after having our walls pretty close to the same in our living space for the last 4-5 years. I like to change something around each season, but I usually stick to changing out the flowers in one of the vases or pillow covers or maybe moving things around on the piano and bookshelves. But I finally got tired of the old pictures on our walls which were all 4 years or older so I decided to switch it up. Here's where the biggest change happened. This wall originally had a mix of different sized black frames with color pictures in it, a collage that was filled with old pictures from 4 years ago when Audrey was about 3 months old. I took the frames from under the clock, turned them vertically and then added some blue paper in the candle holders for a pop of color. The vase and tulips were my only purchased addition, coming in at under $9 for everything including the river rocks inside. I printed out more recent black and white photos to fill the shadow box for a look that's much more streamlined than what we had before. This is my favorite part of my quick little redecorating project.


Here is where those shadow boxes were originally, only they were set straight across horizontally under the clock with color photos of Cait when she was 6 months old and the candle holders were left plain white. Now the space is updated with 3 matching frames taken from the hall and the photo collage I mentioned. I used a small 1/4 yard piece of Lantern Bloom fabric by Michael Miller to mat new black and white photos from our family pictures taken last summer. I'm loving the black and white photos and that blue is one of my favorite shades.


The striped pillow is a simple pillow cover I made for one of my Pier 1 pillows that we got when school started in the fall. The pillow was a pretty chocolate with embroidered fern like leaves; lovely, shimmery, and silky, but I've been in the mood to change it. I used 1/3 yard of this striped fabric from Lantern Bloom to whip together a pillow cover. Which worked out great for the previous pillow cover since it definitely needed a wash after all the abuse my kiddos put it through. Paul would just toss it aside, he doesn't like 'silky' he says and much prefers the plush and cotton pillows we have now ;)


And here's the pillow I made for my desk chair out of the scraps from the frames and the stripe pillow. It was another of that same chocolate embroidered pillow. I wanted something fun but didn't want to cut into any more of my lantern bloom fabric (which I'm saving for a lap quilt), so I used the scraps to make a simple patchwork. I used some plain chocolate fabric to finish the pillow cover and love how it came out. The only patchworks I've done have been kiddy or little girl garden fabrics so it was a real treat for me to use more grown up designs ;) I know it's nothing spectacular and it's hard to see the difference without before photos, but I love the change especially since I got to do it using stuff we already had and spending less than $10 for a fun addition. I hope you enjoyed this little peek into our apartment! Thanks for popping by and have a lovely Sunday!