Showing posts with label Articles. Show all posts

9.28.2009

You Are My Sunshine - Transparency


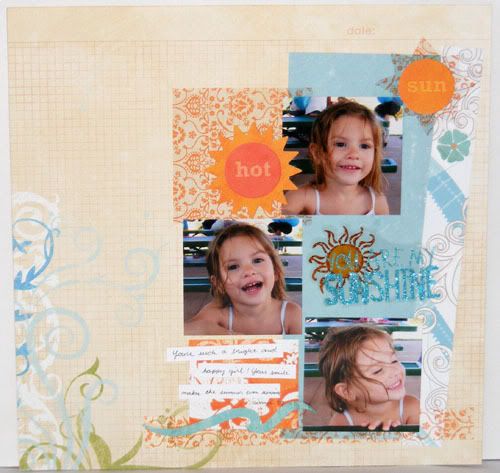
This week the challenge at Practical Scrappers is how to use transparencies. I think transparencies are so fun but like vellum and other clear paper choices it's often hard for me to think of ways to use them. A transparency gives you the opportunity of having floating patterns, images, and even text on your layouts and cards. Here I used a transparency to substitute pattern paper. It let the base paper show through for a fun addition of pattern without having to add so many colors. This is also great for die cutting like I did here with the sun. Try using white printed transparency patterns for snow or cloud shapes. Layer a pattern transparency over chipboard letters for added contrast.

Don't forget transparency titles or decorative elements like my title here. I like using mine on solid or nonbusy monochromatic prints so that they stand out. They are also great for layering over pictures and many manufacturers have 4x6 transparency lays specificallly made for that purpose. Try using a transparency to accent your title or journaling. Or if you have a printer you can print your journaling right on a blank transparency so that your story floats on the page. I hope some of these ideas spark inspiration on how to use your transparencies. Don't forget to visit the Practical Scrappers Blog for more ideas on how to use transparencies. Have a wonderful Monday!

9.19.2009

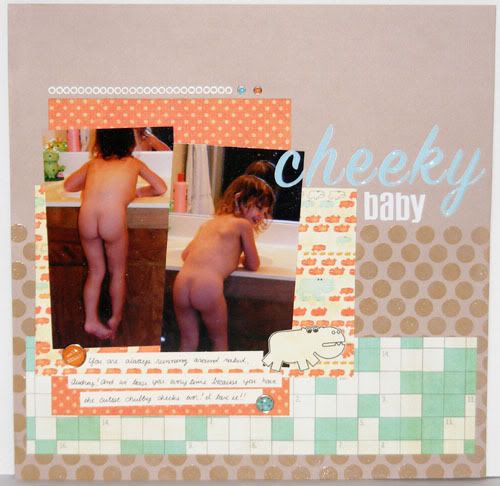
Cheeky Baby - Stamps

Supplies : Paper by Sassafras and My Minds Eye; Kraft from LSS; Polka Dot Basics 2 and Faux Ribbon stamp sets from Papertrey Ink; Clear and White Embossing Powdery; Brads from Basic Grey and My Minds Eye; Thickers Letter stickers and Remarks Letter Stickers by American Crafts

Create a background! Stamping's #1 appeal to me is the customization and not just with colors but also with making your own papers. And you don't have to stamp with just ink either, you can use your versamark to do watermarking or to add embossing powder like I did on this page. Here I only wanted the polka dots pattern to go up half the page, so I stamped up until that point with my versamark. I sprinkled clear embossing powder and then heat set it to give the dots presence and texture but not change the color of the background. I love the extra fun the big polka dots add to the layout! The other thing I did with embossing here was to emboss a small white border to embellish the top of the photo mat while also giving it a more finished off look. Make customized background papers with inks or embossing. You can even use a glue pad to create glitter or flocked backgrounds! Fill an entire page with a background or random stamped images, or just part of a page like I did here. You don't have to keep to cardstock to make your backgrounds either, try stamping a fun image in the middle of huge polka dots or in some of the squares on block pattern paper. Custom create paper to fit your photos for a layout or to create that perfect card with the recipients favorite colors. When it comes to making your own backgrounds, the sky really is the limit! Enjoy the layout and have a great weekend!

9.18.2009

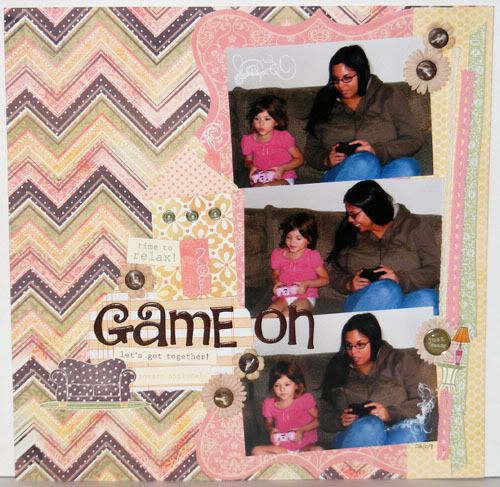
Game On - Stamps

Supplies : Paper by Basic Grey, Creative Imaginations, My Minds Eye, and Making Memories; On the Couch Stamps by Papertrey Ink; Thickers Letter Stickers by American Crafts; Flowers by Prima; Brads by My Minds Eye; Buttons and Jute by Papertrey Ink; Rubons by Basic Grey; Inks and Markers by CTMH; Ribbon by CTMH and Making Memories

The stamps challenge on Practical Scrappers was a couple weeks ago and even though I got my pages emailed to them in time, I hadn't gotten around to creating a post of them for here until I was doing the ones for this week's challenge. This page I wanted to play around with the thing I use stamps for the most when putting them on layouts and that's as embellishments. There are some great benefits to using stamps, the first for me has always been that you can customize your stamped images. I love being able to stamp out the images in the colors I want for whatever project I'm working on. Here I stamped out the couch, rug, sidetable, and lamp in colors that coordinated with my papers and then I used some markers to fill in the lamp a little more. I even took some of the card sentiments and used them as mini-journaling on the layout. Though I didn't do this here, the second thing I love most about stamps is you can create bulk embellishments cheaply and quickly. Mish Mash does this all the time and I love how she creates not just bulk embellishments for cards but for mini albums, scrapbook pages, gifts, etc! Use the same stamps to create completely different looks just by changing the color your stamping them in or the papers your using. Thanks for stopping by and have a fabulous Friday!

9.16.2009

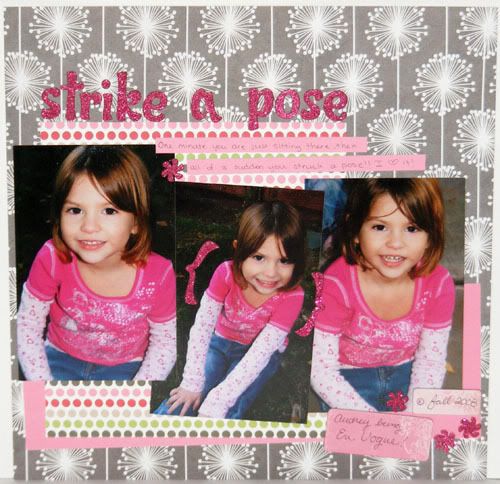
Strike a Pose - Letter Stickers

Supplies : Paper by My Minds Eye and Piggytales; Glitter Thickers by American Crafts; Chipboard Journal Tags by My Minds Eye;

Though you probably buy letter stickers to use for making titles there are some other fun pieces in those packages that can go overlooked. Things like brackets, asteriks, and periods which can all be used to embellish your page. Here instead of using brackets to accent a title, I used them to emphasize the photo Audrey struck a pose in. Use the brackets to highlight journaling, a special embellishment or keepsake, or a photo like I did in this layout. The asteriks in the package were used as fun flower embellishments on the page. Asteriks can be used much like the periods - use them alone, over punched shapes or circles, and even as flower centers. Circle periods can even take the place of brads or eyelets on the right layout. Look at the letters, numbers, and shapes in your alpha packages and think of how you can use them to embellish a page or a card. Make Monogram cards to use up single letters or for an extra simple subtitle or addition to your journaling on a layout. Add punctuation to your titles or as an embellishment at the end of some creative journaling, even a fun card. Enjoy the page and have a great Wednesday!

9.15.2009

Dog Gone Cute - Letter Stickers

Supplies : Papers by Basic Grey and Scenic Route; Glazed Brads by Basic Grey; Thickers Foam letter stickers by American Crafts; Cardstock;

Another fun way to use your letter stickers is to make word games as focal points on your page. Here I made a word search for the title emphasizing the title words by not only circling them but using black letters for them and white letters for the background letters. Creating a word search is great for using up those unused letters like V, Z, and Q. On my layout I picked out letters that I don't use or had too many of to fill in the focal game. Try making crosswords, Bogle, or even Mad Libs right on your layout for a fun twist on a title! Love Sudoku? Use your numbers to create a Sudoku focal. Emphasive a specific letter, word, or number by using a different color sticker than the rest. Or try stamping the background letters and using 3D letter stickers like the Thickers for the words you want to focus on. You don't even need to make it a focal. Have a bunch of flat letter stickers hanging around, create some unique letter paper to use on school or game layouts. Or create a crossword or wordsearch puzzle paper. I hope some of these ideas get your creative juices going on how to use those stickers! Thanks for visiting and have a terrific Tuesday!

9.14.2009

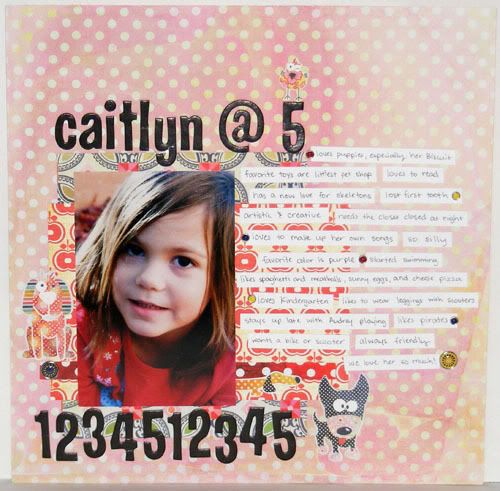
Caitlyn @ 5 - Letter Stickers

Supplies : Paper - June Bug by Basic Grey, Sassafras (apples); Lime Rickey Glazed Brads by Basic Grey; Thickers Letters stickers by American Crafts; Cardstock by CTMH

This week the Practical Scrappers challenge is how to use letter stickers. Usually I use letter stickers just for titles, but there are plenty of ways to use up those stickers! Today I'm focusing on the numbers. They seem to be the stickers that I rarely use and for some reason it seems like manufacturers are putting in more and more numbers in the sticker packs. Here I created a simple title and then used number stickers to create a border on the bottom to emphasize Caitlyn's age on the picture. Try using numbers as borders for the height of a person or object, weight on a weightloss page, days it took to do something or minutes/hours/etc. Create subtitles with numbers like birthdates, months for baby, weeks in pregnancy, etc! Label pictures and journaling with corrisponding numbers, use a number as the age on a birthday card, or put the date for another occassion on cards or layouts. I hope some of these ideas help inspire you on how to use the number stickers that come in the letter stickers packages.

I wanted to include a lot of journaling on this page as well since there is just the one photo, but I didn't necessarily have a story to tell. Instead I let each journaling strip contain one fact about Caitlyn at age five such as she lost her first too (this last week actually!), her favorite color is purple, her favorite toys are littlest pet shop, and she loves Kindergarten. I cut long strips from my white scrap paper and then wrote on the strip before trimming the length. After that I arranged all the strips on the page until I liked the set up and then glued them down. A fun thing to note is that I had run out of Ls and Ts before making this page so I cut the triangle edge off a 4 to make a T and then trimmed a K to make L for Caitlyn's name. Remember that even if you run out of certain letters you can sometimes find ways to create them out of the numbers or other less used letters in the set. Don't forget to visit the Practical Scrappers Blog to see more examples on using up your letter stickers.
Enjoy the layout and have a wonderful Monday!

8.24.2009

Got Vellum?


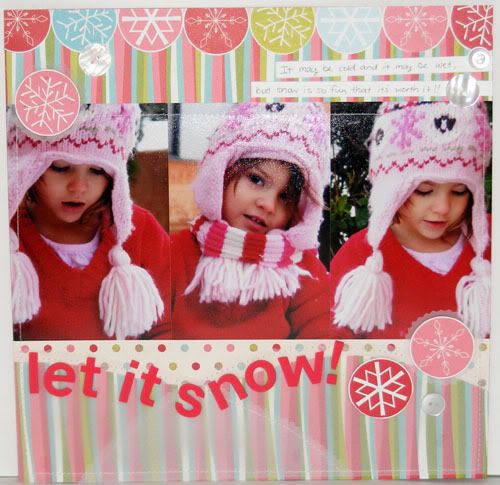
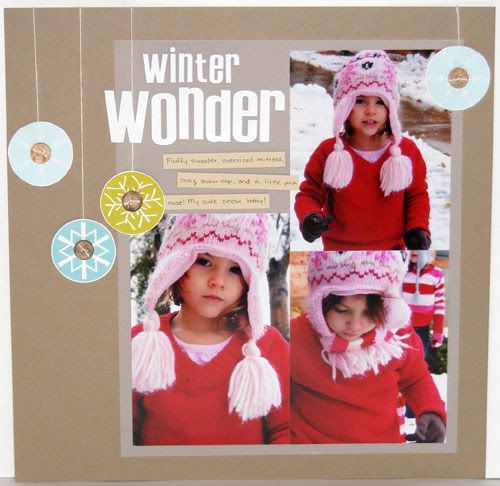
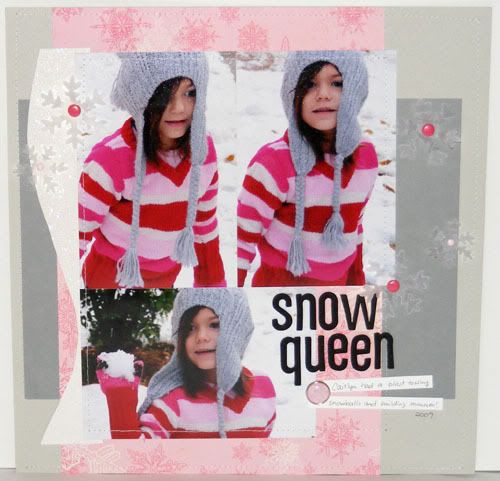
This week the challenge on Practical Scrappers is how to use vellum. I have to say that even though this one has been the most challenging for me so far it was also one of the most fun. I stuck with winter pages because I loved these pictures and have been wanting to scrap them with something fun. And vellum just happened to be the fun for them!


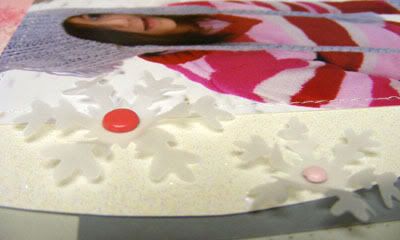
Create a scene! I made some snowy vellum hills overlaying my stripe paper and sewed it in place. I used pinking scissors to edge the vellum snow and then to cut a decorate mat for two of the snowflakes. Tear, paper piece, or simply cut curves in your vellum to create a backdrop scene for your layout. Don't stop with snow either; make water, clouds, rain drops, foggy winter windows, etc. Got colored vellum? Make leaves for a tree or just use like you would cardstock for a lighter layered effect. You can also use vellum to soften bright papers. Have a plaid that's too dark? Lay some vellum over it for a lighter page or use vellum over fun bright papers for a baby layout.


Keep it simple! Sometimes I just can't find the right shade of cardstock to match my page. Here I used vellum to mat my pictures to create a very simple rustic snow layout on dark kraft paper. Use vellum to create shades on monochromatic pages or to mat a picture when you can't find cardstock to match. Love clean layouts? Vellum adds interest without adding colors, almost like texture. Vellum looks great plain or if you love the home spun look adding a hint of stitching can really make a statement! Tip : When sewing make sure to put adhesive closer to the center of your vellum piece so that the needle doesn't get stuck and tear your vellum.


Texturize it! Here I crumpled up my vellum snowflakes to give them more presence on the layout. Crumple or emboss vellum to make it stand out more on a page. It's easier if you cut or punch out your vellum before crumpling. Try dry embossing a ghost with a swirl pattern, or add some dots to mini clouds. I hope you're inspired by some of these fun ideas on how to use vellum! Check out the Practical Scrappers Blog for more examples on how to use vellum. Enjoy and have a great Monday!

8.17.2009

Got Scraps?


Use them up! This weekends Practical Scrappers Challenge was how to use scrap paper. Be sure to check out the site to see what Design Team B made for this challenge. Everyone organizes their scraps differently. I keep the main bulk of my scraps in two 13x13 zip bags, one for each of my main paper styles - cutesy and pretty. The rest are separated by holiday or seasonal. When I use my scraps I start with a base concept - usually one or two scraps or papers which are going to set the tone for the rest of the pile. Then I simply pull out everything from my scraps that match my concept. Usually it's a lot of scraps but I love having a lot of options. Then I go through my pictures and find what fits the papers I picked and after that whittle down the papers I want to use on the layout. And that's exactly what I did to pick the scraps to create these first two layouts.


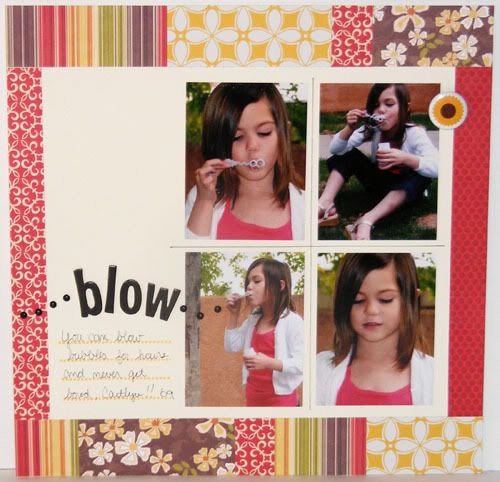
Patch it up! Making these fun border patches or doing center patches has long been a popular design with scallop and shaped patchwork creating the newest trends. Here I kept a simple straight patchwork border. This is great for those smaller scraps you may have where there isn't enough to make a big presence on a layout. Keeping the bulk of the layout a single shade helps let the patterns in the tidbit scraps to really shine whether they make a border like mine or take center stage with your photos. I kept the center of this layout clean and separated the photos by using a ruler and drawing a line with my black journaling pen. The curved title and brads emphasize my DD blowing bubbles and some stamped lines for the journaling finish off the layout.


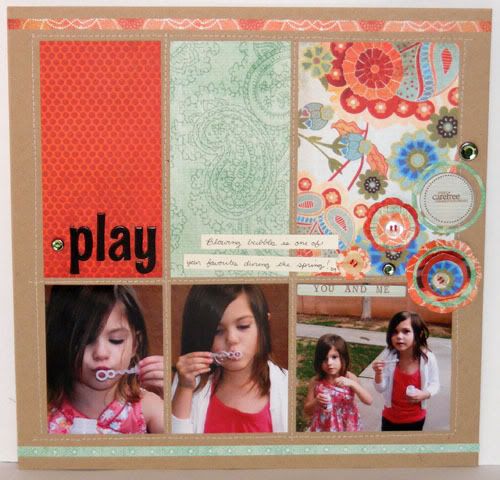
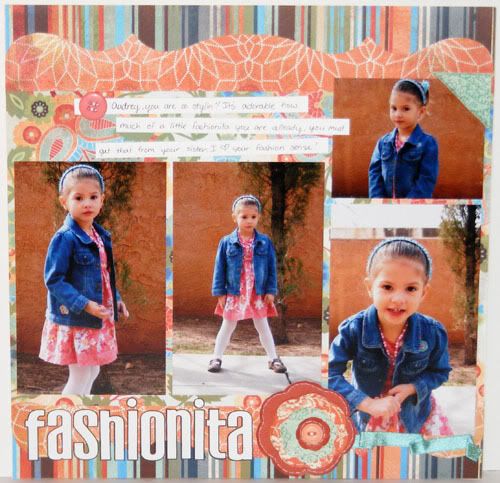
Do it all with scraps! This page I not only took my scraps to make big focal blocks of pattern, but I also created the floral embellishments with various scraps to accent the page. Some sewing adds subtle separation and a border. A really fun approach to using up scraps that I do all the time is to make embellishments out of scraps that aren't even a part of the paper lines used to make the layout like in my Fashionita layout where the bloom and photo corner were made from My Minds Eye scrap papers while the main layout was made with my new Marrakech Basic Grey papers. Try paperpiecing your own elements from scraps or use a die cutting machine to create a fun patterned title!


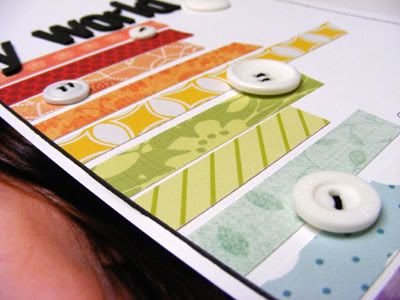
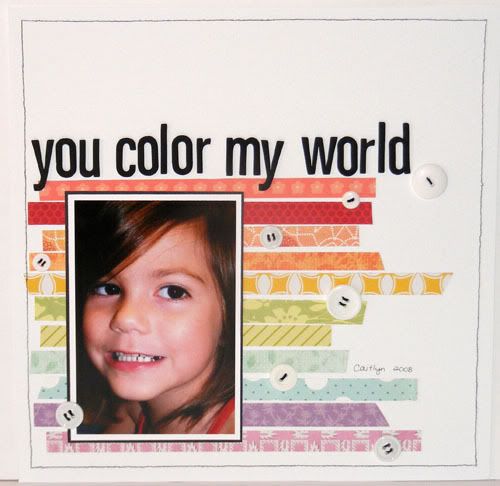
Make a rainbow! Admit it, you probably have scraps in every color and the rainbow effect is hot in crafting right now. Paper piece a cute rainbow for a card or create a rainbowed focal on your layout. Here I cut strips from my scraps to create a fun rainbow striped backdrop for the photo. I really wanted to keep the focus on the rainbow strips of pattern papers so everything else was kept neutral. A white textured base really lets the colors pop and the black stitched border gives the page a nice frame. Using black and white even for the embellishments keeps the attention on the rainbow I made and helps me feel the layout is now complete. I hope you enjoyed the layouts and are inspired to use up your scraps! Don't forget to visit the Practical Scrappers Blog for more examples and have a great Monday!

8.10.2009

Got Stickers?


This week the Practical Scrappers DT challenge is to find ways to use up stickers. So stop on by the Practical Scrappers blog to check out all the inspirational pages created by the Team A design members! We have the option of submitting even during our off week and since I had a few stickers I wanted to get creative with, I made some fun layouts for this challenge as well.


Supplies : Paper - My Minds Eye (snowflake), Scenic Route (green stripe), Pebbles (swirl), and Doodlebug (glitter white); Candy Dots and Christmas Sentiment Stickers by Pebbles; Marvy Snowflake punches; Col White cardstock by CTMH

Create word art with your sentiment stickers! I got those great sentiment stickers for Sparkle's Christmas card challenge a couple weeks ago and wanted a way to use some of them up on a layout. Try replacing your title with a cluster of word art for a fun sticker focal point like I did here. Have smaller sentiment stickers? Use those to create word embellishments. Use them on the corners of pictures like you would with flowers and stack up a few for greater presence. Or get extra creative by cutting up and organizing word stickers for eclectic journaling!


Supplies : Paper - Collage Press (grid) and Pebbles; LinniBell (flower and leaves) and Little Miss (brackets) stickers by Pebbles; Thickers by American Crafts; cardstock by CTMH

Make a scene with your stickers! On this page I made a cute garden type scene with some flower stickers and the border that was attached to the floral paper, then added bracket stickers to bring attention to the title. These particular stickers have negative space in the petals and centers that make them look lost on the layout by themselves. To give them a more solid presence I added pattern paper to the back of the sticker, filling in those empty gaps. Combine your stickers with other elements to create a picture, like bug stickers on cut out grass or in a paper pieced jar. Try creating a zoo with your animal stickers or putting a sleepy animal on a paper cut moon for bedtime layouts. For a focal make a 'mini' scene with small stickers and place on the layout like a picture, complete with a mat for a frame!


Supplies : Paper - Pebbles (stripe) and Scenic Route; Stickers by Pebbles; Thickers by American Crafts; Buttons by Papertrey Ink; Embroidery floss

Embellish your stickers! Some stickers though cute can look pretty plain and boring by themselves on a page. Spice them up by adding buttons, brads, eyelets, rhinestones, etc. Add stitching to emphasize detail or to put some detail where there isn't any like I did on these sticker leaves. You could use brads and stitching to make a jack-o-lantern out of a plain pumpkin sticker or add metallic veins to a leaf with a glitter marker or thread. Try creating a border with your stickers - freestyle, on paper, or on ribbon! I hope some of these ideas inspired you on how you can use up the stickers in your stash. For more ideas visit the Practical Scrappers Blog and have a great Monday!

8.03.2009

Got Eyelets?


This week the Practical Scrappers challenge is to use eyelets. Be sure to stop by there to see all the amazing ideas from both design teams on what you can do with eyelets. Here were my submissions :


Supplies : Paper - Basic Grey (Urban Prairie) and Scenic Route; Thickers Letter Stickers by American Crafts; Flowers by Prima; Buttons by Papertrey Ink; Eyelets by Making Memories; Ribbon - Blue by American Crafts, Black unknown (RAK); Cardstock by CTMH; Embroidery Floss; Nestibilities

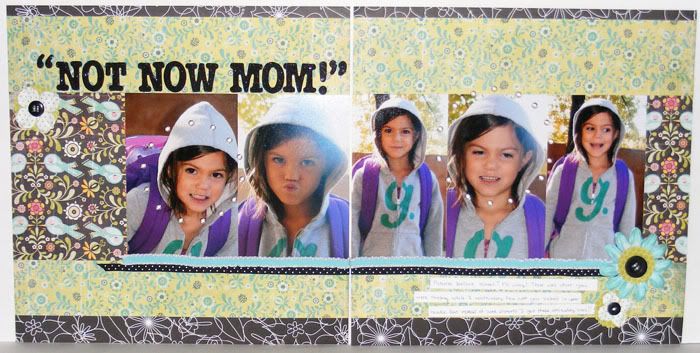
Here I started by using eyelets to create subtle circles around some of the more sour faces Caitlyn was pulling for emphasis on my layout. Make hearts, circles, stars, squares, any shape that you like! The closer the eyelets are the bigger the shape's impact, the further apart the more subtle. To create this look use a punched out shape or open die like the Nestibilities. Using your paper piercer to mark the eyelet spots, poke evenly spaced holes around the edge of the shape making sure to leave enough space for the eyelets. Using the classic hammer with punch or a Big Bite, punch the eyelet holes right over your pierced hole markers. Add your eyelets and back the open eyelet hole area with coordinating cardstock. Here I used white to back my silver eyelets.


Supplies : Paper - Pebbles (Background), Scenic Route, My Minds Eye, Sassyfras (Button Blooms); Eyelets by Doodlebug; Buttons by Papertrey Ink; Urban Bling Stickers by Me and My Big Ideas; Embroidery floss; Nestibilities

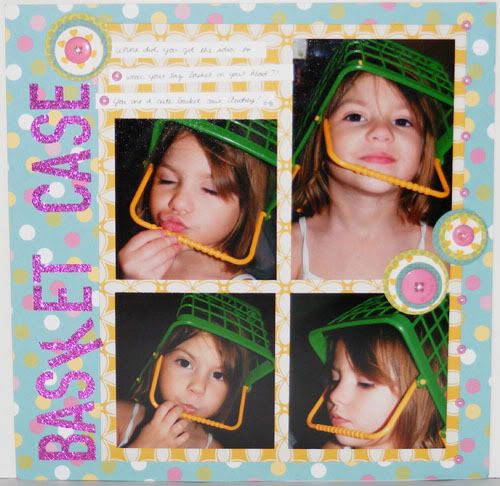
Try creating a fun border with your eyelets. In my layout I created a fun simple border using pink eyelets, then added eyelets to a couple of the journaling strips to make the look more cohesive. Do a varigated strip by alternating eyelet colors or emphasize details on a printed or stamped border by adding eyelets to the flower centers, in the scallop hump, etc. You could even use the same technique as I did on the Not Now Mom layout by substituting a scallop or other shaped border as a template for your eyelet placement to create a shaped eyelet border. Don't want too many eyelets? Simply use them to accent a couple journaling strips.


Supplies : Paper - Basic Grey Porcelian, My Minds Eye, Cosmo Cricket, and Making Memories; Ribbon from CTMH and My Minds Eye; Eyelets from Making Memories; Thickers by American Crafts; Embroidery Floss;

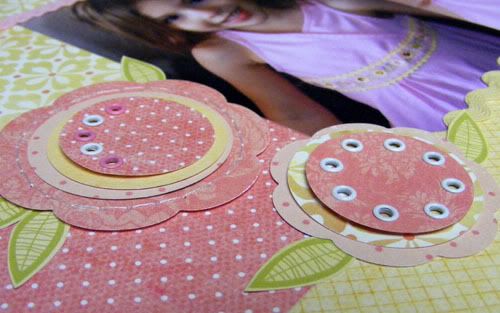
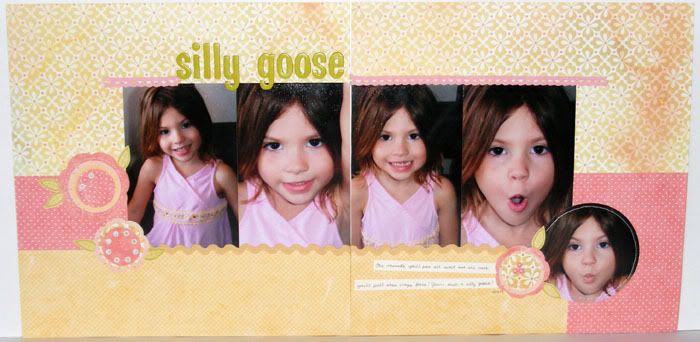
Add accents to your embellishments with your eyelets. Here I created some blooms with my Nestibilities and then added some white and pink eyelets to accent the flower's centers. Accent stars, hearts, paper flowers, etc with eyelets for fun pop! I created my flowers and added the eyelets before adhering them to the layout so that I wouldn't have to back the layout with coordinating cardstock. Some leaves cut out from printed Cosmo Cricket paper finish off the blooms just right. This method also works great with those shaped eyelets. Add star eyelets to circles, heart eyelets to flowers, etc. I was actually cropping with a friend when I made these and she was so sweet to let me have some of her eyelets since all I have are the basics - silver, white, black, and brown! So if you're reading this, thanks Julie! I hope you all enjoyed the layouts and have a great Monday!

12.02.2008

Papertrey Cocoa Gift Box Tutorial


Supplies:
1 sheet patterned cardstock paper
1 sheet neutral cardstock
1 sheet (or a half sheet scrap) dark coordinating cardstock
1 sheet (or ¼ - ½ sheet scrap) light coordinating cardstock
Scoring tool (Scor-pal or scoring blade for your paper cutter)
Scissors
Strong Adhesive
6x6x1 inch acrylic box or empty Papertrey Stamp Set Box

Other misc design supplies:
Circle punches
Scallop circle punch
Snowflake punch
Ribbon
Embellishments
Stamps and Coordinating Ink
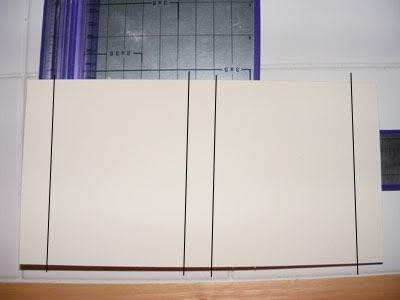


Starting with the Cocoa Box, cut a 5” x 9 ¾” piece from your neutral cardstock. You will be scoring across the long way of the paper at ¾” , 4 ½” , 5 ¼” , and 9” . Here is a quick glance at where the score lines should be on your paper: Now you can turn your paper over to stamp whatever design you wish. Your scored lines should be raised on the side you are stamping.
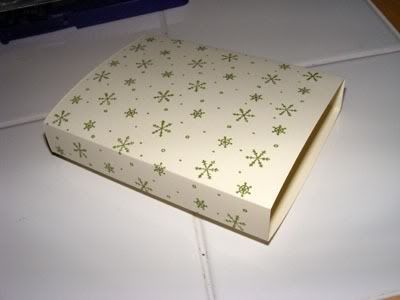


After your paper is stamped, crease your cardstock at the scored lines like so and then glue the side flaps together. This is what your middle piece should look like after it’s done. You may notice that I didn't stamp all the way to the bottom. That is alright because that part will have the bottom cover glued to it so it won't show up in the finished design.
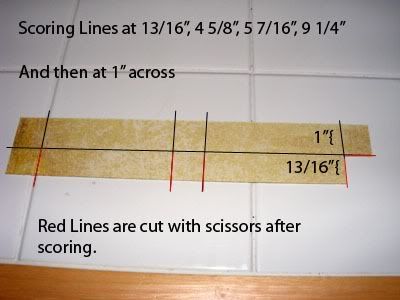


Next is the lid and bottom. Both are exactly the same for the cocoa box. Cut two pieces 1 13/16” x 10 1/16” from your patterned cardstock paper. One for the bottom cover and one for the lid. Starting long ways, scor on the wrong side of you paper at 13/16” , 4 5/8” , 5 7/16” , and 9 ¼” . Then score down the paper vertically at 1”. Here is about what it should look like.
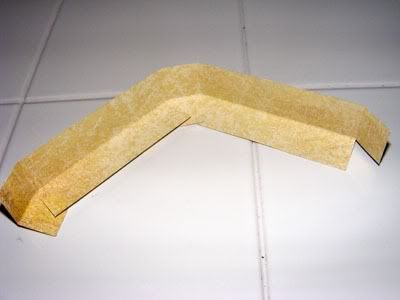


You are going to cut on the red lines, following your score line. This will allow you to fold the base of the covers. The 13/16” flap will fold over to create the ends so make sure you are cutting the right score lines. Trim the extra flap on the right for easier construction. I fold the little flaps in first and glue the large center flap over them. Then I fold over the other large center flap and glue it.
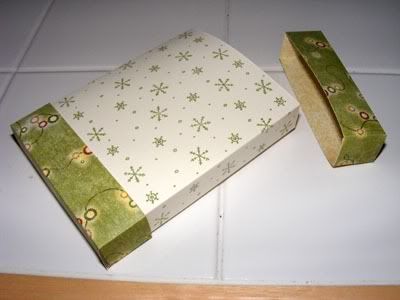

Do the same thing for the other piece to create both top and bottom for the cocoa packet holder. Glue the bottom to the center base to create the cocoa holder. Do not glue the top. You want them to be able to get into the cocoa without tearing up the box. It helps a little to put the cocoa packs in it as soon as you get it together, that way the adhesive stickes better to the edges.
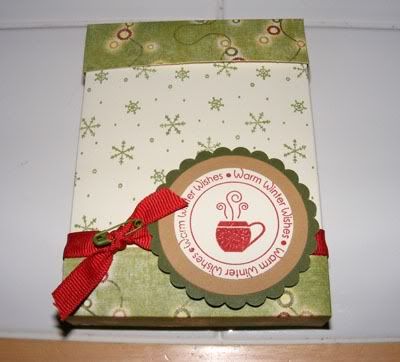

Lastly embellish it the way you like. I used the 2008 Holiday Tags stamp set by Papertrey Ink, CTMH cranberry ribbon, topiary safety pins, and cardstock, a pink marvy scallop circle punch and other circle punches to create my tag. Two coordinating colors of cardstock scraps were used to layer the tag and I punched the stamped image from the neutral cardstock I’m using for the centers. Glue dots were used to keep the ribbon stationary and I carried out the safety pin theme on the ribbon throughout.
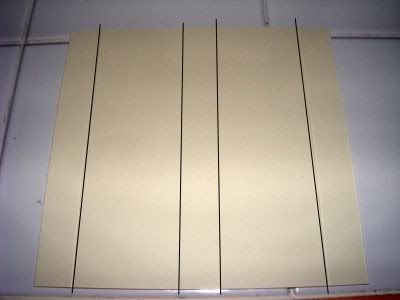


The Candy Cane holder will be made exactly the same way but with different dimensions for it’s box. Note that with the candy cane holder the lid is larger than the bottom though. Let’s start with the center base piece again. Cut from your Neutral Cardstock a 6” x 6 ¼” piece. You are going to be scoring across the 6 ¼” length at ¾” , 2 ¾” , 3 ½” , and 5 ½” .


Again flip it over and stamp your design out, then fold it in and glue the flaps together. Remember that if you are like me and want to do as little stamping as possible, to only leave some of the bottom blank where the bottom cover will go. The lid is made to go on and come off so you will want to continue your stamping all the way to the top for it to look nice :D
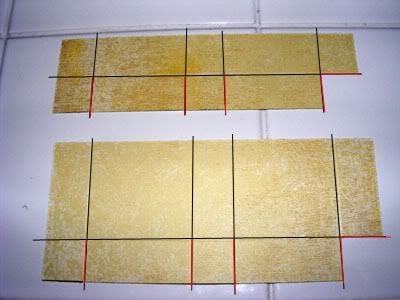


For the bottom cut a 1 13/16” x 6 9/16” piece from your patterned cardstock. For the lid cut a 2 13/16” x 6 9/16” piece from the patterned cardstock. They will have all the same lengthwise scoring points. Score across each at 13/16” , 2 7/8” , 3 11/16” , and 5 ¾ “ . For the Bottom score vertically at 1”. For the Top score vertically at 2”.
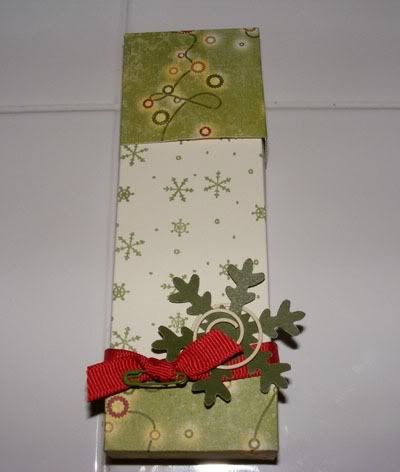

The 13/16” flap will fold over to create the ends just like with the cocoa box. Fold them together just like the cocoa lid. Glue the bottom to the center base and leave the top free for the lid. Decorate as you like. Here is my finished Candy Cane box. Since it is a bit skinnier than the cocoa box I opted to just put a punched out snowflake instead of creating a stamped image. I continued the ribbon and safety pin theme and this time added a fun little spiral to the snowflake for embellishment. This box will fit four regular sized candy canes if you put them in two right side up and two of them upside down. It's already a pretty tight fit so I'm fairly certain that the fatter candy canes won't fit in this box.
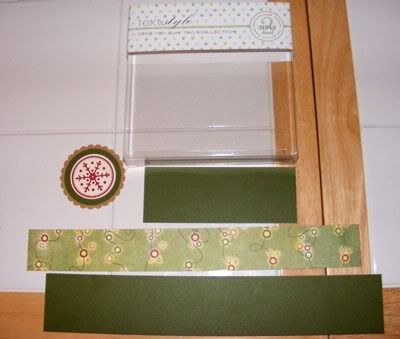


Now you can use these boxes as they are in a mini basket with a couple mugs and a bag of marshmallows to go with the hot cocoa, but if you are like me and have some Papertrey Stamp boxes hanging around these two boxes fit perfectly inside and even have a little space above the hot cocoa box to put a little bag of marshmallows. I did not take off the polka dot stamp packaging. It is easier toglue your new paper and cardstock right on top of it.
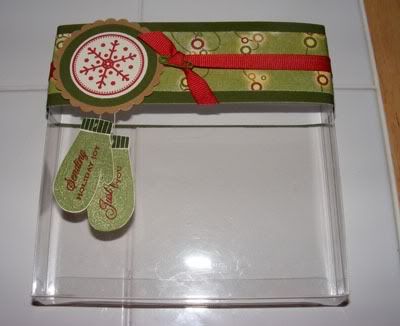


You will need to cut from your dark coordinating cardstock one 2 1/16” x 12” and one 2 1/16” x 5 ½” piece. From your patterned cardstock cut one 1 ½” x 12 inch piece. Align the center of your 12” long cardstock piece to the center of the box and then wrap around. I like to crease the sides a little more before I glue it so that the paper lies more flush. I also glue down the cardstock before adding the paper. It seems to hold better that way.


The smaller 5 ½” piece will cover the space in the back. Before you put the back piece on though, glue on your pattern paper first. Once the back piece is on decorate the front as you like. I put the ribbon on right after adhering the paper then used the same two stamps I had used throughout making the mini boxes, the Snowfall set and the 2008 Holiday tags set.


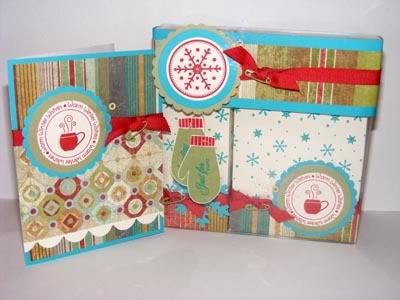
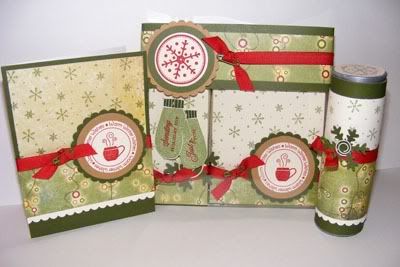
You can use the scraps you had left over to create a cute matching card like I did here. You can even go a step further and add more fun dressed up recycled packaging to the gift set like I did with this empty CTMH embellishment tube filled with chocolate. The finished set:

I hope I did okay on my first tutorial, lol! Have a Happy Tuesday!!
9.29.2008

Title Troubleshooter

Leanne was talking about not being able to come up with titles and since I don't have my camera to post the color challenge with, I decided to write a little short on what I do and maybe it will help someone out :D Once I pick out the pictures I want to scrap with I start trying to think about the story behind the picture. What is happening? How do these pictures make me feel? When were these pictures taken? Where is this place? Why did I take this picture? Usually I just run the answers through my head, something pops out at me, and that's what I end up using for a title. Other times I have to brainstorm harder to get an idea for a title in my head. Here are some of methods I turn to when inspiration decides to leave me high and dry.

Start with just a single word. A past layout with Cait reading a book I used the title "quiet"; another focusing on her and her cousin was titled "Pals". On one of the layouts for my future posts the title for the page is simply "dance". Coming up with just one word to sum up the layout is sometimes easier than trying to come up with an entire phrase. I like to use verbs, adjectives, or feelings for my word. Seasons and locations work great for this too! Think of what is happening in the photo(s). How would you describe them with just one word? Or what feeling does this picture give you? And there is your title!

Expanding on that, sometimes I want to have a phrase as a title to help convey the story about the pictures instead of just a single word. Since it is simpler to come up with individual words or short phrases for a spread of photos, I basically do that then build upon it. The Personality page I did just a few posts back was one such title. I knew I wanted to talk about Caitlyn's crazy hair and about her personality. Personality became the main word and I used the title to spotlight that word, adding the rest of the phrase in smaller, supporting text. I used the story about her crazy hair photo op to portray a couple of the reasons why she 'has so much Personality'.

The idea with expanding that single word into a title can go along way to helping display your story. Often I use what I'm planning to journal about as a catalyst for unvieling possible layout titles, and many times I can pull a few descriptive words that sum up the story and use that as a title instead of trying to find words that describe the pictures. Throughout the years I've learned that I enjoy the layouts with fun stories much more than the layouts with aesthetic appeal but no journaling. Sometimes a title can say it all, but more often than not it's the journaling that takes someone through the adventures of your scrapbook. I almost always journal last but that doesn't mean I don't have an idea about what I'm going to journal about. While putting your pages together think of what you want to say on the layout. What story do you want to tell with these pictures? Then use the subject matter in your journaling as a jump start point for creating a meaningful title.

Sometimes all you need is to describe it, literally. "Christmas Morning PJs", "Pretty Easter Flowers", "Caitie's Pony Parade"; they aren't jazzy or super catchy but they convey what's going on and start the reader off knowing exactly what's on the layout. I like using these titles for things that happen consistantly. Like our Christmas Eve tradition of opening a single present. The title for the page every year is usually the same, "Christmas Eve Tradition". It connects each year to the next with a common theme. Think of what is happening and just describe it with a few words and viola! This also leaves your journaling open or the ability to put many bits of journaling, hidden or viewed, to talk about an event.

Use phrase titles. These titles, for me, go along the same lines as descriptive titles only a little snappier. Trying to come up with a fun phrase you like is sometimes trickier though, and here are some of the things I do to help me find them. Think of how else you can say title yet keep the integrity of your original idea. Is there a catchy cliche that goes with the pictures or story? A play on words you can use? Lyrics from a song or a line from a movies that matches? These titles double as a kind of journaling prompt as well, especially if it's not a something most people would 'get'. You can use that opportunity to journal about the title and how it fits with what is going on in the pictures, which is quite handy if you are struggling with trying to find a story to write about in your journaling.

Just use what was said by inserting real life quotes as titles. I used "I'm doing Cooking" for one of my recent layout titles. It's one of Caitlyn's cute improper grammar responses and I wanted to capture that along with the fact that she loves to cook. These titles already start to tell the story before you even read the journaling and add a little personal flair to the page. Use a common response as a title or an out of the blue phrase that is memorable . Think about what was said in the pictures or what you imagine them saying from the looks on their faces. Was there a funny one liner? A response that is always the same? A comment that was just totally off the wall? Use it as your title, then journal about the phrase.

Regular quotes and poems are occassionally the way to go as well. Sometimes there is a quote you have always loved, or a poem that is dear to your heart. Use a part or all of the quote as a large title. Emphasize a section of the poem or the title of the poem as the title for the layout. Short quotes work great as titles that run down the side of a page. Or even as subtitles! But that is a whole other can of worms, lol. I hope some of these ideas helped. Remember that there aren't any rules to scrapping. If you love it, Scrap It!! The color challenge will be up once I get my camera back to take a pic of the sample. Until then, if you want an early start the colors are Tulip, Honey, New England Ivy, and Vineyard Berry.