7.31.2010

Yoga Mat Bag


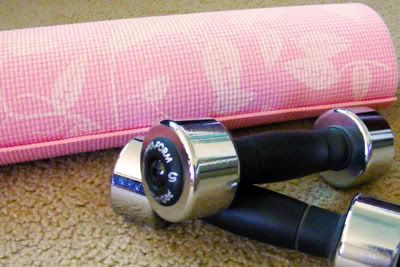
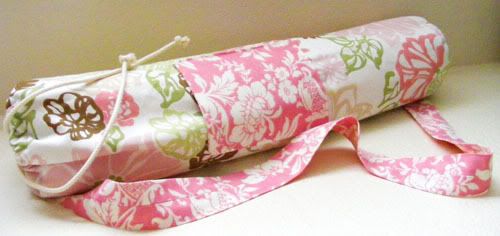
Yoga is pretty much the only exercise I truly enjoy. So I decided to give my yoga mat some much needed love and sewed up my very own yoga mat bag!
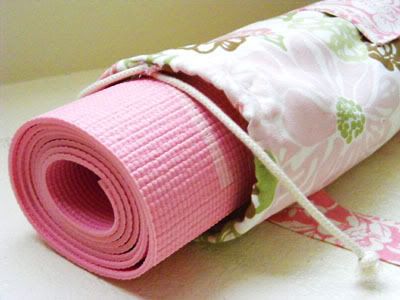


There are plenty of yoga bag tutorials out there and there is a pattern for a yoga mat in nearly every one of my sewing books. I really loved a lot of the patterns and ended up combining the two I felt I could handle. Simple Sewing has a super easy pattern but I liked the rounded bottoms better so I used that part of the One Yard Wonders pattern as well as the larger pocket and lining. Amy Butler has a free Nigella Yoga Bag pattern that doesn't have a closed top if you like the open style more (if not you can add 4"-5" and make a casing for the cord closure) and Sew 4 Home has a lovely Yoga Mat Tote tutorial if you prefer a tote style.
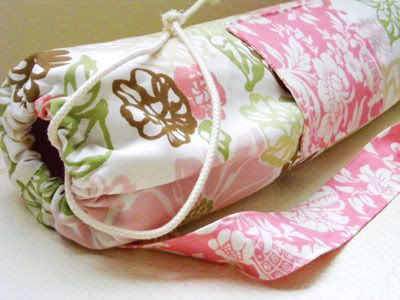


I used some home decor fabric for the weight and because it was on sale ;) Just a tip if you want to use the same, I ended up having to double check labels since most all of those fabrics were Dry Clean Only. I'm definitely not a dry cleaning girl so I found some that were machine washable. Plus the fabric matched my yoga mat, yay! Total time was about 2 1/2 hours for me. Now I've got a great bag to store my mat in between workouts ;) Thanks for popping by and I hope you have a superb Saturday!
7.30.2010

Pool Side


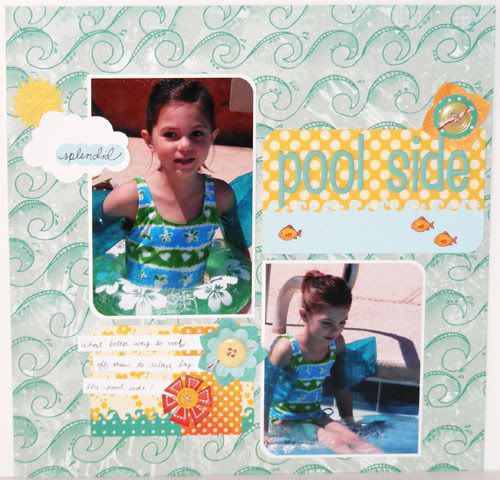
This was the last layout I made at the crop. I didn't quite finish it there since there were some things I didn't have with me that I ended up wanting to put on the page, like those little fishes from my Tiny Treats stamp set. It used to be that I'd stuff everything I had into a XXL Crop 'n Style rolling monstrocity and a couple huge tote bags because I didn't know what I would use and didn't want to leave anything behind that I would need. But now I limit myself to a single bag so that means I have to somewhat plan ahead on what I'm going to be working on which works great if I've done a little stash shopping to make a kit. It's definitely improved how I crop and how much I get done. Plus it's much easier to carry one tote instead of a trunk load of supplies ;) I've been paring down how much I take to crops for the past couple years and I'm still not quite as streamlined as I want to be yet, but I'm getting there! Enjoy the page and have a fabulous Friday!

7.29.2010

Sweet Surprise Ruby


This week #3 SCRS Challenge is an inspiration challenge. I needed a jump start on mine so I ended up using the ESS #93 card sketch via Sparkle's Blog since the inspiration photo simply made me crave dessert. We have the goodies for strawberry shortcake so that will satisfy my sweet tooth for now ;) Isn't Cupcake Ruby a cutie pie? I hope she's sharing that cupcake with some friends! Enjoy and have a great Thursday!

Papers by October Afternoon
Cardstock by American Crafts
Rhinestones by Kaiser
Sentiment by Papertrey Ink
Image by Sparkle Creations

7.28.2010

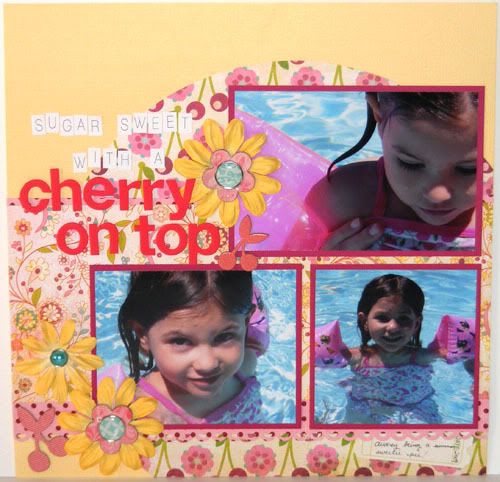
With a Cherry


I miss little toddler swimsuits. A had such darling swimsuits the past couple years. The little girl ones just don't have that same adorableness factor. Not that she doesn't still look stinkin' cute in her little suit, it's just the girls' suits look... well older. Last year's model was a skirted pink cherry number. Too cute, so I had to make a page with cherries on it! I think pool pictures are nearly as stressful as Christmas pictures. I'm always afraid my camera is going to get wet so I don't always get the best shots. But I love the feel of pool pictures. I love the clear blue water and the bright happy swimsuits. I love the contrast of hot and cool, the giggles and squeals. I just wish it wasn't such a precarious position for my camera to be in ;) Anyway, thanks for visiting and I hope you have a wonderful Wednesday!

Lemonade Paper by Basic Grey
Dotted Paper Detours by October Afternoon
Cardstock by Bazzil
Flowers by Prima
Cherry Chipboard Dear Lizzy by American Crafts
Flower Chipboard Urban Prairie by Basic Grey
Lush Decorative Brads by My Minds Eye
Thickers and Remarks letter stickers by American Crafts
Ticket Quite Contrary by My Minds Eye
Fiskars Apron Lace Punch

7.26.2010

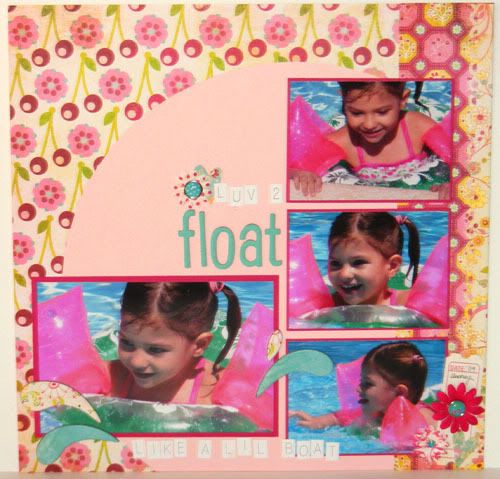
Float like a little Boat


Can you tell I was loving my Lemonade papers at the crop? I often find that I really have to switch gears when I'm at a crop. At home I scrap with my laptop ready so that I can use a sketch or draw inspiration from another layout. When I crop I don't take my computer and I end up having to pull ideas from someplace else. Sometimes it's from the products I'm using, like in this layout, other times it's from the pictures and occassionally I even have my own designs rattling around in my head. It's a longer process since I'm not lifting directly from another visual and am having to compose the page by trial and error. But even though it takes longer and can be more difficult, there is something satisfying and liberating about making a layout that's completely your own ;) I hope you enjoy and have a great Monday!

Lemonade Papers by Basic Grey
Baby Pink Cardstock by Close to My Heart
Other Cardstock by Bazzil
Splash (flower) Chipboard Urban Prairie by Basic Grey
Ticket Quite Contrary by My Minds Eye
Flowers by Prima
Glazed Lemonade and Urban Prairie Brads by Basic Grey
Thickers and Remarks Letter Stickers by American Crafts
Apron Lace Punch by Fiskars

7.24.2010

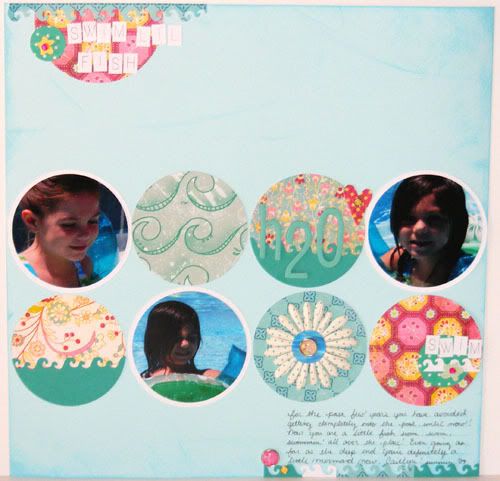
Swim Lil Fish, Swim


Thanks for the water well wishes! The city repaired the line pretty quick the next day and finished over an hour earlier than planned. We ran errands and did a little shopping to make the day go by quicker and the water was back on before we got home, yay! Thursday I got to crop with some friends so I'll be sharing my layouts from that night over the next week. For this one I pulled together some blue scraps and some BG Lemonade papers. You can tell I'm still lovin' circles ;) And I've finally gotten to put my wave border punch to use with these pool pics. I got it on sale half off months and months ago and have been waiting for summer inspiration to strike so that I can use it!

C went through ages 3-5 adamant about not getting into the pool. She loved wading pools, the bath, the water park... but the swimming pool was a whole other thing. We would go and A and I would swim around (well I would swim around while holding A, hehe) and C would just sit on the top pool step, refusing to come in even though every time we went she was so excited. Each year it was the same and as long as she was safe and happy we figured it wasn't worth a battle. Last summer was a complete 180. She was rushing into the water, kickin' and swimming around with her floaties, wanting to go to the deep end, practicing holding her breath to go underwater... it was like she had been gazing out into this new world all this time and was suddenly brave enough to explore it. C had become a little mermaid and she's loved the pool ever since ;) Enjoy and have a lovely weekend!


Lemonade Paper by Basic Grey
Blue Detours Paper by October Afternoon
Wave and Dot Paper by Scenic Route

Cardstock by American Crafts
Flower by Prima
Flower Remarks Dear Lizzy by American Crafts
Glazed Lemonade Brads by Basic Grey
Thickers and Remarks letter stickers by American Crafts
Journal Lines Stamps by Papertrey Ink

Heavenly Blue Ink by Close to My Heart
Heart Punch by EK Success
Fiskars Wave Punch

7.20.2010

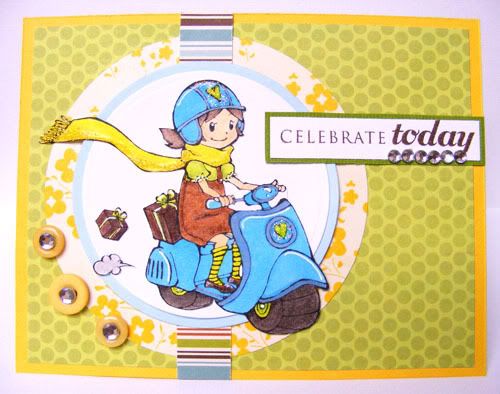
Celebrate Chloe


The week #2 SCRS Challenge is a sketch ;) I heart sketches so very much, they just make creating that much easier! I flipped the sketch horizontally to fit Chloe. I really like how my coloring came out on this one, especially with the pretty stickles on her scarf, helmet and scooter! They are repaving our complex's parking lot which means during this week we have to park outside of the complex and walk in. It's not too much of an inconvenience for us since we live closer to the front and don't mind the walk. But this morning the paving guys broke a water main, cutting off water from the entire complex. I had just gotten back from the gym all sweaty and gross when I found out. y.u.c.k. I changed my clothes since I can't shower yet, and I still feel yucky. I know, just what you all wanted to read about right, lol. So I've been doing anything to keep myself occupied including making my challenge card. The line's getting a temp patch right now and should be finished in another hour or so but they'll still have to shut the water off tomorrow to do the actual repair. Blah. I'm not looking forward to it but at least tomorrow I'll be prepared and won't go to the gym in the morning since this one doesn't have any showers. Ah well, at least I don't have to pay for any of it ;) Anyway, if you want to play in the challenge here's the link. Enjoy the card and I hope you're all having a better day than I am! Chloe certainly is ;)

7.19.2010

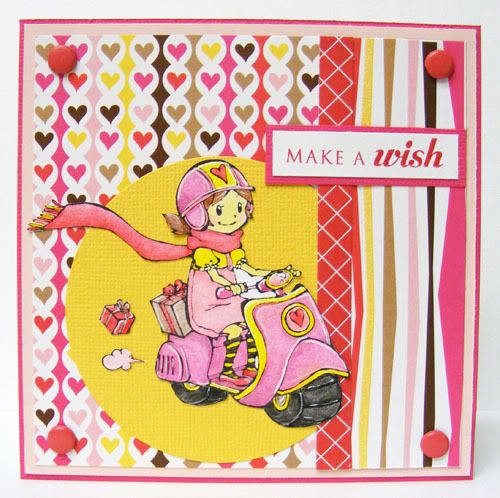
Scooter Chloe Love


Scooter Chloe is my favorite of Sparkle's first stamp release. When I first saw Chloe these papers popped into my mind and I was excited to finally have her in my hands to combine her with them! I used the #56 sketch from 2sketches4you since it had a circle in there and I knew from the start I wanted to do a card with the image in a circle. I love her scarf and it totally makes me wish for fall. It's been getting up past 110 degrees here and even though it's only mid-July I am aching for the cooler autumn weather already! Enjoy and have a happy Monday!

7.17.2010

Anything Summer Challenge!


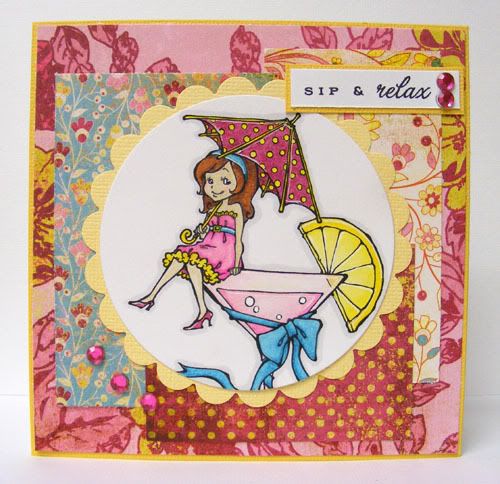
This is my second post today so if you wanted to see my sewing project scroll down ;) If you haven't heard yet, Sparkle has just released an adorable stamp line of her very own! My goodies arrived yesterday afternoon and shortly after I got online I found she was hosting a fun challenge with Surfer Oliver as a prize! This is my entry for the Anything Summer Challenge with my theme being Raspberry Lemonade. There's nothing sweeter than an ice cold raspberry lemonade and a few moments to kick back and relax during the summer! I used Sketch Saturday's Sketch with Cocktail Emily and some BG Lemonade papers to make it easy for me so all I had to decide was how to color her in. Emily is colored with pencils using the gamsol technique on the lemon, drink, ribbon, and dress then hightlighted with a white gel pen. For me the drink in her cocktail glass is Raspberry Lemonade, because even us virgin drinkers love pretty glasses ;) The challenge runs until tomorrow 9pm PST if you want to play along. Enjoy and have a lovely weekend!

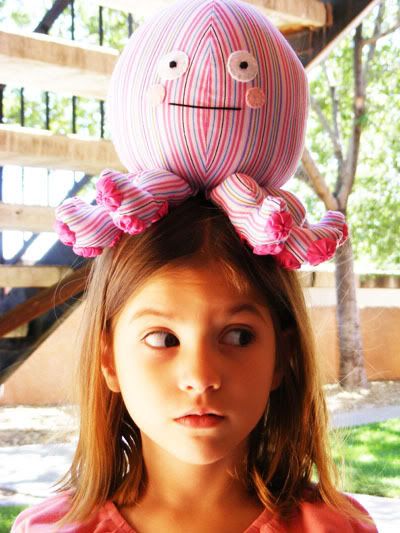
Oopsie the Octopus


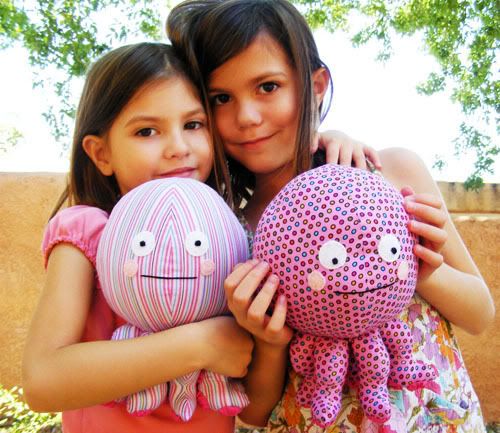
We've recently adopted a couple octopi.


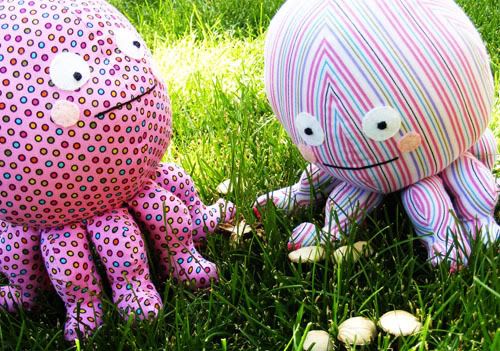
Oh, looks like they found some mushrooms on our lawn!


Watch out! These guys like to hitch rides.

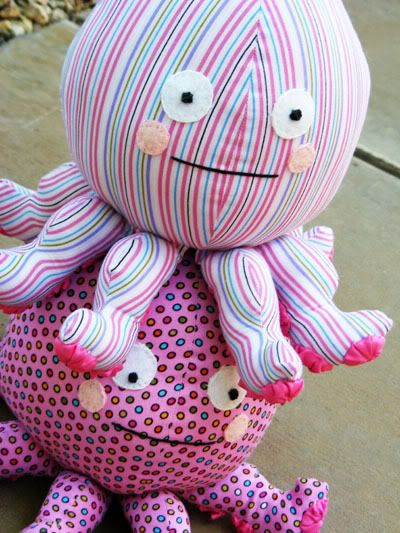
The Moda Bake Shop releases a fun free tutorial every week and Oopsie the Octopus came out a couple weeks ago. Last week was the Octopus Garden Activity at our Library so the girls got big into octopi. We have their darling painted paper plate octopus crafts hanging up in their room, so fun! And when I saw this tutorial this past week I thought Oopsie was just too cute to not make, so I made two! Besides, after finishing the Ever After page I was itching to sew something fabulous!


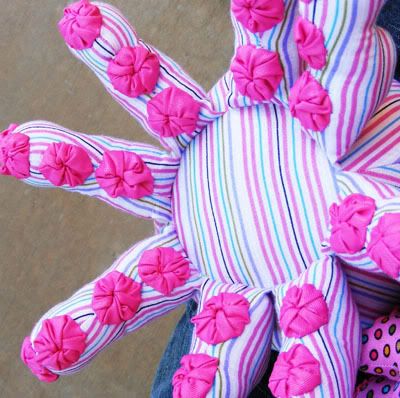
Of course I added my own flair ;) Our faces are different, though I did use the pattern's eyes and cheeks. And I opted to go crazy and make sucker charms for the entire legs instead of just one on the tip. How crazy?... 64 fabric yoyos cut, hand-made, then hand stitched to the octopi crazy. But you don't have to do that, I'm just nutty and thought it would be awesome to have octopi with full sucker charm rows! Total time for the tutorial version, about 2 1/2 hours for one octopus. And I still consider myself a beginner (Hey, I just learned this past month I've been putting my bobbin in the wrong way this whole time!) You don't really want to know how much longer it took me to add on all those other suckers, lol.


And if you're wondering why my suckers don't much look like fabric yoyos I can't say for certain since I've never really made any before, but I think part of it is because of the fabric. It's not cotton, it's some weird swimsuit-pleather-heavy knit kind of stuff. A little slicky and a little sticky, perfect for octopi sucker charms! Of course it could also be that I failed that bad at making decent looking yo-yos but for this project I say that's a plus ;) Enjoy and if you want to make your own irrestibly cute Oopsie here's a link to the tutorial at Moda! Go all the way down to the bottom and click the printer friendly version if you want the PDF. I simply printed the last page (the pattern) then read the tutorial on my computer. Have a fabulous weekend!

7.16.2010

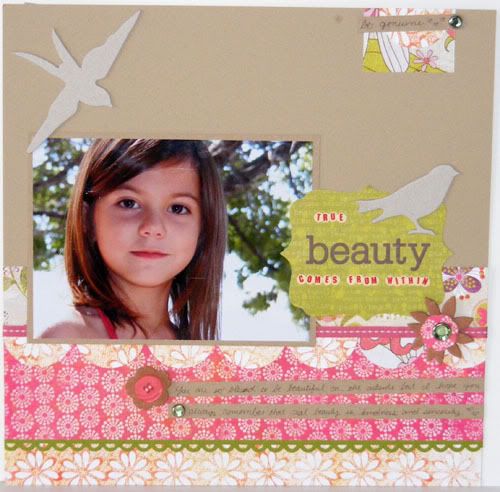
True Beauty Comes from Within


I remember thinking how grown up C looked in this picture when I first took it. How much of a little lady she looked standing there all poise. Five isn't lady like. Five isn't mature. Five is tousled hair and dirty dresses. Five is chocolate smudged on your face and dirt on your elbows. Five is sweet, adorably stubborn, and always sticky. Yet here was C, five and elegant. Five and posing still like some grown up model for a photo shoot. Okay well maybe that's from years of me always making her model so I can take pictures, but still... she's only five. It's strange to feel like she is so young, to know that she is so young and then look at her and see how much she's grown. Sometimes I feel like I turn around and there is this girl standing beside me where I swore a tiny toddler was tugging on my pant leg before. Kindergarten was this huge milestone and now it seems so far away even though only a couple months have passed. I was calculating about how long it'll take me to get my degree since I'm starting back to school this fall. I figured 4-5 years, that's not so long but measuring it by the ages of my kids... C will be going into 5th or 6th grade depending on whether I can manage 15 credits a semester or only 12. She'll be a preteen by then! With A only 2 years behind her. And now I'm reading that the preteen ages start as early as age 8? That's only a year and a half for C! I can't imagine her being that old already. I'm still having a hard time wrapping my head around 7. My baby is going to be 7 years old. Is it like this for all moms? Each year you're always behind and just when you start to get the hang of them being an age they are suddenly another year older and somehow everything has changed. It feels like every year around fall I'm shocked. Shocked at how old my girls are, how fast they went from babies to toddlers and now toddlers to school girls. I asked Audrey the other day if she could stop growing and just stay small. You know what she told me? "I have to grow! I have to get to 5!" I laughed and squeezed her while inwardly wondering if she'd let me keep her small after 5.

Green at Heart Papers by Basic Grey
Paper Doll Collection Paper by Crate Paper
Kraft Cardstock from Roberts
FieldHouse Flocked Boutique by American Crafts
Lush Decorative Brads in Green by My Minds Eye
Mini Type Alphas by Jenni Bowlin
Bird Chipboard bases by Scenic Route
Free Bird Beauty Title from Penny Lane by My Minds Eye

Buttons by Papertrey Ink
Hollihock Ribbon by CTMH

7.14.2010

What I've been doing more of lately


I heart yoga because it makes me less sore...

Especially after I weight train ;)

7.13.2010

Happily Ever After


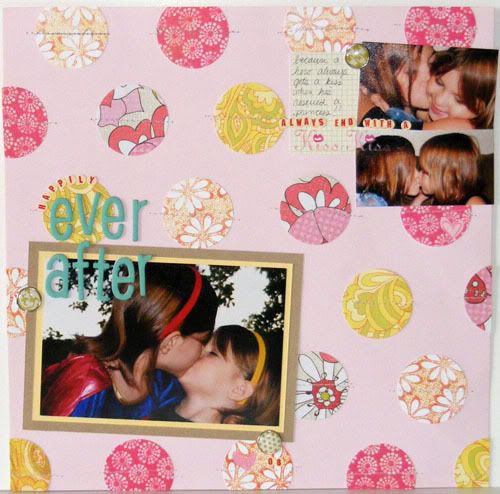
Because at the end of every good fairytale is a kiss ;) Even a fairy tale where Supergirl rescues Batman, lol. This is probably my favorite layout with these papers and not just because of the hilarious pictures. I love the punched circles and have seen it quite a bit lately - punching shapes to make your own pattern paper. After getting my circles on the page though they just needed something extra and a little horizontal stitching through the middles totally gave them that. Even though it's made from scraps I love how it kind of showcases all the different prints, like a fun quilt. The inspiration for this page actually came from a couple Studio Calico designer layouts. One was using this punched circle background but a bit more dense. The other I used a reversed version of the same basic picture placement because it fit so well with my photos. So loving these colors together! Wouldn't a little girls room in this palette be divine? Pages like this really make me want to sew something fabulous ;) I hope you enjoy and have a terrific Tuesday!

Green at Heart and Lime Rickey Paper by Basic Grey
Paper Doll Collection Paper by Crate Paper
American Crafts Cardstock
Kraft Cardstock from Roberts
Lush Decorative Brads in Green by My Minds Eye
Mini Type Alphas by Jenni Bowlin

Thickers Letter Stickers by American Crafts
Journal Cards by October Afternoon

Rubons from Valentines and Dear Lizzy Lines by American Crafts

7.12.2010

Copy Cat


I'm back to scrapping with the Green at Heart stash shopping stuff I was using a couple weeks ago. This is one of the very few times I've sketched out a page before making it. I think I've maybe sketched out my layouts twice before. It was fun to experiment with where to put stuff before cutting and being committed to it ;) My girls are such hams, they copy cat each other so much. Here they were making the most horrible faces. Isn't it terrible that they can make such gross faces and still be cute, haha! They do this all the time and now A has had the habit of smooshing my face because she thinks it's funny. I'm sure I don't look half as cute as they do. By the way they laugh when she squishes my cheeks I certainly must look funny though! Hope you have a great Monday!


Green at Heart and Lime Rickey Paper by Basic Grey
Green Paper by Scenic Route
American Crafts Cardstock
Kraft Cardstock from Roberts
FieldHouse Flocked Boutique by American Crafts
Lush Decorative Brads in Green by My Minds Eye
So Sophie Savvy "Best Thing" Alpha stickers by My Minds Eye
Journal Cards by October Afternoon
Free Bird Beauty Title from Penny Lane by My Minds Eye

Buttons by Papertrey Ink
White RicRac Ribbon by CTMH
Mini Type Numbers by Jenni Bowlin

7.10.2010

Rainbow Zinnia Pillows


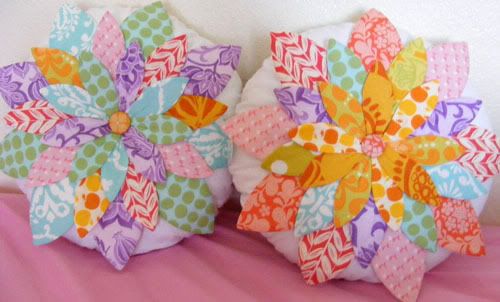
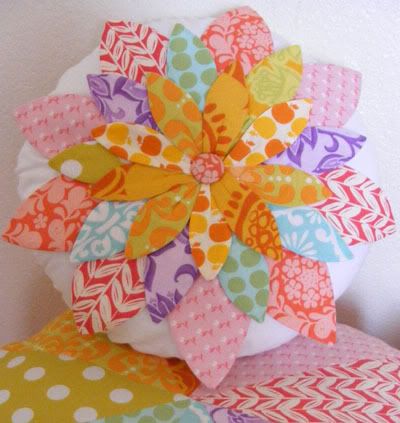
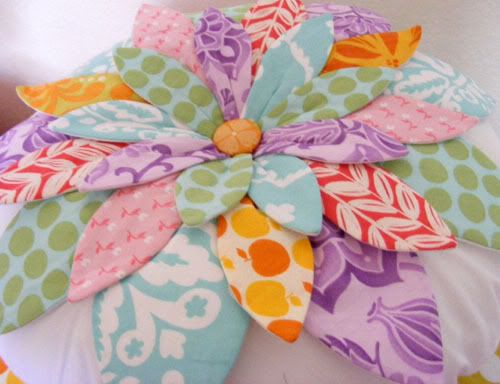
Those rainbow gumdrops gave me a wonderful idea to do the same kind of rainbow design with Amy's Zinnia Pillow. I have been staring at this pattern, wanting to make it, being intimidated by it, and coveting the day I would actually make one for myself (note that this day still has not come since these are for my daughters and not for me). As for the camera strap cover, it will have to wait. But I did manage to get the strap on my camera just for safety sake and Audrey has been loving taking pictures, which is great because I really haven't been doing much of that this month!


This has by far got to be the most cutting intense project I've done! Each pillow has 27 petals and each petal has 3 parts - front, back, and interfacing. For two pillows that was 162 petals to cut! Though I did get to cut the backs 4 at a time since I simply used white for that, the rest were cut individually (I'm certain there must be a faster way - I'm just not that advanced to have figured it out yet, lol.) These pillows took me 3 days to make which is quite the accomplishment because for me if I don't get something done in one sitting, it usually doesn't get done at all. The first evening I pressed and cut all my petals. And then the next day I sewed them together then turned them while watching a movie, and finished pressing them before hitting the hay. The next evening I assembled the final pillows.


The finished result - darling Rainbow Zinnia Pillows! I heart them so very much and yes even though they were a lot of work I'm still planning on making one for me out of the lantern bloom fabric which will go very much faster I'm sure. I did a lot of new things with these pillows - my first circle pillow, covered buttons, pleats, and first pillow tufting (I am so glad I got that long doll needle!) I am wondering though if I should make the smaller 14" pillow which is what these are or to make the bigger pillow which is a whopping 24". The smaller size is a perfect little accent pillow so I'm debating whether the big one would be all the more fabulous or become the huge flower pillow of doom. Anyway, I hope you enjoyed. Thanks for visiting and have a lovely weekend!

7.05.2010

Hugga Bug


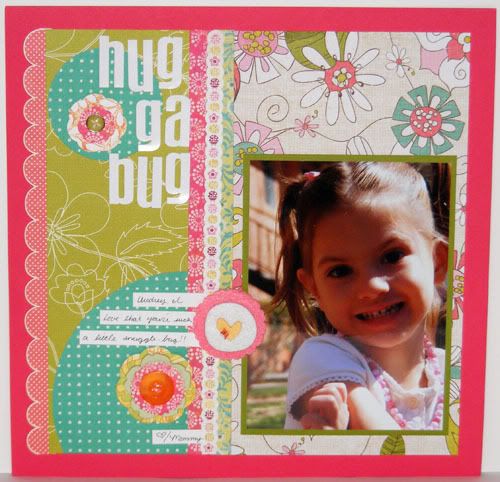
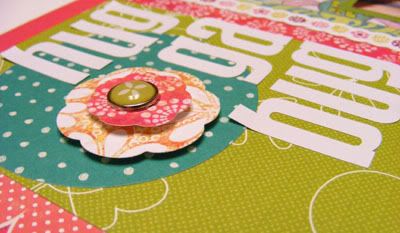
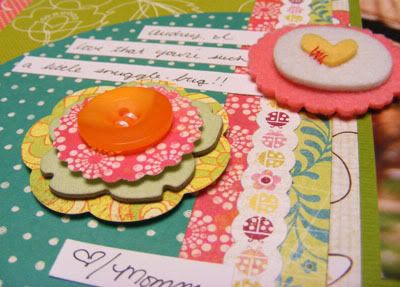
I'm starting to bring in some other scraps now to try and use up the most of these papers. The cute main print on the right is the other side of that green crate paper. I used this side on the Sweet Bubbly layout as well which is funny because when I bought it I was for sure that I would only use the green side. I didn't much like the floral when I first picked it up but I guess now that it's lived in my stash a couple months I've changed my mind, hehe. I love that about double sided papers ;)


This layout was inspired by one in the Studio Calico designer's gallery. They have such gorgeous kits. I think if I ever end up subscribing to a kit system it would be theirs, but I'm not planning on doing that anytime soon. I really want to get my stash waaayyy down first. It's hard when I want to go out and see what's new in the stores. I have to just not look otherwise I end up picking up stuff.


I love how A was sort of hugging herself in this pic. She is my little huggabug and I adore it. Of course she's getting quite heavy now so when she wants me to carry her I pretend I can't hold her for long and slowly droop, droop, droop her back down to the ground. She lifts up her feet and giggles so I have to go even lower to get her to the floor ;) It makes her laugh that she's getting 'too heavy'. Thanks for visiting and I hope you have a wonderful Monday!


Paper Doll Collection paper by Crate Paper
Green at Heart, Lime Rickey, and Urban Prairie paper by Basic Grey
Green floral and Blue dots paper by Scenic Route
American Crafts Cardstock
Lemonade Ladybug border by Basic Grey
Dear Lizzy Details by American Crafts
Scallop Border Sticker by Echo Park Paper Co.
Fieldhouse Flocked Boutique by American Crafts
Remarks Letter stickers by American Crafts
Lush Decorative Brad in Green by My Minds Eye
Orange Zest Button by Papertrey Ink

7.03.2010

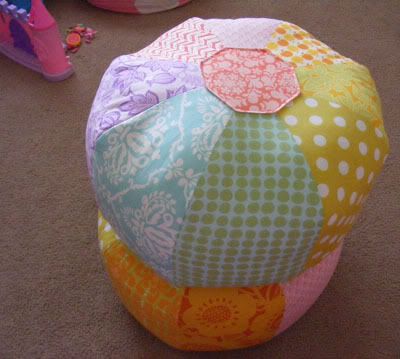
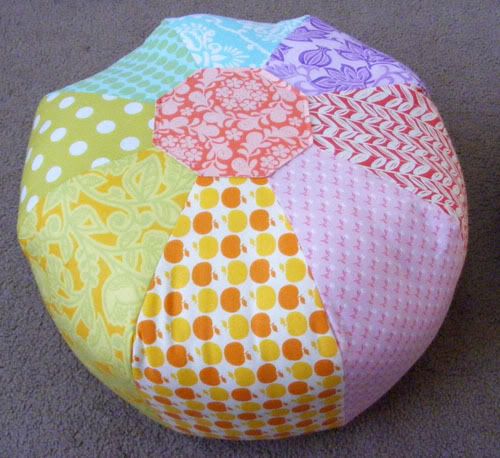
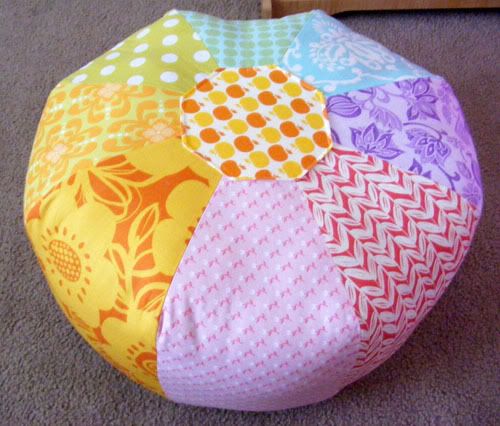
Rainbow Gumdrops


I have been watching Design Sponge for a few months now and one of the posts that caught my eye in May was for sewing a rainbow pouf. There was even a downloadable pattern that you could print to make the cute mini ottoman. While I probably could have used that pattern I thought, I love the gumdrop pillows so much (my big ottoman) that I could just use the smaller 18" pattern to make the girls mini rainbow ottomans using the same 1 fabric per panel concept.


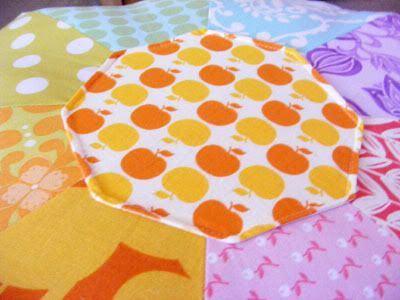
You can make an 18" rainbow style gum drop using Amy Butler's pattern with 1/4 yard of fabric each for the 8 panels but they need to be cut a 1/4 yard (long and skinny) and not a fat quarter (short and fat). I used mostly 1/2 yard pieces so I could make two ottomans, one for each of my girls (there is still quite a bit of fabric left, it's just funny shaped). You can see on some of the orange-green prints that I had to use different patterns since I only had enough room to cut one panel piece from each. It was a great way to use up some of the fabrics in my little stash.


The tops were made with different fabrics so they could easily tell theirs apart and I am loving the rainbow theme. Makes me want to sew some quilts and not just the simple square to square ones which are the only quilts I've ever done ;) I'm leaning towards a pinwheel or banner design. Not sure if my sewing skills are that far yet though so I'll keep with patterns and pillows for now! Thanks for popping by and I hope you enjoy!

7.02.2010

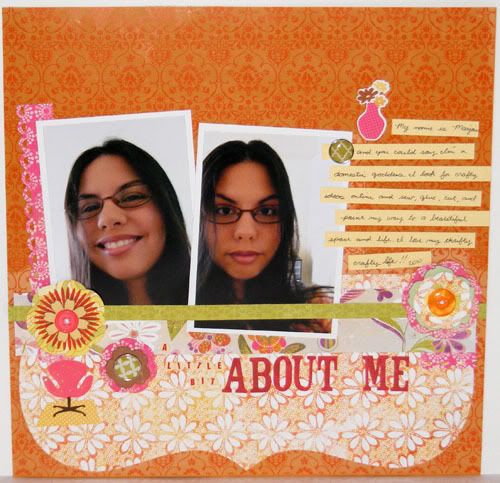
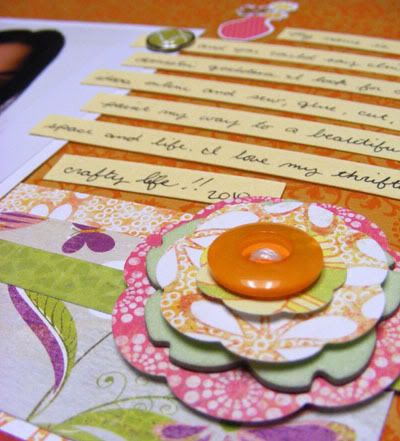
A little bit About Me


Like with the last set I was hoping to get some of the hubby or I scrapbooked as well. We don't have too many photos of us but that doesn't mean I shouldn't let them sit and not scrap 'em ;) What I really need to do is make a list of pages I want to make about us. Then I can search through our photos and if we don't have one to go with the story than we should plan a few photo poses just for those. This page uses the #32 sketch on Inspired Blueprints


I would like to see more of us together and individually, as well as with the girls. The more pages I scrap the more I realize I really need to be in some pictures with my kids. I've always been there behind the camera and I need to be in front of it more often. I know I say that a lot, but each time I do I get slightly better with it. Baby steps, right? ;) With A and C taking pictures every so often now I think it might get a little easier to do this.


A was actually taking some pretty good ones this last week and since that day I first let her snap some shots I hear 'I can be careful with the camera' all the time. That's her way of saying she wants to take pictures. Even though I still have a mild heart attack whenever her tiny hands hold up the camera she's never dropped it and does a pretty good job at keeping it safe. And now that I've taught her how to hold my camera she doesn't get any finger shots or finger prints on the lens anymore. I should make a cover for my camera strap (because it's too ugly to be on there by itself, lol) so that I can avoid those mini heart attacks ;)

Green at Heart and Lime Rickey Paper by Basic Grey
Transparency by Making Memories
Cardstock by American Crafts
Fieldhouse Flocked Boutique by American Crafts
Adobe Remarks Stickers by American Crafts
Lush Decorative Brads in Green by My Minds Eye
Buttons by Papertrey Ink
Rubon by Bo Bunny
So Sophie Savvy Alpha Stickers by My Minds Eye
Mini Red Alpha Stickers by Jenni Bowlin
Apron Lace Punch by Fiskars