9.30.2009

Merry and Pink

Supplies : Rustic White Cardstock, Tree Trimming Trio, Background Basics : Retro; and Signature Christmas Stamps by Papertrey Ink; Blush and Tulip Cardstock and Inks (Sweet Leaf, Cocoa, and Tulip) by CTMH; Kraft Cardstock from LSS; Fiskars Apron Lace Punch, Nestabilities Label 1 smallest die; 1/2" circle punch

I loved my first set that I made on Sunday that I wanted to try out making more bulk flat Christmas Cards again. This set will be gifted to my SIL since she loves giving out handmade cards but thinks she's not creative enough to do it herself. I think she just needs to sit down and try it out with me, but convincing her to do this hasn't worked yet so I'm making some for her ^_~ This set made 6 and I cut the Rustic White to 2 3/4" x 5 1/2". This makes 4 with that size and 2 that are 3" x 5 1/2" if you're using an 8 1/2 x 11 sheet. I stamped the ornament tree in Sweet leaf, then the base in cocoa, and the ornaments and star in Tulip then set it aside. I then took one 12x12 sheet of blush and cut the pieces 4 X 5 1/2. On the left of the blush I stamped one of the retro backgrounds just once horizontally. Because the stamp doesn't go the entire heighth of the card I inked up 1/3 of the stamp again and then stamped the remaining border. Then I took a scrap of Tulip, punched with the apron lace, and trimmed for the edges. Each piece ended up 3/4" x 5 1/2". I put the card together attaching the edging to the card base before putting the blush piece on top and then last the tree panel lining it up next to the border I had stamped. The tree looked a little sparse so I punched out 1/2" circles from the blush scraps and added them to the trees. Then I took a 1 1/2" x 12" scrap of Kraft and cut out 6 of the smallest label 1 nestie dies. I stamped the Merry and Bright in Tulip and then added the sentiments to finish off the cards. These six like the eight last week, also took about an hour. I think they turned out so cute with the pink! Thanks for visiting and have a wonderful Wednesday!

9.29.2009

Go Girl Go!

Supplies : Paper - My Minds Eye, Pebbles Inc, and Scenic Route; Transparency by Making Memories; Glitter Thickers by American Crafts; Flowers by Prima; Big Glazed Brads by Imaginescence; Glazed Brad by Basic Grey; Apronlace edge punch by Fiskars; Sketch by Inspired Blueprints

I played with the #30 Inspired Blueprints sketch with this layout and also the layout I posted yesterday (inspiration for that version came from Designer April Yap's interpretation of the sketch). This one was closer to the original sketch design. I took colors for the layout from the colors on Audrey's shirt. Focusing on the orange and metallic pink I built the layout around those colors and included a transparency (the Practical Scrappers Challenge this week) on my layout, cutting the design by it's curves and using it in place of the patterned paper. Like with pattern paper, try cutting along the design in a transparency to add interest to your layouts. Enjoy the layout and have a terrific Tuesday!


9.28.2009

You Are My Sunshine - Transparency


This week the challenge at Practical Scrappers is how to use transparencies. I think transparencies are so fun but like vellum and other clear paper choices it's often hard for me to think of ways to use them. A transparency gives you the opportunity of having floating patterns, images, and even text on your layouts and cards. Here I used a transparency to substitute pattern paper. It let the base paper show through for a fun addition of pattern without having to add so many colors. This is also great for die cutting like I did here with the sun. Try using white printed transparency patterns for snow or cloud shapes. Layer a pattern transparency over chipboard letters for added contrast.

Don't forget transparency titles or decorative elements like my title here. I like using mine on solid or nonbusy monochromatic prints so that they stand out. They are also great for layering over pictures and many manufacturers have 4x6 transparency lays specificallly made for that purpose. Try using a transparency to accent your title or journaling. Or if you have a printer you can print your journaling right on a blank transparency so that your story floats on the page. I hope some of these ideas spark inspiration on how to use your transparencies. Don't forget to visit the Practical Scrappers Blog for more ideas on how to use transparencies. Have a wonderful Monday!

9.27.2009

Pretty Trees

Supplies : Rustic White Cardstock, Tree Trimming Trio, Signature Christmas, Fancy Flourishes, and Text Style Backgrounds by Papertrey Ink; Juniper, Twilight and Crystal Blue Cardstock, Inks (same plus Sweet Leaf, Cocoa and White) by CTMH; Kraft Cardstock from LSS

Sparkle's Christmas Card Challenge this week had no extra challenge aside from making a Christmas Card and since I just got my Tree Trimming Trio and Signature Christmas set Friday I had to play with them and made 8 total bulk cards. One sheet of Rustic White the pieces cut 4 1/4 x 2 3/4 started the bulk card making (you will get exactly 8 pieces from one 8 1/2 x 11 sheet). I stamped the trees in sweet leaf offsetting them to the right, then the stand, and last the ornaments in the tree blues. After that I lightly distressed the edges in cocoa and set them all aside. The blue cardstock is all scraps from my stash and I cut up enough to make 8 bases. I ended up with 2 Twilight, 2 Crystal blue, and then 4 Juniper. Stamping the flourish first in cocoa I then lightened it up by adding some text background in white. I distressed the base edges in white and set those aside with the trees. Last was the sentiment. I cut one 2 1/4 x 12 strip from a scrap of kraft I had and then cut out 8 of the labels with my nestabilities (it fit 8 just barely so if you do this make sure you're cutting them close together). Instead of stamping the same sentiment on all of them I thought it would be fun to mix it up a little so on 4 I stamped Season's Greetings, 2 Joy to the world and 2 Holiday Greeting to coorispond with the 3 different cardstock bases I had then distressed those in white. Putting them together went by in a jiffy and the total time was about an hour plus the cards are flat, perfect for mailing! Don't forget to stop by Sparkle's Blog for the challenge and her gorgeous Sarah Kay Christmas Card. Have a lovely Sunday!

9.26.2009

Batty

Supplies: Paper - Spooky by My Minds Eye and Eerie by Basic Grey; Diecuts by My Minds Eye; Cardstock from LSS; Spider Brad from Imaginescence; Glitter brads from Doodlebug; Pansy Purple Brad from CTMH; Remarks letter stickers by American Crafts; Bat/Moon Sticker by Pebbles Inc.; White Embroidery Floss (1 Strand)

Here is the other layout I did with die cuts for the Practical Scrappers Blog Hop Challenge only this time I used dies from the preprinted Spooky sheet by My Minds Eye instead of plain ones. I played with another fun sketch from The Scrappiest, this one is sketch #29. Audrey was hilarious the first day I let her wear her costume. She just made the funniest faces I wish I could have caught them all! That Batgirl costume was such a find. Both the girls had been so into superheroes right around Halloween and Caitlyn had already gotten Supergirl but we couldn't seem to find something that really fit Audrey. When we saw the batgirl costume it was perfect. Of course Audrey insisted that she was Batman and not Batgirl no matter what we said. The funniest part was when Caitlyn would kiss little miss 'Batman' for rescuing her! I guess Batman or Batgirl is tougher than Supergirl ^_~. Thanks for stopping by and have a fun Saturday!

9.25.2009

Bat Girl

Supplies : Paper - Basic Grey Eerie, Pebbles Inc.; Transparency by Making Memories; Bat Die Cuts from Pebbles in my Pocket; Glitter Brads by Doodlebug; White Gel Pen; Thickers Letters by American Crafts; Embroidery Floss (1 strand)

Have you heard about the challenge site blog hop? If not hop over to Scrapsketch to start! They are hosting a 'Challenge Site' Blog hop complete with prizes so head on over and see if there is a challenge you want to play in! Here is one of my entries for the Die Cut challenge on Practical Scrappers and for the jazz up your die cut challenge at Just Buggin'. I took plain cardstock bat dies from my LSS and dressed them up just a tiny bit with glitter brads for the eyes and a white gel pen to make the mouth and fangs. The transparency came out looking like vellum in the photo but it's clear in real life. I'm loving the new Eerie papers by Basic Grey. The added plus is they match the My Minds Eye Spooky papers I got last year and never got around to using ^_~ I also used a sketch for this layout from The Scrappiest, a fun sketch site. This layout uses Sketch #20 for inspiration.

You can barely tell, but Audrey is dressed up as batgirl (the layout tomorrow will show her costume better ^_~), and she is also holding a little stuffed bat. Both the girls completely love that thing and named him Squeaky last year because Caitie said that is the sound bats make. I realize now that I didn't put any journaling on this page and I might just add some journal strips later on overlaying the moon so that we have that info about Squeaky written down. If you want to play in the diecut challenge hop on to the Practical Scrappers Blog and link your layout to the Mr. Linky there. Enjoy the layout and have a fabulous Friday!

9.24.2009

Big Cheeser

Supplies : Paper - Sassafras and My Minds Eye, Ribbon by We are Memory Keepers and May Arts; Crochet Flowers and glazed brad by My Minds Eye; Plain brad, Classmate Alpha, and Cardstock by CTMH; Hi button and Glitter Thickers Letters by American Crafts;

I've been trying so hard to give myself some me time and that hadn't happened until last night when I finally had to let the dishes and laundry sit so that I could create a bit ^_~ I still haven't found a happy balance of time where I get in some moments to myself without letting other stuff slide too much. I really wanted to thank you all for your comments this past week especially on my Doggone It post. It really uplifts me to read your supportive words. Talking to other moms and my friends helps so much but your comments I can always come back to read again when I need that extra lift. So thank you for talking time from your busy schedules to leave me a comment!

For a while Audrey made the funniest big cheesers any time I wanted to take a picture. I seriously thought that her cheeks would pop she would smile so hard sometimes! She still does it occassionally, but not nearly like she used to. This layout was quick and simple I just used some scrap ribbons and easy layering to throw this one together. It worked out so well with these cute papers and crochet flowers. I only had one E left in this alphabet so I used the Ws turned on their sides instead. I love it when they make the alphabet so versatile. This particular font also has Hs that double great as Ys, another letter I'm constantly running out of too fast. My other layouts are for the Practical Scrappers challenge so those will be coming up next week. I hope you enjoy the layout and have a fabulous weekend!

9.21.2009

My Sweet

Supplies : Paper - My Minds Eye; Chipboard Urban Prairie by Basic Grey; Rubons by Bo Bunny; Thickers Glitter Stickers by American Crafts; Brads by Basic Grey;

I finally used one of those big gorgeous flower chipboard things on a layout! For months I have wondered how to use them or even where to use them. They are so pretty sitting there in the package but I knew if I could find the right set up that they would look even better on a page! I think the trick is to use them on non-busy paper and on a page with fewer photos. I don't think these things fit if you're trying to get 3 or more photos on a page (unless they are small photos). I love the way it looks, so pretty!! Audrey can be such a sweetheart. It's funny how she gets upset if she doesn't get her hugs and kisses and it's so heartwarming how she always has to have snuggles and hugs throughout the day! Caitlyn is my wild girl, she'll do silly things just to make me laugh and I love it, but the only time she seems to want to cuddle is when we are having story time. Audrey will snuggle anytime and it's just so sweet. Between the two of them I'm sure I get the best of both worlds (clingy and non-clingy kiddos :D). Anyway, thanks for stopping by! I hope you enjoy the layout and have a great Monday!

9.19.2009

Cheeky Baby - Stamps

Supplies : Paper by Sassafras and My Minds Eye; Kraft from LSS; Polka Dot Basics 2 and Faux Ribbon stamp sets from Papertrey Ink; Clear and White Embossing Powdery; Brads from Basic Grey and My Minds Eye; Thickers Letter stickers and Remarks Letter Stickers by American Crafts

Create a background! Stamping's #1 appeal to me is the customization and not just with colors but also with making your own papers. And you don't have to stamp with just ink either, you can use your versamark to do watermarking or to add embossing powder like I did on this page. Here I only wanted the polka dots pattern to go up half the page, so I stamped up until that point with my versamark. I sprinkled clear embossing powder and then heat set it to give the dots presence and texture but not change the color of the background. I love the extra fun the big polka dots add to the layout! The other thing I did with embossing here was to emboss a small white border to embellish the top of the photo mat while also giving it a more finished off look. Make customized background papers with inks or embossing. You can even use a glue pad to create glitter or flocked backgrounds! Fill an entire page with a background or random stamped images, or just part of a page like I did here. You don't have to keep to cardstock to make your backgrounds either, try stamping a fun image in the middle of huge polka dots or in some of the squares on block pattern paper. Custom create paper to fit your photos for a layout or to create that perfect card with the recipients favorite colors. When it comes to making your own backgrounds, the sky really is the limit! Enjoy the layout and have a great weekend!

9.18.2009

Game On - Stamps

Supplies : Paper by Basic Grey, Creative Imaginations, My Minds Eye, and Making Memories; On the Couch Stamps by Papertrey Ink; Thickers Letter Stickers by American Crafts; Flowers by Prima; Brads by My Minds Eye; Buttons and Jute by Papertrey Ink; Rubons by Basic Grey; Inks and Markers by CTMH; Ribbon by CTMH and Making Memories

The stamps challenge on Practical Scrappers was a couple weeks ago and even though I got my pages emailed to them in time, I hadn't gotten around to creating a post of them for here until I was doing the ones for this week's challenge. This page I wanted to play around with the thing I use stamps for the most when putting them on layouts and that's as embellishments. There are some great benefits to using stamps, the first for me has always been that you can customize your stamped images. I love being able to stamp out the images in the colors I want for whatever project I'm working on. Here I stamped out the couch, rug, sidetable, and lamp in colors that coordinated with my papers and then I used some markers to fill in the lamp a little more. I even took some of the card sentiments and used them as mini-journaling on the layout. Though I didn't do this here, the second thing I love most about stamps is you can create bulk embellishments cheaply and quickly. Mish Mash does this all the time and I love how she creates not just bulk embellishments for cards but for mini albums, scrapbook pages, gifts, etc! Use the same stamps to create completely different looks just by changing the color your stamping them in or the papers your using. Thanks for stopping by and have a fabulous Friday!

9.17.2009

Doggone It

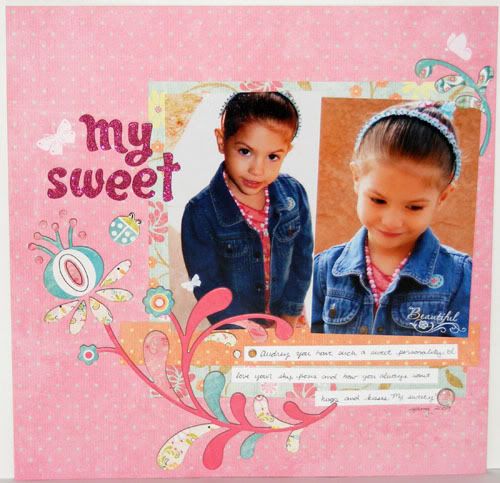
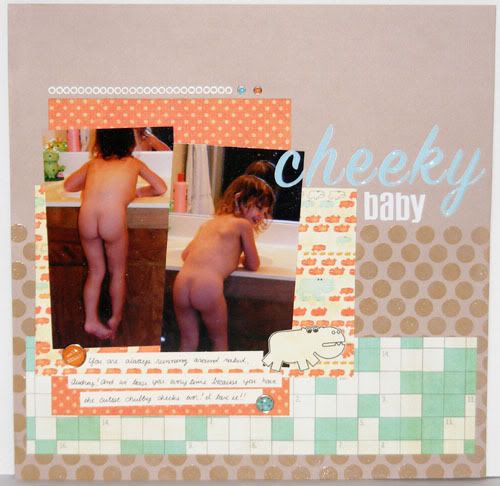
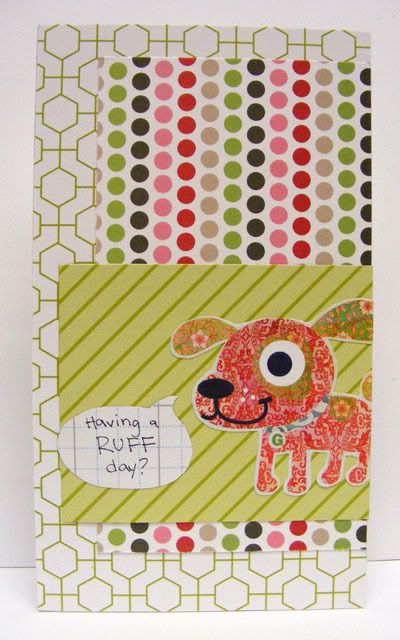
Supplies : Paper - Scenic Route and Basic Grey

A super simple dog card! I really love these dogs from the June Bug Basic Grey line, they are so quirky and cute. And even though I don't much care for my own handwriting I find that it goes okay with these pups. This one I made just to use up some more of these layout scraps. They are too small to really put on another page so I thought if I could make some cards with them right after then the scraps won't just sit in my stash forever ^_~. And Paul finally got a chance to take a look at my laptop and got my connection fixed so now I can get online again, yay! The first few days were hard but after that it was actually really nice. I got a lot of things done that normally I wouldn't have gotten around to until weeks later and our home's energy is so much clearer now. I did a lot of reorganizing and purging that I've been meaning to do for weeks. I've also gotten in a lot more time with Caitlyn working on all the things she's struggling with. This next part is a lot of venting, just to warn you.


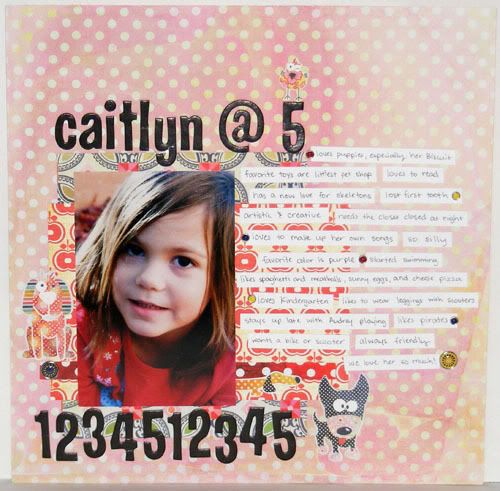
Caitlyn had been working in speech therapy as well as going to preschool for a year and half before Kindergarten and this first month of school has really tested her limits with 1-3 hours of work at home a day between homework from school, therapy homework, and then trying to work on the skills her classmates have already mastered that she is having a hard time with. She's still pretty behind in her speech but at least her educational skills are starting to catch up more to her peers' levels. I feel bad because there are so many times where I think she finally gets something after months of working and then I hear about how other kids master the same thing in a week. One of our nephews who will start Kindergarten next year is already so ahead of Caitlyn and his mom says she only spends 10 or 15 minutes a day working on kindergarten prep with him. I feel so jealous and discouraged when I see how easy it is for her kids and all the time I spend working with Caitlyn to not even get half the results. When I mentioned we've been working on the alphabet for over a year she gave me this unbelieving look like how can it be possible to work with a child so long and they still not be able to identify all of the letters.


I know we're so lucky to have Caitlyn. She's hilarious and loving, energetic and creative, and even our speech therapist has said if you have to have a kid on the spectrum, she's the kid to have. I love her so much and I would never change the person she is, but even with all that I still feel these swells of sadness that we have to work so hard, that she has to work so hard, to learn things that take other kids less than half the time with half the effort to learn. Sorry, I'm falling into a little pity party here, it's just so hard to work and work and then celebrate a small victory only to have other mothers mention how if every parent would only spend 15 minutes a day with their child, the kids would never be behind. I spend sometimes hours in a day and Caitlyn's always been behind. Those comments break me down so badly because so often even though I know most of these moms don't know what it's like to have a disabled child, I feel like they are blaming me for why Caitlyn's not doing what all the other kids are doing. I know I just need to keep at it, to keep encouraging her and helping her to learn and her therapist and even other mothers with older disabled children have assured me that she'll be fine, the people I should be listening to are saying she's doing great. But all those other people, the ones that just have to get their comments in about parenting when they have healthy normal kids, they always strike that nerve that seems to say 'You're a bad mom. It's all your fault that Caitlyn's behind.' Some days I get angry because they don't know what it's like to work so hard and watch your child fail again and again on the same things. Most the time I'm just sad because Caitlyn spends so much time working and every time someones has a comment about Caitlyn's shortcomings it makes me feel hopeless because it feels like all that work doesn't show.


It just wears me down, day after day. When it comes to disabilities people seem to only see it as you have to be severe or you're not handicapped at all. Caitlyn is one of those kids who can run and will sing and is friendly. At first glance she seems like a normal kid, you wouldn't know she's on the Autism Spectrum, you can't really see that she has SPD. You have to spend time trying to talk to her to see her handicap and sometimes even then it doesn't seem like much until you have her right next to another kid or ask open ended questions. So many other parents I've met have viewed her as there can't be anything wrong. Most of our family members treat it like it's nothing as well, the same as with Paul's MS, so we don't even get family support. In fact it's usually only from other moms I've met at the preschool or at therapy that have ever even shown an interest in listening to what Caitlyn goes through. Even if our kids don't have the same difficulties, it seems that a lot of us have the same struggles and I've learned so much with all of my conversations with these other moms even if it was just one time. But I have such a hard time really connecting with them. Most the gals I've met are 10 or more years older than I am, and none of them I've met have a disabled husband as well. I feel so alone so often because I'm constantly dealing with worries about Paul's MS, especially since he hasn't recovered much at all from these past relapses, while also dealing with trying to help Caitlyn's challenges.

Kindergarten has really been an eye opener, both good and sad. It's great to know what we need to work on each day to help her but to watch and see when I'm volunteering how far the gap is between where she is and where the other kids are is tough. That first day was really difficult for me. I wanted so badly for her to be one of the girls breezing through the work stations, but she wasn't. Her behavior was good and I was so proud of that and she had a lot of fun so that it made it a lot easier. It's just so hard to watch her be unable to do what the other kids can, harder than it is for me to watch Paul with that same struggle, though his is mostly physical. There's something about having to watch your child work through a disability that hurts so much more than watching your spouse. I always thought that his first relapse would be the hardest thing in our marriage I'd have to go through, that after those really hard 4 years I wouldn't have to go through that again. It's never gotten easier to watch him go through a relapse and in fact it's only gotten more worrisome since we have kids now and I worry how it'll effect them. But even all that doesn't compare to how hard it is to watch Caitlyn not be able to keep up with her peers. The amazing blessing about her is that she doesn't even know she's behind. She takes each success as a huge victory and we celebrate it with her even though inside I'm still worried because I know she still has so far to go. And her being so happy about every little thing helps so much every day. I don't know if I could do it if she weren't such a funny and positive girl all the time. I pray she keeps that her entire life, even after she understands her challenges and the hardship they might bring. Thanks for reading my spout and I hope you enjoy the card and have a happy Thursday!
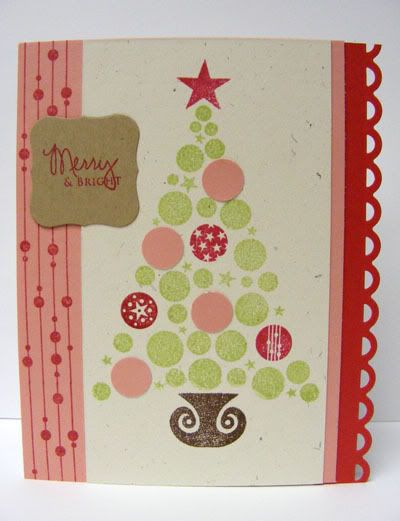
9.16.2009

Strike a Pose - Letter Stickers

Supplies : Paper by My Minds Eye and Piggytales; Glitter Thickers by American Crafts; Chipboard Journal Tags by My Minds Eye;

Though you probably buy letter stickers to use for making titles there are some other fun pieces in those packages that can go overlooked. Things like brackets, asteriks, and periods which can all be used to embellish your page. Here instead of using brackets to accent a title, I used them to emphasize the photo Audrey struck a pose in. Use the brackets to highlight journaling, a special embellishment or keepsake, or a photo like I did in this layout. The asteriks in the package were used as fun flower embellishments on the page. Asteriks can be used much like the periods - use them alone, over punched shapes or circles, and even as flower centers. Circle periods can even take the place of brads or eyelets on the right layout. Look at the letters, numbers, and shapes in your alpha packages and think of how you can use them to embellish a page or a card. Make Monogram cards to use up single letters or for an extra simple subtitle or addition to your journaling on a layout. Add punctuation to your titles or as an embellishment at the end of some creative journaling, even a fun card. Enjoy the page and have a great Wednesday!

9.15.2009

Dog Gone Cute - Letter Stickers

Supplies : Papers by Basic Grey and Scenic Route; Glazed Brads by Basic Grey; Thickers Foam letter stickers by American Crafts; Cardstock;

Another fun way to use your letter stickers is to make word games as focal points on your page. Here I made a word search for the title emphasizing the title words by not only circling them but using black letters for them and white letters for the background letters. Creating a word search is great for using up those unused letters like V, Z, and Q. On my layout I picked out letters that I don't use or had too many of to fill in the focal game. Try making crosswords, Bogle, or even Mad Libs right on your layout for a fun twist on a title! Love Sudoku? Use your numbers to create a Sudoku focal. Emphasive a specific letter, word, or number by using a different color sticker than the rest. Or try stamping the background letters and using 3D letter stickers like the Thickers for the words you want to focus on. You don't even need to make it a focal. Have a bunch of flat letter stickers hanging around, create some unique letter paper to use on school or game layouts. Or create a crossword or wordsearch puzzle paper. I hope some of these ideas get your creative juices going on how to use those stickers! Thanks for visiting and have a terrific Tuesday!

9.14.2009

Caitlyn @ 5 - Letter Stickers

Supplies : Paper - June Bug by Basic Grey, Sassafras (apples); Lime Rickey Glazed Brads by Basic Grey; Thickers Letters stickers by American Crafts; Cardstock by CTMH

This week the Practical Scrappers challenge is how to use letter stickers. Usually I use letter stickers just for titles, but there are plenty of ways to use up those stickers! Today I'm focusing on the numbers. They seem to be the stickers that I rarely use and for some reason it seems like manufacturers are putting in more and more numbers in the sticker packs. Here I created a simple title and then used number stickers to create a border on the bottom to emphasize Caitlyn's age on the picture. Try using numbers as borders for the height of a person or object, weight on a weightloss page, days it took to do something or minutes/hours/etc. Create subtitles with numbers like birthdates, months for baby, weeks in pregnancy, etc! Label pictures and journaling with corrisponding numbers, use a number as the age on a birthday card, or put the date for another occassion on cards or layouts. I hope some of these ideas help inspire you on how to use the number stickers that come in the letter stickers packages.

I wanted to include a lot of journaling on this page as well since there is just the one photo, but I didn't necessarily have a story to tell. Instead I let each journaling strip contain one fact about Caitlyn at age five such as she lost her first too (this last week actually!), her favorite color is purple, her favorite toys are littlest pet shop, and she loves Kindergarten. I cut long strips from my white scrap paper and then wrote on the strip before trimming the length. After that I arranged all the strips on the page until I liked the set up and then glued them down. A fun thing to note is that I had run out of Ls and Ts before making this page so I cut the triangle edge off a 4 to make a T and then trimmed a K to make L for Caitlyn's name. Remember that even if you run out of certain letters you can sometimes find ways to create them out of the numbers or other less used letters in the set. Don't forget to visit the Practical Scrappers Blog to see more examples on using up your letter stickers.
Enjoy the layout and have a wonderful Monday!

9.12.2009

Having a Ruff Day?

Supplies : Paper by Scenic Route, Piggytales, and Basic Grey

This is what it's been like the last two weeks here. Remember my last Saturday post where I was hoping for some relax time? Well, that totally didn't happen! Long story short from that Saturday until the next we had major construction going on in our kitchen and bathroom because the water and sewer line broke underneath us. Luckily there was no flooding and the manager is so great so it wasn't horrible. In fact the girls loved having to hang out in the club house until bedtime and Paul and I really enjoyed the free dinners. We got new flooring and a professional steam cleaning for not just the hall they used but our livingroom as well. It was during SEP week here so Caitlyn happened to be out of school which helped a lot. She has afternoon kindergarten and I'm sure we would have managed somehow, but I'm glad we didn't have to worry about juggling school for her and me volunteering without us having our apartment available during the day.

Then this last week my laptop hasn't been able to connect to our network so I've had no internet. My hubby's computer and our other things like the 360 can get online but my laptop keeps saying I don't have security access even after we've put in the password. Out of the blue it does this so we've been trying to fix it but it's just not happening. Paul's had so much homework that he's always on the desktop when I get free time and that definitely takes priority over me checking emails and blogging. Aside from the fact that I haven't had much free time at all, this last night was the first time I've made anything in over two weeks. It's just been a crazy crazy month so far. I keep hoping things will settle down but I think with flu season, all the birthdays in our family, and the holidays coming up it's just going to stay busy. Thankfully Paul was taking a break so I was able to get online and check up on my emails and update my blog with what I made today :D So I hope you enjoy my simple card. It's made from scraps from my Practical Scrappers design team pages that will be posted starting Monday. Thanks for stopping by, reading my soap of a life, and have a wonderful weekend!