6.30.2010

Makin' Blossoms


I used up all my cute Sassafras blossoms and I still have a few pages left that I want to make. So I made some of my own ;) My favorite is the big far left flower. That pretty burst on the paper is a rub-on!

6.28.2010

The Little Plaid Dress


Audrey's little plaid dress ;) This was one of my favorite dresses of hers last year. She's had so many cute clothes. When I scrapbook the older pictures and see the darling outfits they wore it makes me a little sad because I'm reminded how fast my girls are growing.


Caitlyn is shooting up like a rocket and for a while she was eating like a bird but this past week she's back to gobbling everything in sight! I swear every half an hour I hear her whine "I'm hungry". Meanwhile Audrey's growing taller and leaner like Caitlyn. She's starting to lose what little baby fat she had and even her cute roundy feet are getting longer and leaner. While I love getting and now making them new clothes, it's hard to know they grow up so fast. It's exciting to watch the new things they learn but I also miss my bebes.


Audrey used to curl up on my lap when I called her my bebe but now she gives me one of her lemony faces and says "I'm not a baby, mom-mom! I'm a girl!" Breaks my poor mama heart! Of course if I act sad at the comment she comes rushing into my lap anyway. I just don't get to call her my Audrey bebe anymore. Now she says she's 'Audrey girl', lol. I know I totally baby and spoil my girls. Audrey will be five in the fall but I can't help it, they grow up way too fast!

Green at Heart Paper by Basic Grey
Paper Doll Collection Paper by Crate Paper
Kraft Cardstock from Roberts
Spring Sprout Blossoms by Sassafras
Lush Decorative Brads in Green by My Minds Eye
Fieldhouse Flocked Boutique by American Crafts
So Sophie Savvy Alpha Stickers by My Minds Eye
Indian Summer glazed brad by Basic Grey
Journaling Card by October Afternoon
Mini Red Alphas by Jenni Bowlin
Dear Lizzy Springhouse shapes by American Crafts

6.27.2010

The Party Dress


I forgot to mention in my post yesterday that the Analise dress pattern is by Portabello Pixie. It comes with instructions for 3 styles of clothing, a patch work dress, a patchwork skirt, and the party dress. I also thought it would be helpful to add that I don't have a serger. Most of the seams ended up very nice after the topstitching. The one thing I will hope to remember the next time I make this dress is to zigzag stitch the gather seam allowance before topstitching. I think that would have made that part a little neater. At any rate, here is A's dress made with the Woodland Delight fabric by Michael Miller.


A's was made in about 1/4 of the time. The biggest help was not doing any patchwork. I think that's what took so long the first time. Also I only had one gather to do since the party dress version uses binding. I could have added a ruffle and actually considered it but I'm glad I went with the binding since the dress is a little big on her. I made the size up on both dresses (7 and 5), though with C's I did cut the elastic to a size 6 since she's such a string bean. And I'm sure it helped that I had sewn the dress once before ;)


Some mistakes were still made this time around, different ones but definitely fewer. My seam ripper didn't see nearly as much action on this dress, hehe. Seeing A's back now can you tell the big mistake I made with C's? Because I patchworked her straps I forgot to add the extra dimensions for the cut on the fold so they are twice as short. Don't worry though, I'm fixing that soon ;)


It doesn't twirl as big as C's, that comes from the extra ruffle. I'll definitely be making more of these for the girls or at the very least trying the skirts. It will be sad when C passes size 8. That's where most of these darling patterns end. Of course I guess by then she'll be wanting less of a little girl style *sigh*. I'll just have to enjoy it while it lasts!

6.26.2010

Analise Dress


If you haven't been able to tell I've really been getting into sewing more lately. Though sewing clothes was almost a lost cause again earlier in the week. I had gotten this pattern about a month and a half ago. I opened it up, read through the instructions and looked at the pattern pieces. It was very easy to understand and seemed simple enough for me to try out. At the time I didn't have fabric that I felt worked with the pattern so I pulled out a couple Simplicity ones that I had picked up on sale for $1 at JoAnns. They looked like they used a lot less material and I thought it would be better to practice on something simpler.


But it wasn't simple at all! There were weird markings all over the pattern pieces, the instructions were confusing with terminology I'm not yet familiar with. After pouring over the patterns I finally put them away, completely discouraged. It took me another week before I thought to just pull out this pattern again since I actually understood it and simply used what I had. The prints in this are from 5 fat quarters I bought over a year ago. The pattern calls for either two large pieces for the skirt, or provides a specific patchwork design.


I thought, why can't I improvise my own patchworked design sized to the same dimensions? And that's exactly what I ended up doing. The fat quarters were cut as strips and pieced then topstitched. Because my finished length ended up being 17 1/2" instead of the 19" on the pattern piece, I increased the length of the ruffle at the bottom. I love the way this dress turned out though the entire time sewing I wasn't sure I'd care for it. After all it used fat quarters I wasn't in love with anymore. Now I think they are gorgeous!


The dress is so full and fun! C calls it her princess dress. I love the way it looks when she twirls ;) Now I've got to make one for A. Hopefully I can learn from the dozens of mistakes I made while making this one and the other will move along more smoothly!

6.25.2010

Sweet Bubbly


Lately I've been wanting to create but not wanting to have to think of how to do my layouts so I've been doing a lot of lifts and sketches. It had been a while since I visited Inspired Blueprints and I headed over to check out what was new and see if any of the sketches fit my pics. One of their newer sketches - #48 - was perfect for these pictures. I simply turned the layout to fit my vertical photos and the circle elements were like bubbles ;)


Last year C was such a camera ham with the bubbles. While a got plenty of her I only caught a few good ones of A since while she was blowing bubbles she wanted 'no pictures mom!' Now of course she wants pictures all the time, hehe. But these were some of the few shots I got of her and she's wearing one of my favorite tops for her last summer. She still fits in it just barely right now, but I think she passes it by in favor of the newer hand-me-downs from C ;) I hope you enjoy and thanks for stopping by!


Paper Doll Collection Paper by Crate Paper
Green at Heart Paper by Basic Grey

Kraft Cardstock by Roberts
Baby Pink Cardstock by CTMH
Dear Lizzy Details by American Crafts
Dear Lizzy Rubons by American Crafts
Spring Sprouts Blossoms by Sassafras
Lush Decorative Brads in Green by My Minds Eye
Lemonade and Indian Summer Glazed Brads by Basic Grey
Subway Thickers by American Crafts

6.23.2010

Be Happy


Starting fast and fresh with these goodies ;) I think spring and summer are my favorite pages to create. My best photos are the ones taken outside and the girls just love a chance to play model when the weather is nice. These sweet pictures of A are from last spring. The girls are always so happy when the weather warms and they get to wear skirts and dresses nearly all the time. I took inspiration for this layout from another one of Susan's. I added more goodies since this is a girly layout ;) The bees I have been hoarding for a while and I'm so glad to finally have used them on a page. They were the perfect little addition with that title.


A lot of the embellishments I picked to go with my stash shopping have a bit of dimension and I know it's hard to capture that with a straight shot of the layout so I thought it would be fun to share some of the little details too ;) Thanks for popping by and have a happy Wednesday!


Green at Heart Paper by Basic Grey
Cardstock by American Crafts
Kraft Cardstock by Roberts
Urban Prairie Chipboard (bees) by Basic Grey
Spring Sprout Blossoms by Sassafras
Dear Lizzy Rubons by American Crafts
Regards Thickers by American Crafts
Journaling Lines Stamps and Raspberry Fizz Ink by Papertrey Ink
Gingham Ribbon by Making Memories
Lush Decorative Brads in Green by My Minds Eye
Apron Lace Border Punch by Fiskars

6.22.2010

Stash Shopping - Green at Heart


I had so much fun making layouts from that last collection that I thought to put together one using items from my stash. So I did a little 'stash shopping' and put these together to use on my next layouts. With the Sweet Summertime set I didn't use everything I got, though I did use quite a bit of it. My hope is to do the same with these and use up my goodies rather than buying more, especially since I haven't even broken into some of them! ;) Here are the details :

Green at Heart Papers (3) by Basic Grey
Lime Rickey Paper by Basic Grey
Paper Doll Collection Paper by Crate Paper
American Crafts Cardstock
Kraft Cardstock from Roberts
Dear Lizzy Details by American Crafts
Spring Sprout Blossoms by Sassafrass
FieldHouse Flocked Boutique by American Crafts
Lush Decorative Brads in Green by My Minds Eye
So Sophie Savvy "Best Thing" Alpha stickers by My Minds Eye
Bird Chipboard bases by Scenic Route
Journal Cards by October Afternoon
Free Bird Beauty Title from Penny Lane by My Minds Eye
Urban Prairie Chipboard by Basic Grey
Rhinestones by Kaiser

6.21.2010

Pretty Replacement Covers


After making those darling pincushions I kept thinking about making a sewing machine cover to complete the set ;) The cover I had been using was one that came with the machine, a very flimsy white plastic thing that was now very torn, crinkled, and stained. Needless to say it was ugly. So I pulled out the scraps from the fat quarters I used for the pincushions and found another fabric in my stash that matched the reds to make the sewing cover. I lined the inside with bleached muslin and used some light interfacing for more structure since I didn't have any scrap batting hanging around. There was literally just enough of the plaid floral to make binding. So much better!


I was about to call it a day when I realized just how gross my ironing board was. I still had that interesting vine fabric out and laid it over to see if I had enough. A while ago I had read the instructions for recovering table top ironing boards in the One Yard Wonders book so just going from memory I measured, cut, sewed, and finished recovering my little board. I happened to be lucky that my foam covering the board was in great shape and remarkably clean considering all the stains on the cover itself. I even managed to reuse the cording which worked out great because I didn't have any on hand. So not only is my ironing board like new - it matches my sewing goodies!

6.20.2010

10 Things Mini Book and Some Bookmarks


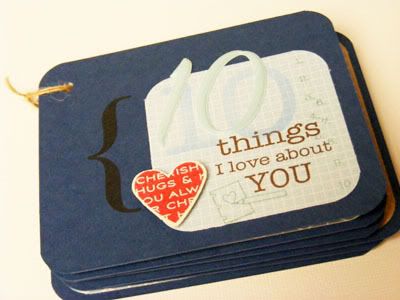
Here's the minibook I made for Paul. As much as I love to scrap, making a page or album for Father's day isn't very display compatible with his space. However, a mini book would be right at home on his desk. I opted to make this pretty small, it's only 3.5x 4.25 basically so I could cut the 6 base pieces from one piece of 8.5x11 cardstock.


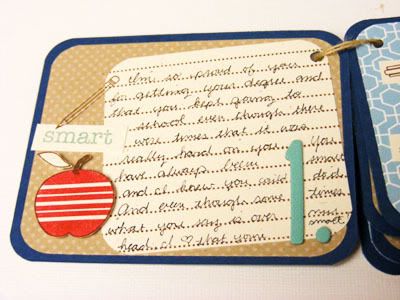
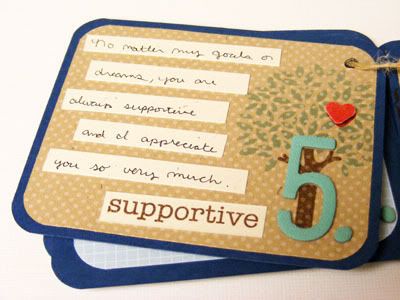
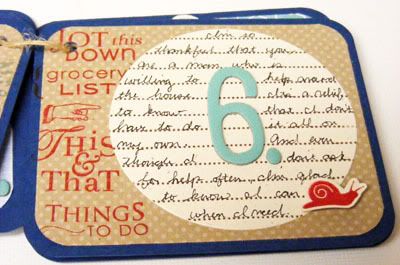
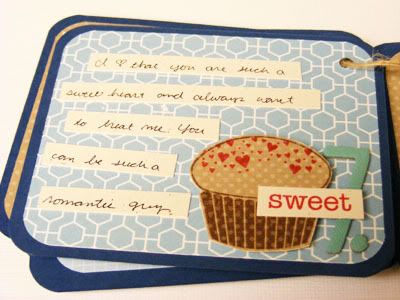
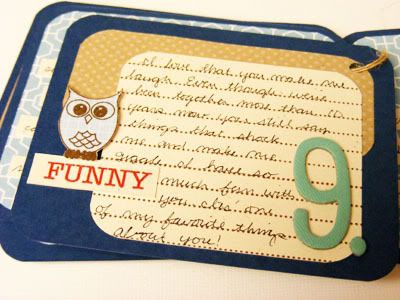
One of the first things I had to do was to plan a little bit about what was going on the pages. I knew I wanted each page to have a number, and at first I wanted each one to have a stamped reason as well but found that there were reasons I wanted to include that aren't generalized. So I made a list and then found 5 reasons that included the more generalized stamped words like sweet, caring, and smart.


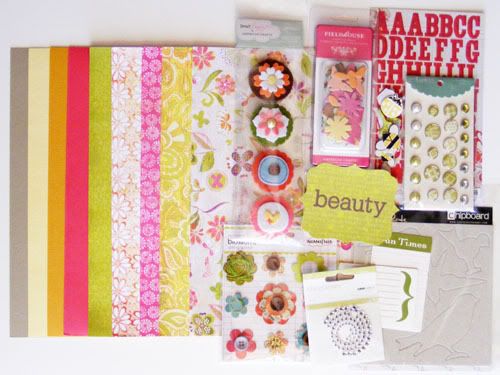
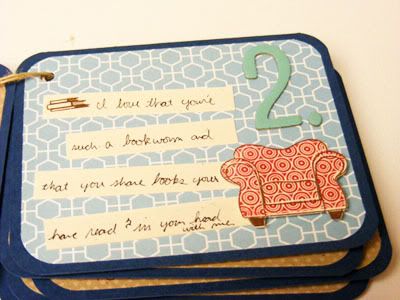
There aren't any pictures, just journaling and embellishment. It was really liberating to make a project without pictures. You still get to document and decorate but don't have to match up photos ;) I simply picked a few papers I wanted for the minibook throughout and then went from there.


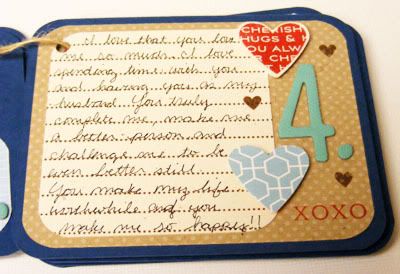
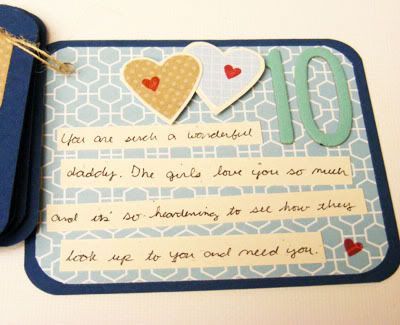
Not every page had a 'theme' but I did try to work them in as much as possible. I probably could have gone with hearts through the whole thing, but that seemed a bit Valentines to me. I did work them into a few pages though and put them with the lovey journaling.


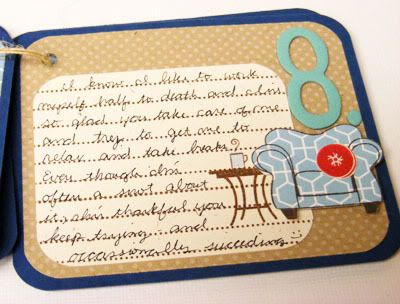
I mixed and matched a lot of stamp sets though the main ones were Journaling Lines and the Take Ten set + additions. There's also quite a bit of dimension since I used 3d foam tape on all the images for extra depth.


This project was perfect for using up those Thickers numbers. I love the numbers but usually only use a couple and I feel like they get wasted. Now I have a project that uses the whole range, quite nice!


And last but not lease a couple fun book marks using some of the extra chairs I made. I love the book list one and am thinking of making a couple of those for me as well. As it is I've been using receipts, post-its, or whatever scratch paper I have laying around as bookmarks! Both of these projects were so fun, I am definitely going to be making more mini-books in the future! I hope you enjoyed and are having a wonderful Father's Day with your families ;)

6.19.2010

Father's Day Cards


Here are the cards I made for the guys. Masculine cards are usually really difficult for me but making these wasn't too bad. This one is for the girls' poppa. C wanted to make her own goodies and drew a cute tie and wrote I love you boba. So cute! I left the spelling wrong simply because I thought it was adorable. Hopefully Poppa thinks so too. A copied C and drew a tie. I have to wonder where they got this idea since they don't often see Paul or Poppa wear ties and I didn't prompt them on this one either. I think it's crazy that they picked that up on their own to link ties and fathers day.


We had a birthday to go to before the weekend and so I whipped this card for our chocolate loving friend. Inside it says "except, of course, a friend with chocolate." So fitting for him! This card was the inspiration for the others. I really liked how the blues looked with the kraft and brown.


And here is Paul's card from me. I love the guy and girl pillows since that's an item of hot debate at our house ;) I kept everything else simple, not coloring any of the background stamping since I wanted the couch to stand out. The girls drew a bunch of pictures for him. A's first few ones she forgot she wasn't supposed to show him and went running back to display her hard work to Paul. So sweet! I'll be sharing another Father's Day project tomorrow since I'm still working on it right now. Enjoy and have a wonderful weekend!

Freshly Picked Pincushions


I love these little pincushions! Months ago I picked up the Freshly Picked pattern at our quilt shop because this pattern by Heather Bailey was way too cute to pass by. The added plus is you get patterns for 4 different pin cushions. I wanted to make them all but after finishing the pear off it was after midnight and I thought it was probably best to call it quits and clean up ;)


The tomato I made first and after having made the other two I can vouch that the tomato was definitely the easiest to make. It also happens to be my favorite of the three I made, though I was for sure that my fav would be the pear since I love pears so very much. But something about the tomato, maybe it's cute short and plump shape... maybe the darling double buttons I sewed on top... maybe just the colors. Whatever the case, the tomato is my go-to pincushion of cuteness!


How darling is this apple! I'm thinking it would make such a cute teachers gift. Even if they don't sew this makes such a cute little softie. C hoarded it the moment she saw it. It's C's favorite fruit so of course she was in love with the apple. This one was the hardest to create mostly due to the tufting to create the apple shape. I'm sure it would have been infinitly easier had I a nice long doll needle but I'm a stubborn girl and made due with what I had in the middle of the night instead of waiting until morning to buy myself one.


Last but not least was the pear. Doesn't it look so scrumptiously pretty! This was a nice break from the apple. It took longer than the tomato, simply because of the leaves and stem, but was almost just as easy. Though it's darling I'm not sure it makes for a very stable pincushion, it's the wobbliest of the three of them. They are so cute all clustered together on my bookcase though! The last pattern is for strawberries. I'm not sure if I'll be making them, though the girls keep telling me "You forgot to make the strawberries, Mom!"

Meadowsweet fabric by Sandi Henderson for Michael Miller

6.18.2010

She's a Farm Fresh Girl


This is the last layout I'll have made with these Sweet Summertime papers! I hope you've enjoyed seeing all these layouts with that same set and didn't get sick of it, lol! All I have now are some smaller scraps so hopefully I'll use them up on pages or cards soon. This particular page was inspired by one made by Susan. I was really pulled into the slanted design and wanted to try it out for myself. It was a lot of fun, so different than what I'm used to. There's so much dimension on this page, I used a bit of 3D foam to build it up and if I wasn't such a night owl I might actually get some pictures with natural light so that you could see it. As it is I'm usually taking them at 11pm and have to use my flash since my lights aren't that bright inside. I think my photos come out okay for the most part, and you get the general idea ;) Another layout of A. I had so many of these cute pictures of her. Like with C blowing bubbles last year, I just took so very many, lol. I hope you've enjoyed the pages! Thanks for popping by and have a fabulous Friday!


Sweet Summertime Papers by Echo Park Paper Co.
Farm Fresh Papers by October Afternoon
Cardstock by American Crafts
Farm Fresh Stickers by October Afternoon
Sweet Summertime Stickers by Echo Park Paper Co.
Thickers Letter Stickers in Rainboots by American Crafts
Mini Alpha Stickers by Jenni Bowlin
Scallop and Circle punches by EK Success
Red Candy Dot by Pebbles
3D Foam Squares

6.16.2010

Wordless Wednesday


I've seen a few of these out on the blogosphere and thought it would be fun to give it a try ;) A sweet little message I made for my DDs yesterday.

6.15.2010

Summer Time


Pendant banners have become so popular and it's a trend that I adore. I'm hoping to make some for the girls' room but I'm thinking about using fabric for that and frankly I'm a little intimidated about cutting letters out of fabric or felt. However, making little banners to go on a page is much easier so I'm getting my fix that way for now ;) This layout was inspired by one at Studio Calico. Mine's quite a bit simpler but I love how it came together. The little clouds that were originally going to be with the hot air balloon worked perfectly here with the sun stickers. That main sticker sheet is nearly empty now. It makes me a little sad but also proud. All those fun goodies went to good use! This picture cracks me up. The girls love to chase each other around and it's rare that I can capture it on camera. I haven't learned how to take moving photos very well and even when I have it set to action speed I'm sure there's something more I should be doing with it. Thanks for visiting and have a terrific Tuesday!


Sweet Summertime Paper by Echo Park Paper Co.
Farm Fresh Paper by October Afternoon
Cardstock by American Crafts
Sweet Summertime Stickers by Echo Park Paper Co.
Cloud precut die cuts by Pebbles
Treehouse Epoxy Brads by Pebbles
Lemonade mini glazed brads by Basic Grey
Waxy Flax
Journaling Lines and Berry Sorbet Ink by Papertrey Ink
Token Ticket Quite Contrary by My Minds Eye

6.14.2010

Cute and Simple


Sometimes you want something cute and no fuss. And sometimes you have only 5 minutes to get that card made and get out the door. This time was one of those times ;) I spent my procrastinated time making the apron below for a birthday present, which left me with minutes to make the card, especially since I still needed to help the girls get their swimsuits and sunscreen on, plus roll up their towels and make sure the batteries in my camera are still kickin'. In times like these my Slice is a lifesaver. Pull out a cardbase, grab a couple scraps and cut out a name or simple silhoutte shape. If it's not enough add a punched border from same said scraps and call it done. Her mom thought the card was fabulous, extra plus for quick modern style creativity!


With that quick card was the not quick apron. I had known about this birthday party for a week and a half but being the procrastinator that I am I didn't start making anything until 11 that morning with the party at 2 that afternoon. Add in lunch and the 64 times the girls asked me if it's time to go to the party yet and the apron was slow coming. But it certainly turned out cute! I thought making a binded apron would be slightly quicker than the reversable ones I made for the girls but it wasn't. It did however take up less fabric and I love the finished off look binding gives ;) I had enough left over binding from the girls aprons to do the pocket on this one. I made the rest from a remnant piece of fabric that was also used for the pocket. A's modeling it since the little girl is her same age. Doesn't she make such a darling model?

6.13.2010

Weekend Sewing : Puppy Love


I whipped up some collars and leashes for the girls' stuffed puppies. They had been asking me for collars and at first I just tied some extra ribbon around their necks, but they kept falling off which meant I was tying ribbon every 15 minutes, lol.


First I made some simple collars with velcro closures. The tag is made from felt with a little bit of interfacing on the back for stability. I embroidered a letter for the name. B is for Biscuit ;)


Then I made little leashes that attached to the collar so the girls could 'walk' their dogs. They got such a kick out of it! Caitlyn took it seriously and took Sam outside for his walk. I tried to get her to keep him inside but she kept sneaking him out. The compromise was that Sam was not to be dragged but floated over the sidewalk, hehe. Except for the pictures of course, but only because Momma posed him ;)

6.12.2010

Weekend Sewing : Reversable Kid's Aprons


These aprons are too sweet!


Perfect for mixing, stirring, and keeping their darling clothes nice and clean.


Not to mention they look super cute and fashionable! Now it's hard to keep my girls OUT of the kitchen! I got the One Yard Wonders book back in February and finally used one of the patterns after looking through it about a dozen times (it's fun eye candy!) These were altered from the craft/tote apron in the book. I didn't really want an apron that turned into a tote bag, but I did love the simple style of the apron itself so I used the main piece pattern and pocket dimensions to make the girls some fun reversable aprons. I simply cut two main pieces and two pockets for each apron. Since I love the finished look of binding I made some 3/4 binding out of some scrap fabric for the pockets and then stitched some strips closed to use for the ties and around the neck. The binding was sewn to the pockets then the pockets to the apron fronts. Put the right sides together, pinning the ties and neck loop in place and stitch around the apron leaving about a 3-4" opening for turning. Turn right side out, iron and press the open seam closed, then do a finishing stitch all around the apron again, this will all close your turning seam as well. Viola! Cute, reversable, and tons of fun!