Showing posts with label Spring. Show all posts

8.27.2010

Chalk It Up!


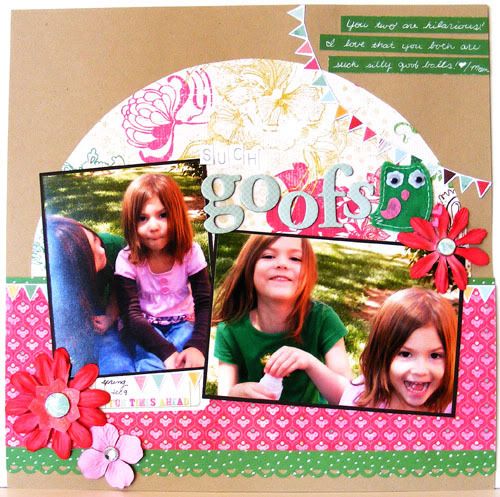
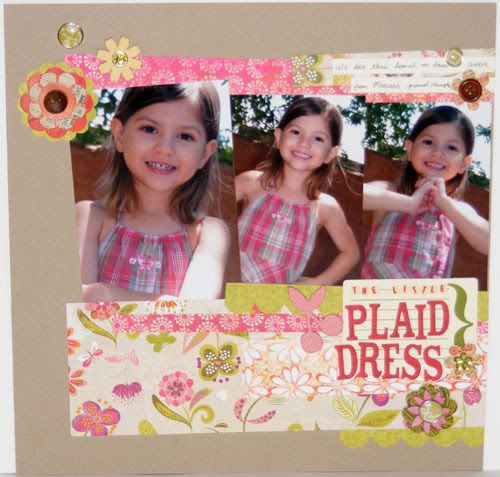
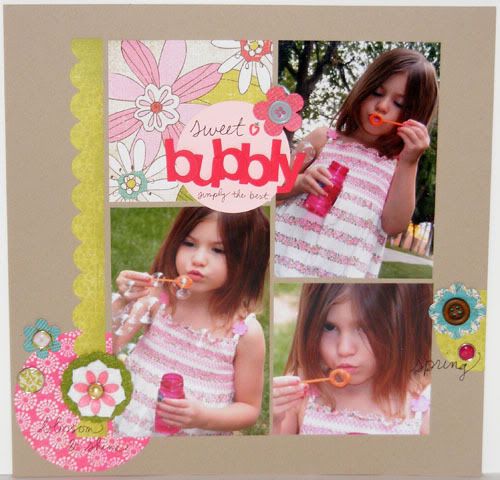
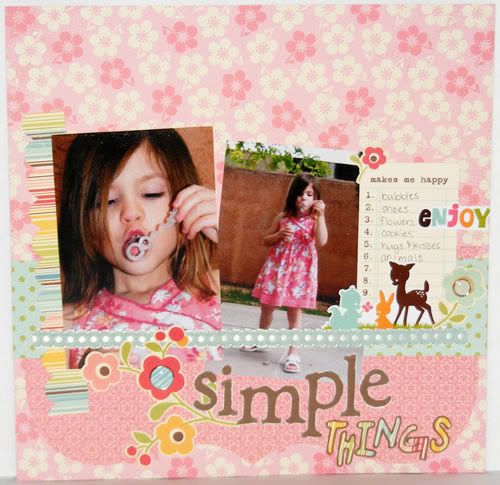
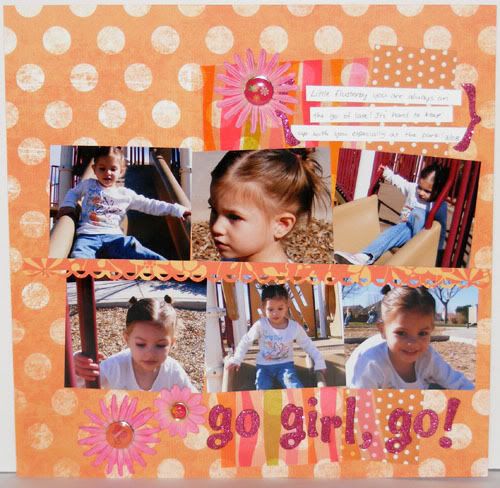
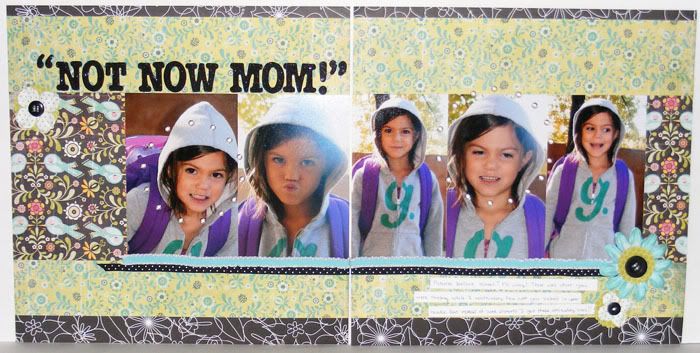
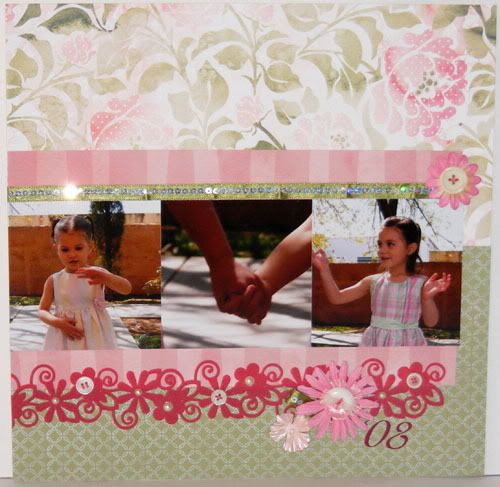
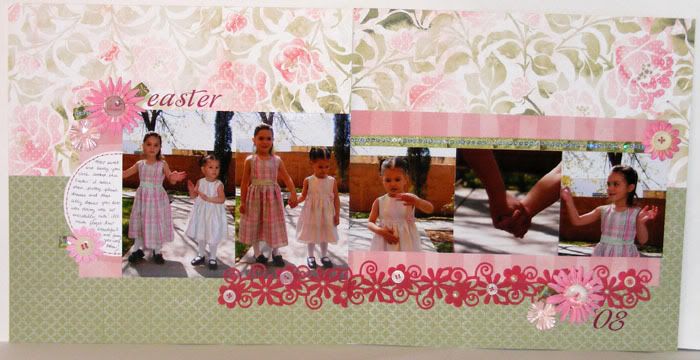
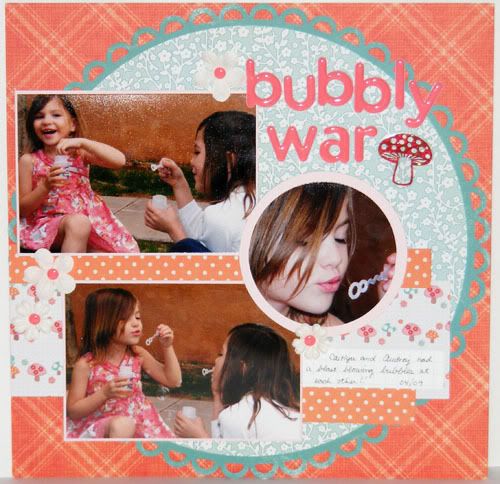
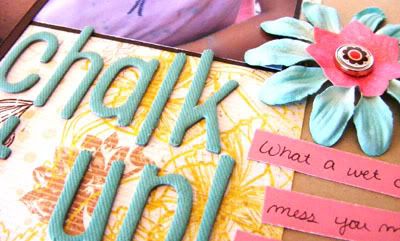
This was the last page I made at the crop and also the only page I didn't use any circle cut paper in. It ended up being a perfect stop since I had used up all my mojo by the time I got to this layout. These pics were taken after C and A discovered that chalk and water made super bright and fun pictures. Of course at the time C was the one who drew and A just liked to get ultra messy as you can tell from her showing off her grubby little hands! It's so weird to think that this was two years ago! Next year both the girls will be in school, crazy!


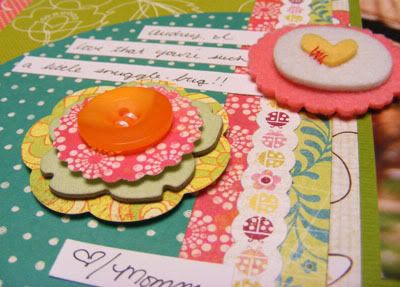
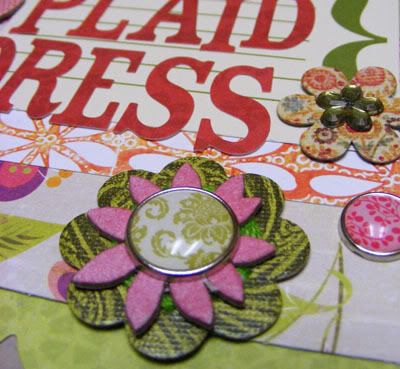
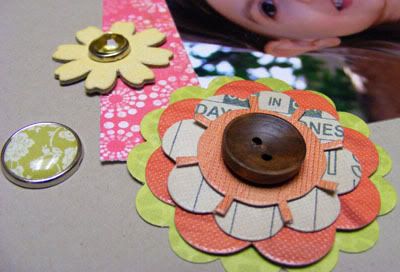
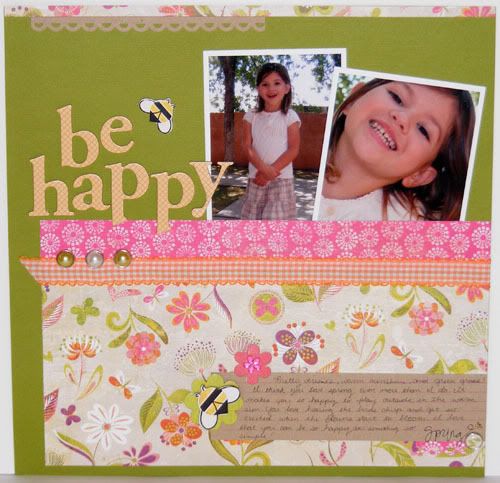
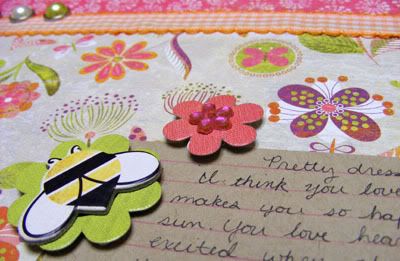
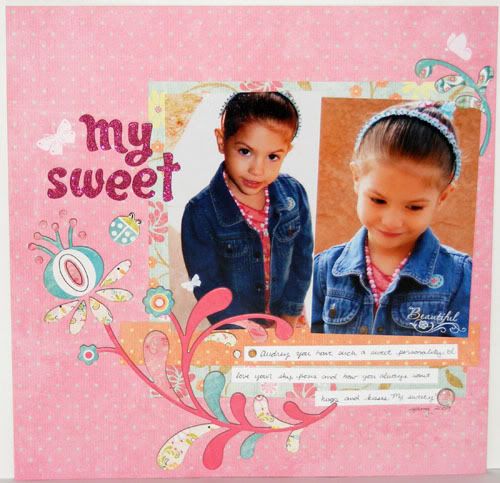
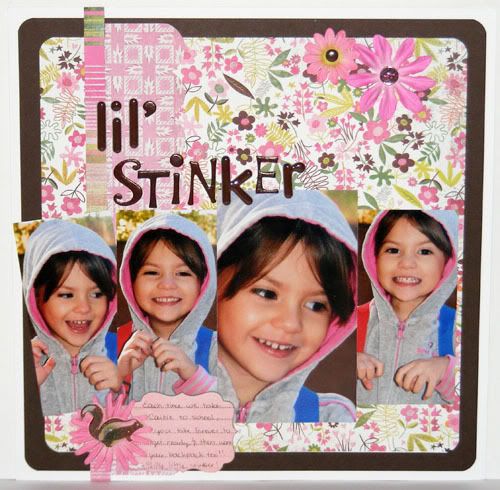
I was really in love with these Beach House Glittered Paper Flowers by American Crafts. They were great for layering with primas, adding rubons to, and just looking fun and glittery! I used them on every layout I made at the crop and I still have nearly half the package. These little babies go a long way ;)


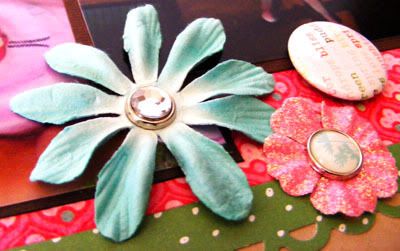
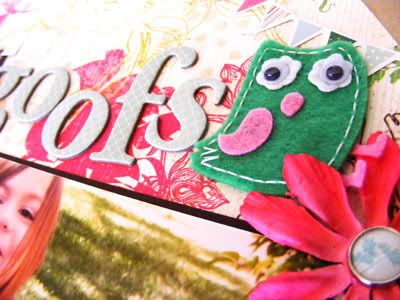
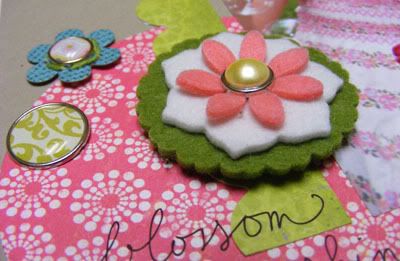
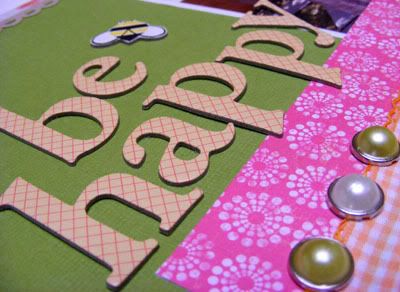
Prima flowers, rhinestones, and glazed brads were also used on nearly every layout ;) Gotta love pretty accents! I hope you've enjoyed the pages. Thanks for popping by and have a fantastic weekend!

8.25.2010

Such Goofs


I love it when my girls are little giggly gal pals together. They get so silly, especially A. She loves to make weird faces and they are so incredibly hilarious. C gets a kick out of her faces too and laughs hysterically when A pulls out one of her wacky expressions. I actually put these papers together back when I bought them months ago and I was so proud to put the different brands together all coordinated like ;) The floral is by Crate Paper, the green dots and bunting are by Dear Lizzy for American Crafts, and the Pink pattern is by My Minds Eye.


I've had these little Sassafras feltie birds for quite a while and have slowly been using them up. There were 4 big birds, one teensy bird and a branch. I am down to just the biggest owl and the branch now. This was the bird that I wondered if I'd ever use, and the moment I flipped through my embellies, I knew he would be perfect for this goofy page! Enjoy and thanks for visiting!

7.05.2010

Hugga Bug


I'm starting to bring in some other scraps now to try and use up the most of these papers. The cute main print on the right is the other side of that green crate paper. I used this side on the Sweet Bubbly layout as well which is funny because when I bought it I was for sure that I would only use the green side. I didn't much like the floral when I first picked it up but I guess now that it's lived in my stash a couple months I've changed my mind, hehe. I love that about double sided papers ;)


This layout was inspired by one in the Studio Calico designer's gallery. They have such gorgeous kits. I think if I ever end up subscribing to a kit system it would be theirs, but I'm not planning on doing that anytime soon. I really want to get my stash waaayyy down first. It's hard when I want to go out and see what's new in the stores. I have to just not look otherwise I end up picking up stuff.


I love how A was sort of hugging herself in this pic. She is my little huggabug and I adore it. Of course she's getting quite heavy now so when she wants me to carry her I pretend I can't hold her for long and slowly droop, droop, droop her back down to the ground. She lifts up her feet and giggles so I have to go even lower to get her to the floor ;) It makes her laugh that she's getting 'too heavy'. Thanks for visiting and I hope you have a wonderful Monday!


Paper Doll Collection paper by Crate Paper
Green at Heart, Lime Rickey, and Urban Prairie paper by Basic Grey
Green floral and Blue dots paper by Scenic Route
American Crafts Cardstock
Lemonade Ladybug border by Basic Grey
Dear Lizzy Details by American Crafts
Scallop Border Sticker by Echo Park Paper Co.
Fieldhouse Flocked Boutique by American Crafts
Remarks Letter stickers by American Crafts
Lush Decorative Brad in Green by My Minds Eye
Orange Zest Button by Papertrey Ink

6.28.2010

The Little Plaid Dress


Audrey's little plaid dress ;) This was one of my favorite dresses of hers last year. She's had so many cute clothes. When I scrapbook the older pictures and see the darling outfits they wore it makes me a little sad because I'm reminded how fast my girls are growing.


Caitlyn is shooting up like a rocket and for a while she was eating like a bird but this past week she's back to gobbling everything in sight! I swear every half an hour I hear her whine "I'm hungry". Meanwhile Audrey's growing taller and leaner like Caitlyn. She's starting to lose what little baby fat she had and even her cute roundy feet are getting longer and leaner. While I love getting and now making them new clothes, it's hard to know they grow up so fast. It's exciting to watch the new things they learn but I also miss my bebes.


Audrey used to curl up on my lap when I called her my bebe but now she gives me one of her lemony faces and says "I'm not a baby, mom-mom! I'm a girl!" Breaks my poor mama heart! Of course if I act sad at the comment she comes rushing into my lap anyway. I just don't get to call her my Audrey bebe anymore. Now she says she's 'Audrey girl', lol. I know I totally baby and spoil my girls. Audrey will be five in the fall but I can't help it, they grow up way too fast!

Green at Heart Paper by Basic Grey
Paper Doll Collection Paper by Crate Paper
Kraft Cardstock from Roberts
Spring Sprout Blossoms by Sassafras
Lush Decorative Brads in Green by My Minds Eye
Fieldhouse Flocked Boutique by American Crafts
So Sophie Savvy Alpha Stickers by My Minds Eye
Indian Summer glazed brad by Basic Grey
Journaling Card by October Afternoon
Mini Red Alphas by Jenni Bowlin
Dear Lizzy Springhouse shapes by American Crafts

6.25.2010

Sweet Bubbly


Lately I've been wanting to create but not wanting to have to think of how to do my layouts so I've been doing a lot of lifts and sketches. It had been a while since I visited Inspired Blueprints and I headed over to check out what was new and see if any of the sketches fit my pics. One of their newer sketches - #48 - was perfect for these pictures. I simply turned the layout to fit my vertical photos and the circle elements were like bubbles ;)


Last year C was such a camera ham with the bubbles. While a got plenty of her I only caught a few good ones of A since while she was blowing bubbles she wanted 'no pictures mom!' Now of course she wants pictures all the time, hehe. But these were some of the few shots I got of her and she's wearing one of my favorite tops for her last summer. She still fits in it just barely right now, but I think she passes it by in favor of the newer hand-me-downs from C ;) I hope you enjoy and thanks for stopping by!


Paper Doll Collection Paper by Crate Paper
Green at Heart Paper by Basic Grey

Kraft Cardstock by Roberts
Baby Pink Cardstock by CTMH
Dear Lizzy Details by American Crafts
Dear Lizzy Rubons by American Crafts
Spring Sprouts Blossoms by Sassafras
Lush Decorative Brads in Green by My Minds Eye
Lemonade and Indian Summer Glazed Brads by Basic Grey
Subway Thickers by American Crafts

6.23.2010

Be Happy


Starting fast and fresh with these goodies ;) I think spring and summer are my favorite pages to create. My best photos are the ones taken outside and the girls just love a chance to play model when the weather is nice. These sweet pictures of A are from last spring. The girls are always so happy when the weather warms and they get to wear skirts and dresses nearly all the time. I took inspiration for this layout from another one of Susan's. I added more goodies since this is a girly layout ;) The bees I have been hoarding for a while and I'm so glad to finally have used them on a page. They were the perfect little addition with that title.


A lot of the embellishments I picked to go with my stash shopping have a bit of dimension and I know it's hard to capture that with a straight shot of the layout so I thought it would be fun to share some of the little details too ;) Thanks for popping by and have a happy Wednesday!


Green at Heart Paper by Basic Grey
Cardstock by American Crafts
Kraft Cardstock by Roberts
Urban Prairie Chipboard (bees) by Basic Grey
Spring Sprout Blossoms by Sassafras
Dear Lizzy Rubons by American Crafts
Regards Thickers by American Crafts
Journaling Lines Stamps and Raspberry Fizz Ink by Papertrey Ink
Gingham Ribbon by Making Memories
Lush Decorative Brads in Green by My Minds Eye
Apron Lace Border Punch by Fiskars

3.26.2010

Such Dolls!


Supplies : Paper, Remarks Stickers, Spring House Chipboard Shapes, and Rubons from Dear Lizzy by American Crafts; Cardstock and MiniMarks Rubons by American Crafts; Journaling Lines stamp set and Melon Berry Ink by Papertrey Ink; Apron Lace Fiskars Punch

Today's Sketch Friday Sketch for Practical Scrappers is provided by Lucy and what a wonderful sketch it was to try out some of the Dear Lizzy goodies I picked up. My favorite is those chipboard dresses. Aren't they so sweet! They remind me of all those darling baby dresses the girls had. I love these papers too, the only thing I don't like is that I'm having such a hard time matching the red. I found some scraps in my stash that matched, I'm pretty sure it's AC cardstock so I think Pebbles must have just been out of that particular red when I bought the papers since I didn't find any that worked then and this one coordinated perfectly. I'll be taking a piece when I go next time to see if it's back ;) Enjoy and have a fab Friday!

1.04.2010

Passing By

Supplies : Paper by October Afternoon, Scenic Route, and My Minds Eye; Flowers from Prima; Buttons and Jute from Papertrey Ink; Candy Dot by Pebbles; Thickers and Remarks letter stickers from American Crafts;

I used some of those fun embellies I posted on Saturday on this layout I made using the Inspired Blueprints #37 sketch. March of last year Caitlyn was in speech therapy 1-2 times a week and at that time the rehab clinic was in the main hospital building. They have an area with a fountain that goes down to a stream and a little bridge that takes you over to some seating where they created a spot of lovely desert landscaping. It's an area we usually rushed past because there was always someplace to be and because it's nothing all that special, just an area around a hospital. After therapy it was errands or going to the preschool, another doctors appointment, picking up Paul, etc. And every visit Caitlyn would ask to see the fountain and go across the bridge, each time receiving the 'we don't have time' answer that seemed to become so commonplace in our lives. One day I finally realized we needed to slow down and so after the therapy session that day we crossed the bridge and played. Caitlyn spent most of the time just sitting near the water, listening and watching it and in those quiet unrushed moments I saw that this was something she needed and she needed this more than I needed to finish some other errand right at that moment, or to be early to another doctors appointment for her where we would wait another 20 minutes before being seen. So almost every time we had therapy after that we spent a little time across the bridge or by the fountain wall. And it made all the difference, not just for her but Audrey and I as well. I no longer had to drag her to therapy and running errands afterwards seemed to go more smoothly. I was more patient with them and they were more tolerant of doing things that weren't fun. Just 5 minutes to get away from the hustle. Five minutes in someplace beautiful and quiet. And I wonder how much we miss when we're just passing by. I've noticed since she's started Kindergarten that we've been in that rush again and I need to break us out of it. Take some time today to enjoy something you haven't noticed and have a lovely Monday! Thanks for visiting ;)

11.09.2009

Simple Things

Supplies : Paper by October Afternoon; Flower Stickers and Journal Prompt by October Afternoon; Enjoy and Animals Remarks Stickers from American Crafts; Brads Abbey Road by My Minds Eye and Lemonade by Basic Grey; Ribbon by Making Memories; Basics 2 and Handwritten Fonts Slice Cards by Making Memories; Chocolate Cardstock by CTMH

This week the challenge on Practical Scrappers is on using white core cardstock. I used my favorite method on this layout, scissor distressing on my title! I love the soft comfy look it gives to any paper and with white core cardstock the distressing can help make your items gain more presence on the page. For me distressing is the biggest benefit to white core cardstock. Emboss it then sand the embossed image to really make it pop out. You can even sand the paper itself for a more rustic or linen look. Try crumpling your paper up, then laying it out flat and sanding lightly on the creases for great texture. Hold open your scissors and lightly drag it across the edge of your cardstock for easy scissor distressing, lighter for a softer look and harder for a more rugged or torn look. Speaking of tearing, white core cardstock looks great torn, where it can reveal a bold white edge! Score a border around the edge of your base page then sand to create a simple frame. Have fun distressing your titles and shapes cut with your die cut machine or punches, add texture to them by embossing, crumpling, or scoring first! Remember that a little can go a long way so keep it simple; distress a few pumpkins on a page, a title, or the base but don't distress everything so that the elements you want to pop from your distressing/texturing don't get lost on the layout :D I hope you've gotten some fun inspiration on how to use your white core cardstock. Hop on over to Practical Scrappers for more samples and have a marvelous Monday!

11.02.2009

4 a Moment

Supplies : Paper by October Afternoon; Journaling Prompt and Text Elements by October Afternoon; Owl, Cloud, Daydream sticker and Thickers Stickers by American Crafts; Ribbons by Pebbles Inc, CTMH, and Making Memories; Brads by My Minds Eyes Abbey Road; Apron Lace Punch by Fiskars; Sketch by Pagemaps

Practical Scrappers is teamed up with Frosted Designs and Stuck On U Sketches for a Triple Challenge complete with prizes from each challenge site this week! You can incorporate all the challenges like I did here on this layout, or you can make two or three seperate projects. The only catch is to qualify for the prizes, you need to do all three challenges. The Practical Scrappers Challenge for this week is to use up your ribbons! I'm almost as bad with ribbon as I am with paper. It's so easy to buy one yard here and there, then end up with a huge stash! Ribbon tabs are one of the easiest ways to add different patterns/colors of ribbon to your page without overwhelming it. It's also a great technique for using up those tiny ribbon scraps as well! I used some various sizes to give my ribbon more interest. Try cutting them at different angles or letting them fray for interest instead of making tabs. Use wider ribbon strips in place of pattern paper for texture or create flowers, leaves, sunrays, etc. The Frosted Designs Challenge was to use an owl someplace on your project and the Stuck On U Sketches challenge was of course to use a sketch :) I picked this cute owl from a set of American Crafts Stickers and rotated + flipped the sketch to fit my photo. Don't forget to stop by Practical Scrappers for the challenge and more inspiration on how to use up your ribbon and maybe even a few more samples using the triple challenge! Thanks for visiting and have a wonderful Monday!

9.29.2009

Go Girl Go!

Supplies : Paper - My Minds Eye, Pebbles Inc, and Scenic Route; Transparency by Making Memories; Glitter Thickers by American Crafts; Flowers by Prima; Big Glazed Brads by Imaginescence; Glazed Brad by Basic Grey; Apronlace edge punch by Fiskars; Sketch by Inspired Blueprints

I played with the #30 Inspired Blueprints sketch with this layout and also the layout I posted yesterday (inspiration for that version came from Designer April Yap's interpretation of the sketch). This one was closer to the original sketch design. I took colors for the layout from the colors on Audrey's shirt. Focusing on the orange and metallic pink I built the layout around those colors and included a transparency (the Practical Scrappers Challenge this week) on my layout, cutting the design by it's curves and using it in place of the patterned paper. Like with pattern paper, try cutting along the design in a transparency to add interest to your layouts. Enjoy the layout and have a terrific Tuesday!


9.24.2009

Big Cheeser

Supplies : Paper - Sassafras and My Minds Eye, Ribbon by We are Memory Keepers and May Arts; Crochet Flowers and glazed brad by My Minds Eye; Plain brad, Classmate Alpha, and Cardstock by CTMH; Hi button and Glitter Thickers Letters by American Crafts;

I've been trying so hard to give myself some me time and that hadn't happened until last night when I finally had to let the dishes and laundry sit so that I could create a bit ^_~ I still haven't found a happy balance of time where I get in some moments to myself without letting other stuff slide too much. I really wanted to thank you all for your comments this past week especially on my Doggone It post. It really uplifts me to read your supportive words. Talking to other moms and my friends helps so much but your comments I can always come back to read again when I need that extra lift. So thank you for talking time from your busy schedules to leave me a comment!

For a while Audrey made the funniest big cheesers any time I wanted to take a picture. I seriously thought that her cheeks would pop she would smile so hard sometimes! She still does it occassionally, but not nearly like she used to. This layout was quick and simple I just used some scrap ribbons and easy layering to throw this one together. It worked out so well with these cute papers and crochet flowers. I only had one E left in this alphabet so I used the Ws turned on their sides instead. I love it when they make the alphabet so versatile. This particular font also has Hs that double great as Ys, another letter I'm constantly running out of too fast. My other layouts are for the Practical Scrappers challenge so those will be coming up next week. I hope you enjoy the layout and have a fabulous weekend!

9.21.2009

My Sweet

Supplies : Paper - My Minds Eye; Chipboard Urban Prairie by Basic Grey; Rubons by Bo Bunny; Thickers Glitter Stickers by American Crafts; Brads by Basic Grey;

I finally used one of those big gorgeous flower chipboard things on a layout! For months I have wondered how to use them or even where to use them. They are so pretty sitting there in the package but I knew if I could find the right set up that they would look even better on a page! I think the trick is to use them on non-busy paper and on a page with fewer photos. I don't think these things fit if you're trying to get 3 or more photos on a page (unless they are small photos). I love the way it looks, so pretty!! Audrey can be such a sweetheart. It's funny how she gets upset if she doesn't get her hugs and kisses and it's so heartwarming how she always has to have snuggles and hugs throughout the day! Caitlyn is my wild girl, she'll do silly things just to make me laugh and I love it, but the only time she seems to want to cuddle is when we are having story time. Audrey will snuggle anytime and it's just so sweet. Between the two of them I'm sure I get the best of both worlds (clingy and non-clingy kiddos :D). Anyway, thanks for stopping by! I hope you enjoy the layout and have a great Monday!

8.05.2009

Fashionita

Supplies : Papers by Basic Grey (Marrakech) and My Minds Eye (Tres Jolie and Bloom and Grow); Ribbon from LSS; Buttons by My Minds Eye; Cardstock and Marker by CTMH; Remarks Letter Stickers by American Crafts; Embroidery Floss; Blossom Nesties

Can you tell I've been addicted to playing with my Basic Grey papers this week? Now if someone would just get the lemonade line in town before I break down and buy it online! I used the Inspired Blueprints #26 sketch for this layout which was a 2 page sketch. I didn't have enough photos for both pages so I just did the right side. I finally got a few nesties after debating for a year and a half! Yeah, I'm so not an impulse shopper. I got just a few of the ones I think I'd use the most for right now to make sure I like using them and I love 'em! This one I used the blossom nesties to make a lollipop flower. This baby is what made the layout take so darn long to make! The first combo I cut out I didn't like the order of, I had the flower print on the outside and it just disappeared into the background. So I cut some more blossoms and then thought stitching would be cute after finding the combo I liked. Each blossom is hand stitched and I sew really s-l-o-w. I curled the edges of each blossom up for some dimension and then gave the same treatment to the photo corner on the right. I love the way this came out and I'm sure to be using these blossoms for more lollipop flowers in the future! Everything else was fairly quick. The letters are just the remarks stickers so to make them pop more on the layout I took my cocoa marker and traced around the edge. It really made so much of a difference (note to self I should start taking before/after photos). A little ribbon scrap to take the place of a flourish on the sketch and viola - a fashionable page for my little fashionita! Enjoy and have a terrific Wednesday!

8.03.2009

Got Eyelets?


This week the Practical Scrappers challenge is to use eyelets. Be sure to stop by there to see all the amazing ideas from both design teams on what you can do with eyelets. Here were my submissions :


Supplies : Paper - Basic Grey (Urban Prairie) and Scenic Route; Thickers Letter Stickers by American Crafts; Flowers by Prima; Buttons by Papertrey Ink; Eyelets by Making Memories; Ribbon - Blue by American Crafts, Black unknown (RAK); Cardstock by CTMH; Embroidery Floss; Nestibilities

Here I started by using eyelets to create subtle circles around some of the more sour faces Caitlyn was pulling for emphasis on my layout. Make hearts, circles, stars, squares, any shape that you like! The closer the eyelets are the bigger the shape's impact, the further apart the more subtle. To create this look use a punched out shape or open die like the Nestibilities. Using your paper piercer to mark the eyelet spots, poke evenly spaced holes around the edge of the shape making sure to leave enough space for the eyelets. Using the classic hammer with punch or a Big Bite, punch the eyelet holes right over your pierced hole markers. Add your eyelets and back the open eyelet hole area with coordinating cardstock. Here I used white to back my silver eyelets.


Supplies : Paper - Pebbles (Background), Scenic Route, My Minds Eye, Sassyfras (Button Blooms); Eyelets by Doodlebug; Buttons by Papertrey Ink; Urban Bling Stickers by Me and My Big Ideas; Embroidery floss; Nestibilities

Try creating a fun border with your eyelets. In my layout I created a fun simple border using pink eyelets, then added eyelets to a couple of the journaling strips to make the look more cohesive. Do a varigated strip by alternating eyelet colors or emphasize details on a printed or stamped border by adding eyelets to the flower centers, in the scallop hump, etc. You could even use the same technique as I did on the Not Now Mom layout by substituting a scallop or other shaped border as a template for your eyelet placement to create a shaped eyelet border. Don't want too many eyelets? Simply use them to accent a couple journaling strips.


Supplies : Paper - Basic Grey Porcelian, My Minds Eye, Cosmo Cricket, and Making Memories; Ribbon from CTMH and My Minds Eye; Eyelets from Making Memories; Thickers by American Crafts; Embroidery Floss;

Add accents to your embellishments with your eyelets. Here I created some blooms with my Nestibilities and then added some white and pink eyelets to accent the flower's centers. Accent stars, hearts, paper flowers, etc with eyelets for fun pop! I created my flowers and added the eyelets before adhering them to the layout so that I wouldn't have to back the layout with coordinating cardstock. Some leaves cut out from printed Cosmo Cricket paper finish off the blooms just right. This method also works great with those shaped eyelets. Add star eyelets to circles, heart eyelets to flowers, etc. I was actually cropping with a friend when I made these and she was so sweet to let me have some of her eyelets since all I have are the basics - silver, white, black, and brown! So if you're reading this, thanks Julie! I hope you all enjoyed the layouts and have a great Monday!

7.31.2009

Easter Dresses

Supplies : Porcelien Paper by Basic Grey; Cardstock, Inks, and Discovery Paper by CTMH; Retro Backgrounds stamp and Buttons by Papertrey Ink; Flowers by Prima; Felt ribbon by We R Memory Keepers; Pearls by Kaiser; Blossom Brad by Imaginescence; Sequin Ribbon by My Minds Eye; Remarks letters by American Crafts; Embroidery Floss

Sometimes I have such a hard time with pretty paper like this but not this time! I started with the Basic Grey paper and a sketch I jotted down from a layout I'd seen a couple weeks ago online. I didn't have any green pattern paper that went with the basic grey so I created some with garden green cardstock, white ink, and Papertrey's Retro backgrounds stamp set. I didn't want to cover up too much of that gorgeous paper and this layout was perfect for letting both the pictures and paper really show off. Both pictures are 4" x 6" and the pink strip paper is 1.5" x 6". You'll see how it pulls together the second page in a sec here.


Here is the right side of the layout. These smaller photos are 3.75" x 3.75". The bottom paper strip is an easy 1" x 11.25" and the top is 1.25" x 11.25" to make the 6 inch height the photos have on the left side. So pretty! I love these dresses too. Audrey has outgrown that cute rainbow plaid but Cait still fits in that pretty pink and green dress even now. I remember how funny they were that day, dancing while I was trying to take pictures. Caitlyn started it, doing a kind of luau dance and soon Audrey followed. I got them to hold hands for few seconds so I could snap a few sweet shots of them, but they didn't care much for posing more than that on that day. Anyway, thanks for stopping by and have a fabulous Friday!


6.24.2009

Funny Girl

Supplies : Paper by Scenic Route, Cosmo Cricket, Basic Grey, and My Minds Eye; Prima flowers; Thickers letter stickers by American Crafts; Cardstock by CTMH; Brads by Basic Grey

Another fun bright page using the IB sketches. I'm loving bright summery colors right now and am hoping to get to use some of my new summer papers soon. I'm excited for Christmas (I know totally random subject change) because we are redoing the girls' room as their big Christmas present and the colors are bright and fun like summer. The palette is varieties of pink and purple for the main colors and a dash of spring/lime green. Their bedspreads are reversable huge dots so that their beds aren't too matchy matchy and Caitlyn's features purple sheets and bedskirt, while Audrey's is pink. There is still a little bit of the garden theme that we had before. Butterflies for both, lady bugs and bird/owls for Audrey, and then a little bit of rockstar thrown in for Caitie. Cait has really been into Hanna Montana. She doesn't watch it, but she knows who she is and is big into the rockstar thing right now, lol. Anytime she sees a toy guitar she wants it and she can spot Hanna Montana stuff a mile away! I've been picking up the stuff here and there so that it's not one huge purchase (which is why I'm starting so early ^_~) and I think they'll have a blast decorating their room Christmas morning before we go to Nana's that afternoon. Anyway, enjoy the layout and have a bright and happy Wednesday!

6.22.2009

Too Stinkin Cute

Supplies : Paper by Cosmic Cricket, Collage Press, and Basic Grey; Cardstock by CTMH; Cardstock butterfly by Basic Grey; Thickers Letters by American Crafts; Felt Flower ribbon by We R Memory Keepers

These are some of my favorite spring pictures I took of Audrey this year. Probably because this is one of my favorite long sleeve shirts of hers. I had to get it a size bigger since we found it in January so that she could wear it again this fall, lol. She's such a cutie! This was one of those days where she was a camera ham, which isn't very often. Usually Caitlyn is my little model, posing for camera and being an all around diva (both the good and the bad, lol!). I used the #21 Inspired Blueprints sketch for this layout. I still need to get #17 and both of the sketches for this month to be all caught up. It's nice that they usually only put out 2 sketches a month. It's a scrapbooking challenge that is easier for me to keep up with and if I fall behind it's pretty easy to catch up as well. Anyway, that's all for today :D Have a happy Monday!

5.14.2009

Lil Stinker


Supplies : Sultry paper and Urban Pairie glazed brad by Basic Grey; CS from LSS; Journal prompt by MME; Thickers and Brads by American Crafts; Skunk from Forest Friends glitter acetate shapes by Colorbok


Even though I made this layout after the Hang Out one, I had to save it for last since it's my favorite! It uses the sultry papers from Basic Grey which I have adored ever since I got them and have had them sitting pretty in my stash, lol. Plus these are some just darling pics of Audrey. I also happen to have a soft spot for layouts that have a distinct row of photos, usually in trios. The quartet was something I really had to work with as I didn't want to cut my pics quite as much as the sketch suggested, but I knew I wanted to use the very focal pictures of Audrey making faces. The skunk inspired the title, which is totally fitting since I'm always calling her my little stinker. Tomorrow I can share my surprise with you :D It's been a good thing that I was so busy during April because that took all of my focus and I didn't need to force down any of those 'I need to share these now' cravings while having to wait until I could post, lol. Have a great Thursday and enjoy the layout!

5.13.2009

Bubbly War


Supplies : Paper by Making Memories, MME, Creative Imaginations; Flowers and CS by CTMH; Mushroom Glitter Acetate by Colorbok; Puffy Thickers by American Crafts (also used for flower centers)


Sketch #20 was a fun but very challenging sketch to work with. The great thing though is that it got me to use one of the pretty circle papers I've bought. I have quite a few of these pretty shaped papers that I rarely use because I'm not sure what to do with them, lol. These photos are so much fun and guess what, they are actually recent!! Most of the pages I've been scrapping are from last year spring and summer, but these pictures are from just last month! They aren't the best ones that I got as I was experimenting with my very limited and wimpy photography skills, but they were some of the more fun. It was ball for me to watch Cait and Audrey blow bubbles at each other like crazy while giggling like little maniacs, lol. The colors were picked to coordinate with Audrey's dress, which I'm so sad that she's growing out of! More layouts to come as well as a surprise on the 15th :D Have a happy Wednesday!