Showing posts with label Craftiness. Show all posts

8.12.2011

For the Hubs


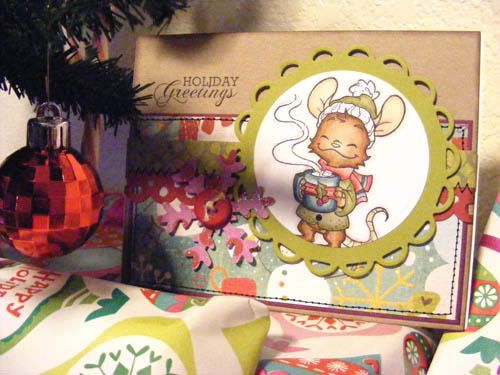
Paul's birthday was on Monday and we surprised him with some fun homemade banners, lemon cream-cheese cake, and gifts. These were my crafty creations for his day. Of course I had to make him a card. And I couldn't help but use birthday Josh. The girls demanded daddy have a goatee on his card so I did my best to replicate his face fuzz. Paul loved it, lol! Apple also wanted daddy to have his blue eyes so I added a very slight blue line next to the pupil. There isn't much room there to do that, but I think it turned out quite well ;)


My dear hubby is an avid reader like myself and I had found a bunch of thrift books right up his alley. The classics 20,000 Leagues Under the Sea and Treasure Island, both of which he hasn't read surprisingly, plus a bunch of 'literature' mini books on classic poetry and myths, just like some of his other lit books he kept from his classes in college. I know that sounds completely boring to most people, myself included ha! But he loves that stuff ;) So I made a new bookmark for him (he's great at losing those) for his new reads and a bookmark for his other project that I made...


... A book journal! He's been talking about keeping track of his reads better and so I took a composition notebook and covered it. I also covered the inside panels to have a little folder spot for him to slip stuff in. Then for the first half of the book I organized the pages, putting prompts for his book entries (Title, Author, Date, Rating, Plot, and Thoughts) along with list sections for what books he wants to read, favorites, etc. Because he loves writing as well I put in some fun poetry prompts for him and writing challenges. After seeing how cool his turned out, I'm itching to make one for myself! Especially since most of my summer has been spent reading rather than crafting, hehe. Anyway, thanks for stopping by and I hope y'all have a great weekend!

2.07.2011

New Spring Decor


Every so often I feel a little rebellious when it comes to doing my homework. Not so much that I won't do it at all, but that I'll do a whole lot of other things just to avoid doing the homework for as long as possible. This weekend, after 4 tests between Thursday and Friday, I was happy to note that the only weekend school work I had was some reading with a one page reader response. But instead of getting it done and out of the way, I somehow got it in my head that I didn't want to do it, which is silly since I found the articles fairly interesting when I finally did get around to reading them. Anyhoo, I decided to kind of redecorate my girls' room instead ;) Here are some fun photos of what we did.


The first item was the pendant banner which you see a part of in the photo at the top of the post. It was too hard to get a decent photo with the light coming into the room, so I ended up not getting a photo of the banner itself. From there I went a little batty with paper crafting decor in their room ;) I made this big "flower" as C puts it out of the funny end pieces from the banner triangles. I love the quiltish look of it. Then I made the fun circle paper fans or whatever it is that they're called to match. C calls them "daisies, because they have lots of petals," she says ;)


After that I couldn't leave their wooden letters out. For more over a year I've been telling myself I'd paint these white letters and just never got around to it. Friday, I sat down and cute 1" squares from scraps and covered the letters.


Here is A's fans. Since I only had enough leftovers from the pendant banner to make one large quilty flower thing, I made her more "daisies".


And I couldn't stop there. A while ago I saw a darling scrap page that used these Girl Friday paper letters from Cosmo Cricket. I happened to have scraps of the same alphabet and hoped I had enough to make some alpha art. As it turned out, I didn't have any Es or Rs. But I did have 2 matching Fs and a P and X that were the same pattern. So I fashioned my missing letters out of them. I put together the cute alphabet to fit a 8x10 frame, the girls singing the ABCs about 2 dozen times while I made it. The frame is one that I simply repurposed. It's been sitting in our closet with Paul's AS degree. So I put his in another repurposed frame (which had old pictures) and took this one for their room.


In addition to that frame I took the two 5x7 frames I had bought to go with it, but were still empty to this day. Using scraps and some fun stickers, I made some sweet papercrafted art to with everything. The left one says "Dream Big Dreams" and the sheep with balloons says "Shy girls are sweet girls". The shy one definitely describes little A ;)


I also made a quick little fun piece for their bathroom, which has been artless for quite a while. The colors match their little circo cups and towels. A big part of this piece was to use up some of the extra single letters I had left, since with the two other framed art pieces for their room, I had used up all the vowels. In this case, the extra Q and B were used.


And last but not least (and before I made the bathroom art actually) I made a fun magnet for C's hot lunch menu from school. My cheapy, but super cute, kitchen magnets aren't very strong so it takes about 4 of them to hold up the menu.  So, when I saw that a few of my odd left over letters spelled out lunch, I just had to make a fun magnet! The other two words were 'big' and 'shy', then there were a string of odd consonants. Anyway, I did finish my homework, Sunday morning before I went to a friends house to crop (yay!)  I hope you enjoyed this little peek into the girls newly decorated room. Thanks for popping by!

1.15.2011

Felt Food and Pink Milk Repurposed


Today has been a lazy kind of day. I wanted to really get some hefty craft time in this weekend, maybe make one of the cute aprons that Kelly from Sewing in No Mans Land has been making tutorials for this past month like the Razzelberry or Sail Away apron. But today I ended up with a huge lack of motivation to actually do anything. After the girls lunch, I realized the pink milk (Strawberry Quik) jar was empty. It seemed too wasteful to just throw away, so I decided to cover it up with some Adobe papers from American Crafts ;) Then my mojo started to sputter back to life and I figured since I have this cute box now, I should make something to fill it with. I've been eyeing all the felt foodies online, planning to make some for the girls, but my hand sewing skills are pretty atrocious. Even so, I figured I could give some felt cookies a shot and I ended up making a full dozen! They are so addicting and a lot of fun. Plus, all I used for these guys were scraps. I'm excited to try making more felt food. I think next up is donuts, lol!

1.10.2011

Covered Containers


I know this is nothing new, but I thought it would be fun to share. Lately, the girls have loved collecting little containers and since we like to repurpose things when we can, I gave them cleaned out Stephen's hot cocoa jars to store stuff in. But they're rather ugly to look at, unless they have hot cocoa mix in them of course ;) So I decided to cover them up all pretty! This is a great way to use up that leftover paper as well. Gotta love that!


Here's my jar. I used a cleaned out honey roasted cashews jar. It's perfect for tossing in my scrappy trash when I'm making cards and for sharpening my pencils so I don't get shavings everywhere. You can use these jars to hold paper clips, pens, tape, or whatever little bits and bobs you may have! It's a great way to organize without breaking the bank ;) I'm back in school today but I still have some layouts I did from my crop that I haven't shown you yet so you'll all get a few more posts before I go MIA in bloggo land. I hope you enjoy and have a happy Monday!

12.18.2010

A Little More Christmas


I've been having a bit of frugal fun with decorating for Christmas this year ;) Here's our medium sized Christmas tree in the corner.


I created treat cones for the tree a couple weeks back using cardstock, paper, and ribbon I had on hand. I used Thickers for simple monograms and then punched out snowflakes for a couple generic cones. Last year I made the fun star/pompom garland out of felt, paper, and leather string.


The chipboard snowflake is from BG's Eskimo Kisses set. Just punch a hole, add some baker's twine, and viola!


I also thought it would be fun to wrap our presents to match and I created monogramed tags from the same paper set, along with a few matching bits of October Afternoon. The wrapped prezzies on the piano from a couple posts ago used up the last bit of wrapping paper from last year. This year I delved into all the saved packing paper and paper bags I stashed away just for this sort of repurposing ;)


And I tried my hand at making a banner with that cute new flag style that's been going around ;) I think it came out so cute! Enjoy and thanks for visiting!

12.16.2010

Holiday Greetings!


I just finished my last final today, YAY!! So now I have time to post the stuff I haven't had time to these past few weeks. Even though it's been hectic, I have been able to squeeze a tiny bit of crafting in here and there. These are some cute little paper ornaments I put together for the girls' mini Christmas trees. I love these little MME eskimos, they are so cute. And what's even better is that I got the fabric this week for 50% off!! It'll make such a cute Christmas quilt and pillow cases for the girls ;)


These are the mini tags I made from the little punch tags in the cutouts. They were all really quick and easy, just some 3D foam squares and a little added bling!


Here are the other two bigger ornaments, the little boy eskimo and polar bear.


This is the top of the piano decorated with the girls' Christmas trees. I thought it would be fun this season to put some fun holiday mats in place of our regular ones. These were so easy to put together, I simply punched snowflakes out of old BG Christmas paper, added PTI wooden buttons, and matted it all on kraft paper. A fifteen minute uplift for the holidays!


Here's a little closer look at the trees. This one is the one C mostly decorated. I added the tags after making them.


And here's the other side. A decorated this one. We're planning on either making more paper ornaments and/or dividing the ornaments between them again with all the colors and giving A some of the MME ones ;)


And sitting happily as well as matching nearly perfectly, is Sparkle's darling card! It's the first one to arrive this season. Isn't it so cute? Thank you so much hun! This reminds me that I need to get on the ball with sending out my Christmas cards this year too ;) That's it for today. I hope you're all having a wonderful holiday season!

6.20.2010

10 Things Mini Book and Some Bookmarks


Here's the minibook I made for Paul. As much as I love to scrap, making a page or album for Father's day isn't very display compatible with his space. However, a mini book would be right at home on his desk. I opted to make this pretty small, it's only 3.5x 4.25 basically so I could cut the 6 base pieces from one piece of 8.5x11 cardstock.


One of the first things I had to do was to plan a little bit about what was going on the pages. I knew I wanted each page to have a number, and at first I wanted each one to have a stamped reason as well but found that there were reasons I wanted to include that aren't generalized. So I made a list and then found 5 reasons that included the more generalized stamped words like sweet, caring, and smart.


There aren't any pictures, just journaling and embellishment. It was really liberating to make a project without pictures. You still get to document and decorate but don't have to match up photos ;) I simply picked a few papers I wanted for the minibook throughout and then went from there.


Not every page had a 'theme' but I did try to work them in as much as possible. I probably could have gone with hearts through the whole thing, but that seemed a bit Valentines to me. I did work them into a few pages though and put them with the lovey journaling.


I mixed and matched a lot of stamp sets though the main ones were Journaling Lines and the Take Ten set + additions. There's also quite a bit of dimension since I used 3d foam tape on all the images for extra depth.


This project was perfect for using up those Thickers numbers. I love the numbers but usually only use a couple and I feel like they get wasted. Now I have a project that uses the whole range, quite nice!


And last but not lease a couple fun book marks using some of the extra chairs I made. I love the book list one and am thinking of making a couple of those for me as well. As it is I've been using receipts, post-its, or whatever scratch paper I have laying around as bookmarks! Both of these projects were so fun, I am definitely going to be making more mini-books in the future! I hope you enjoyed and are having a wonderful Father's Day with your families ;)

4.18.2010

A Little Redecorating


I'm so bad when it comes to getting before/after pictures because I never remember to take the before ones, lol. Anyway, this little project came after having our walls pretty close to the same in our living space for the last 4-5 years. I like to change something around each season, but I usually stick to changing out the flowers in one of the vases or pillow covers or maybe moving things around on the piano and bookshelves. But I finally got tired of the old pictures on our walls which were all 4 years or older so I decided to switch it up. Here's where the biggest change happened. This wall originally had a mix of different sized black frames with color pictures in it, a collage that was filled with old pictures from 4 years ago when Audrey was about 3 months old. I took the frames from under the clock, turned them vertically and then added some blue paper in the candle holders for a pop of color. The vase and tulips were my only purchased addition, coming in at under $9 for everything including the river rocks inside. I printed out more recent black and white photos to fill the shadow box for a look that's much more streamlined than what we had before. This is my favorite part of my quick little redecorating project.


Here is where those shadow boxes were originally, only they were set straight across horizontally under the clock with color photos of Cait when she was 6 months old and the candle holders were left plain white. Now the space is updated with 3 matching frames taken from the hall and the photo collage I mentioned. I used a small 1/4 yard piece of Lantern Bloom fabric by Michael Miller to mat new black and white photos from our family pictures taken last summer. I'm loving the black and white photos and that blue is one of my favorite shades.


The striped pillow is a simple pillow cover I made for one of my Pier 1 pillows that we got when school started in the fall. The pillow was a pretty chocolate with embroidered fern like leaves; lovely, shimmery, and silky, but I've been in the mood to change it. I used 1/3 yard of this striped fabric from Lantern Bloom to whip together a pillow cover. Which worked out great for the previous pillow cover since it definitely needed a wash after all the abuse my kiddos put it through. Paul would just toss it aside, he doesn't like 'silky' he says and much prefers the plush and cotton pillows we have now ;)


And here's the pillow I made for my desk chair out of the scraps from the frames and the stripe pillow. It was another of that same chocolate embroidered pillow. I wanted something fun but didn't want to cut into any more of my lantern bloom fabric (which I'm saving for a lap quilt), so I used the scraps to make a simple patchwork. I used some plain chocolate fabric to finish the pillow cover and love how it came out. The only patchworks I've done have been kiddy or little girl garden fabrics so it was a real treat for me to use more grown up designs ;) I know it's nothing spectacular and it's hard to see the difference without before photos, but I love the change especially since I got to do it using stuff we already had and spending less than $10 for a fun addition. I hope you enjoyed this little peek into our apartment! Thanks for popping by and have a lovely Sunday!

4.11.2010

Paperscraps House


Remember how I said I wanted to put something on the back of the town I made? Well here it is, a little house for Mao (Audrey's tiger lovie) or their littlest pet shop toys. It was created much the same way, starting with a sketch on the back of the poster board town. I glued down the rooms first and then made the furniture from memory. With a less detailed project like this I didn't need to keep the sketch visible so I simply created each room, measuring and gluing as I went. The big sections were part of my purging pile of papers, but all the rest was from scraps. This was much quicker than the town and just as fun. I had a hard time deciding which angle to approach the furniture from though. In the end I did a simple mix of forward and top facings to make all the home's goodies. The bath mat cracks me up and it's one of my favorite accessories. Audrey wanted it to be Mao's house and since he's a cat I thought a dead fish bath mat would be hilarious. Even though it started out being for Mao, they usually play with their pet shops on it. My favorite room is the laundry room. If my washer and dryer looked that cute, I'd probably have no problem getting the laundry done, lol! Thanks for popping by and have a lovely Sunday!