Showing posts with label Slice. Show all posts

1.18.2011

Fairy


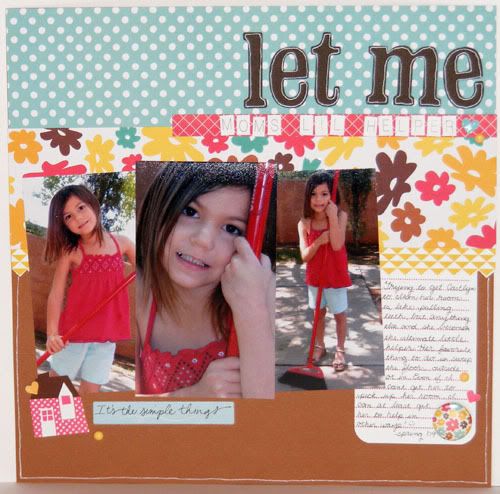
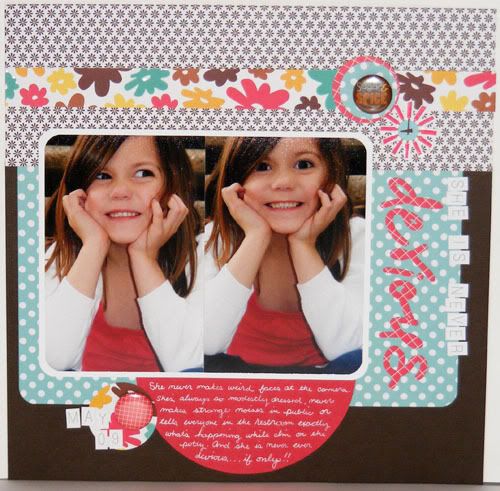
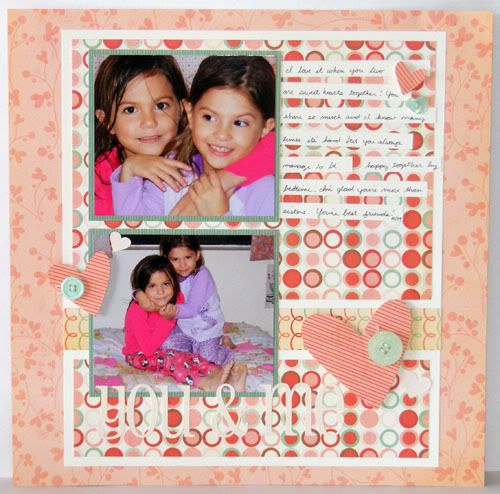
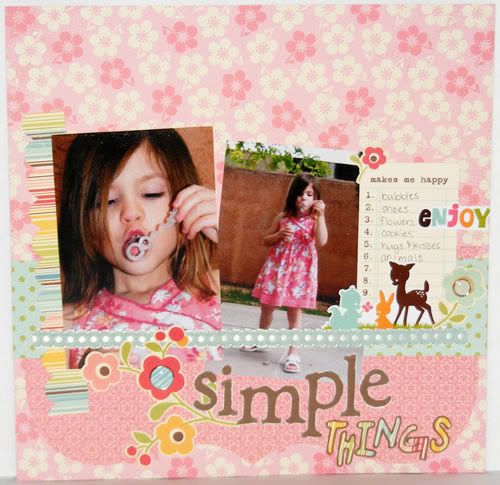
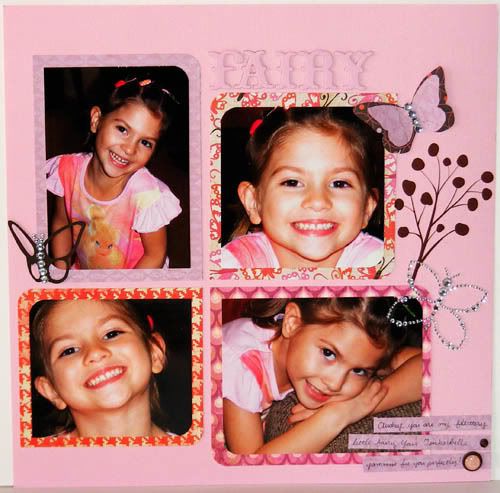
A loves Tinkerbell. She basically loves everything fairy, princess, or mermaid and she'll often skip or dance or twirl around the house. It's so stinkin' cute and I love having my very own little fairy running around in the house. She is also such a poser. A always wants me to take pictures of her and she'll really ham it up when I pull out the camera randomly, which is another goal I want to focus on. Once I started classes in the fall I almost never took pictures and I'm really sad that happened. So this semester I'm making a pact with myself to take out the camera at least once a week (hopefully more often than that) to snap some shots & to get at least a couple pics of me each month ;) Enjoy the page and thanks for stopping by!

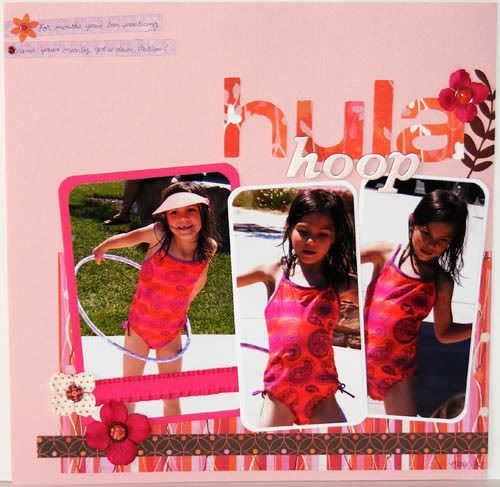
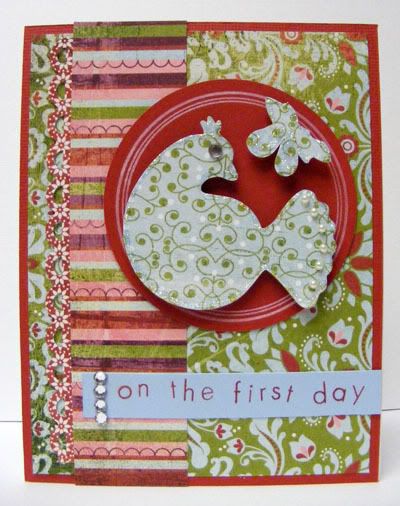
Papers by Crate Paper and My Minds Eye; Rubons and Glazed brads by Bo Bunny; Rhinestones and rhinestone butterfly by Kaiser; Thickers by American Crafts; Butterflies from Basics 2 Slice card;

1.14.2011

Hula Hoop


C tried so hard this summer to learn how to hula hoop and she nearly got it down! I noticed that the smaller, lighter hoops were easier for her to use. She is so cute to watch! This page was the second layout I did at the crop. The Slice and Thickers title was the inspirational starting point for the page. I knew I wanted to cut the word hula out with that Basic Grey paper and then layer the Thickers over it but that was about it, lol. Luckily the rest of it just came together after that ;) I hope you enjoy! Thanks for visiting and have a great weekend!

1.12.2011

Twirl


Right after the New Year I printed out some 2010 pics so I could crop with Julie. I picked out all my papers and embellishments and then chose photos to match before printing. I had a total of 13 pictures and I'm so proud to say that I scrapped them all at the crop! Twirl was the first page I made. While cleaning up my folders on my laptop I found inspiration in a very cute valentine layout and committed the things I loved about it to memory specifically for this page. I love how it turned out! Enjoy and have a lovely Wednesday!

Paper by Crate Paper and Basic Grey; Ribbon by Pebbles Inc.; Stitched Brad by Sassafras; Glazed Brads by Bo Bunny; Rhinestones by Kaiser; Thickers by American Crafts; Flower by Imaginisce; Just Chillin card on Slice by Making Memories

6.14.2010

Cute and Simple


Sometimes you want something cute and no fuss. And sometimes you have only 5 minutes to get that card made and get out the door. This time was one of those times ;) I spent my procrastinated time making the apron below for a birthday present, which left me with minutes to make the card, especially since I still needed to help the girls get their swimsuits and sunscreen on, plus roll up their towels and make sure the batteries in my camera are still kickin'. In times like these my Slice is a lifesaver. Pull out a cardbase, grab a couple scraps and cut out a name or simple silhoutte shape. If it's not enough add a punched border from same said scraps and call it done. Her mom thought the card was fabulous, extra plus for quick modern style creativity!


With that quick card was the not quick apron. I had known about this birthday party for a week and a half but being the procrastinator that I am I didn't start making anything until 11 that morning with the party at 2 that afternoon. Add in lunch and the 64 times the girls asked me if it's time to go to the party yet and the apron was slow coming. But it certainly turned out cute! I thought making a binded apron would be slightly quicker than the reversable ones I made for the girls but it wasn't. It did however take up less fabric and I love the finished off look binding gives ;) I had enough left over binding from the girls aprons to do the pocket on this one. I made the rest from a remnant piece of fabric that was also used for the pocket. A's modeling it since the little girl is her same age. Doesn't she make such a darling model?

3.30.2010

Sunny Shine

Supplies : Papers - Adobe by American Crafts; Cardstock by AC; Dear Lizzy Rubons by American Crafts; Journaling Lines stamp set and Summer Sunrise Ink by Papertrey Ink; Circle Nestabilities; Just Chilling Slice card by Making Memories; Apron Lace border punch by Fiskars; Sewing Machine and white thread

The supply challenge on Practical Scrappers this week is Rubons! I have been loving the new rubons by American Crafts, they are so fun and cute. These ones are from the Dear Lizzy line. I was looking for ideas in my inspiration folder on my hard drive and came across a layout I think that Kelly Purkey made. I used the basic design and even added butterflies to my layout like she did. My favorite part is the tone on tone border punched piece sewn to the base, so subtle yet so pretty! It's hard to capture those kinds of details on the camera, it shows up so much better in real life ;) I used the 'shine' rubon to finish my title and then added another sunshine journal blip to the bottom right to continue the theme. I love the way this came out, with more bold color blocks and just a tad of that darling flower print. Enjoy the page and thanks for stopping by!

3.21.2010

Sweetness


Supplies : Paper Blue Skies and Letterbox by American Crafts; Remarks Stickers and button flair by American Crafts; Journal and tag stickers from Farm Fresh by October Afternoon; Just Chilling Slice card by Making Memories; Ribbon by American Crafts; Dear Lizzy Rubons; Adobe AC Paper for title; AC Cardstock; Paper Shapers Scallop Scissors;

Here's a sweet quick layout I put together from more AC papers. Some sorta smiles from Cait. It's so hard to get good pictures of her right now. She always gives the camera that weird fake smile and it's nearly impossible to get candid shots of her since she's such a poser, lol. I can't wait until the fake smile phase is over. Anyway, I hope you enjoy the layout and have a lovely Sunday! Thanks for popping by ;)

3.09.2010

Let Me

Supplies : Papers Adobe by American Crafts; Yellow Border from Monstrosity by Sassafras; Remarks Letter Stickers, Adobe Stickers, Dear Lizzy Rubons, and Button Flair by American Crafts; Journaling Lines stamp set and Pure Poppy Ink by Papertrey Ink; Yellow Candy Dots by Pebbles Inc., Just Chillin' Slice card and Slice by Making Memories; White Gel Pen;

Have you noticed all the projects I've been posting using my White Gel Pen. That's because it's the supply challenge at Practical Scrappers this week! I love white gel pens but before working on my project for the challenge I hadn't really been giving mine much love so that was fun motivator for me to use it more often again, especially on layouts. Here I used my pen to outline the cardstock title for some extra detail and along the bottom half of the layout for a thin frame. Make faux stitching with your white pen or just doodle some fun details, even journal on darker papers for a change like I did with Sunday's layout. This page also used another February Page Maps layout. As for the pictures, they are of Cait trying to help me sweep the walkway. She's at that age where she wants to help clean and tells me often that these are her 'chores'. Of course she'll do anything except clean her room, the one chore I want her to do, lol. I think every parent has this battle though. Most of my friends say that it's near impossible to get any of their kids to clean their rooms, yet other chores aren't nearly as bad. I can hope that will change, but I'm thinking I should just be happy that she wants to do other things to help without whining and complaining yet. Enjoy the layout and have a terrific Tuesday!

3.07.2010

She Is Never Devious

Supplies : Papers Adobe and Letterbox by American Crafts; Remarks Letter and Adobe Stickers, Button Flair, and Cardstock by American Crafts; Handwritten Fonts Slice card by Making Memories; White Gel Pen; Circle Nestabilities

I picked up some of that fun Adobe paper and had to play! This layout is from the February Pagemaps. It was an 8.5 x 11 page that I turned and stretched to fit 12x12. Inspiration for this layout came from this post by Ruffles and Stuff. She's amazingly talented, always altering clothes for both herself and her darling daughter. If you love to sew/alter clothes, especially girls clothes her blog is a must see! No I haven't really dared to sew clothes yet, but I love seeing what other people make and maybe one of these days I'll finally try it out, hopefully before my girls get too big to object. When I read her outtakes post I just knew I had to create a page on that theme using these mischiveous outtakes of Caitlyn ;) The journaling talks about all those things that she 'never' does and ends with an 'if only'! I hope you enjoy the page and have a lovely Sunday!

3.06.2010

You Float My Boat

Supplies : Paper by My Minds Eye; Cardstock by Bazzil; Ocean Tides and Fresh Snow Ink, Tiny Treats Valentines and Heart Prints stamp sets by Papertrey Ink; Basics 1 Slice Card by Making Memories; Sharpie and Copic Markers; White Gel Pen

Sometimes a project I make ends up nothing like the idea I started with. My Friday Sketch layout, that cute sunny page, was originally going to have the title 'Float'. I cut out the letters using the last of these blue scraps and was ever so proud of finishing off some papers, but as I lay them on the layout it just wasn't inspiring me. So I set aside my title and finished the layout another way, which I ended up liking much more. In the meantime the poor little title sat pushed aside on my table and I really didn't want to just toss the letters. I knew I wouldn't use it on another page so I thought to try and make it into a card. Quite a different style for me but it was fun and easy and the only thing I would have changed was to use the smooth side of the bazzil since the textured side was a real pain to write on, lol. Lesson learned there ;) The hearts were an after thought, that top part just seems too empty and the boat is pop dotted for dimension. Anyway, enjoy the card and thanks for popping by!

2.16.2010

Fall 4 U - Flowers Challenge

Supplies : Paper by Bo Bunny; Woolies Indian Summer by Basic Grey; Silk flowers and glazed brads by Bo Bunny; In a Stitch flowers by Sassafras; Bird Glazed brad Indian Summer by Basic Grey; Fall/Back to School Slice Card by Making Memories; Scallop Scissors; Rustic Cream cardstock by Papertrey ink; Cardstock by American Crafts

Using flowers is the Challenge this week at Practical Scrappers. I love flowers, so this was a really fun one for me! Here I did a mix of cardstock, silk, and felt flowers for a fun texture rich page. It's so funny what you forget your kids had until you see a photo of it. This was one of Audrey's favorite shirts and I had completely forgotten it since she last year winter was the last time she fit into it. I remember her Aunt Beth sent it to her for her birthday and since Audrey's favorite color is pink she immediately fell in love with it. She also loved all the fun things on that pretty embroidery and I have to admit I did too, like the butterfly and bird, the flowers, that design was just full of hidden treasures. The picture doesn't do the cute blouse justice as there is shimmery gold in there as well, such a perfect pretty fall shirt for my girly girl plus it was soft and comfy ;) And since she's an autumn baby, it was doubly perfect! So use some flowers in a project this week and then head on over to Practical Scrappers and link it up! Thanks for visiting and have a terrific Tuesday!

2.09.2010

Dyson

Supplies : Paper by American Crafts and October Afternoon; Cardstock from American Crafts, Bazzil, and Papertrey Ink; EK Success heart punches; American Crafts Brads; Journal Lines stamp set and Pure Poppy Ink by Papertrey Ink; Fall/Back to School Slice Card by Making Memories;

Using your brads is the supply challenge over at Practical Scrappers this week! I also used a Friday Sketch from PS last month to create this layout. This bright AC paper was so fun and funky I knew I wanted to make a kind of quirky layout with it and the daily random photos of my vacuum were just the ticket with that bright yellow ;) I used some hot pink brads on my hot pink punched out hearts to give them some fun texture without making them too busy and taking away from the paper which is what I really wanted to pop, aside from the photos that is! Try creating patterns with your brads on punches like a heart within heart or polka dots on circles. Use are variety of different sizes and patterned brads for a focus embellishment or keep it simpler like I did here with monochromatic colors on cardstock for a more subtle look. Starting on the 20th of January I decided I'd start taking at least one photo a day. I take a bazillion ton of photos of the girls so the goal is to take random shots of other things that are in our daily lives. Also I'm trying to make it a goal to get at least one photo of myself each month as well and hopefully more of Paul and I together ;) The vacuum was actually the very first random item I shot. I knew I wanted to make a page about it later just for fun and then after that the ideas just started rolling of things I could take pictures of and journal about, lol. So I've been trying to keep up by making a list of items I want to take pictures of. I also write a couple sentences to a paragraph about the item in the photo to help me learn to journal better and I'm starting to do it with the girls photos too when I upload them to my computer. That way even though it may take me months (or longer!) to scrap a page, I'll have the memory already written so that I won't forget. And it really helps with the random photo to remember why I took the picture in the first place, lol. Enjoy the layout and have a fun Tuesday!

2.02.2010

Solitary Girl

Supplies : Paper - Marrakech by Basic Grey, Brown Swirl by Pebbles Inc.; Kraft Cardstock; Brads Abbey Road by My Minds Eye; Just Chillin' Card for Slice by Making Memories; Sewing machine and white thread

Using your Die Cutting machine is the challenge this week at Practical Scrappers. I have to say this was a very sad little photo shoot. I had taken the girls to a spot by the college last March to get some pretty sister pictures. This area has a lovely water feature and these large red rocks placed for bences. But for some reason Audrey just didn't want to be near Caitlyn and Caitlyn was content to run off and do her own thing so instead of getting sweet sister pics I got some solitary grumpy girl ones. So here's the best photo out of them all, Audrey's pouty self on the rock, lol. I took inspiration from a layout on Susan's blog (second one down). Hers is so cute and happy ;) Anyway, the design of her layout fit perfectly with how I wanted to do the title, which was the only thing I knew what I wanted to do with. I cut the solitary in lowercase and then girl in upper case subbing the 'I' for a girl cutout all done with the Just Chillin' card on my Slice. I pop dotted the girl image up to make it stand out of the title more and then added a stitched frame around the title and picture. Even if the pictures didn't come out great, I think this layout did ;) Gotta love Audrey's solemn faces, lol. Thanks for stopping by and have a wonderful Tuesday!

1.29.2010

Beloved You & Me - Sketch Friday


Supplies : Paper Beloved by My Minds Eye; Cardstock by CTMH; Aqua Mist buttons and White twine by Papertrey Ink; You & Me and Heart stickers by Pebbles Inc.; Basics 1 Slice card by Making Memories

It's Sketch Friday over at Practical Scrappers! Lucy created the sketch this week and it sported a cute Valentines theme with hearts so I thought why change a great thing and went along and did hearts on my layout as well ;) I broke out the Beloved papers and printed these two cute jammie pics of the girls from last year. Though they weren't taken at Valentines I loved the huggy little poses they were doing here. They share everything, even clothes sometimes, and I know that can't be easy for them. In fact sometimes they just plain don't get a long because one or the other is sick and tired of ALWAYS having her sister around, lol. But for the most part they are sweethearts and I love how by bedtime no matter what scruples happened during the day, they are back to best friends again. Below is the sketch. Remember to link it to the Mr. Linky at Practical Scrappers if you play along ;) Enjoy the layout and have a fab Friday!

1.24.2010

4 Calling Birds

Supplies : Paper Eskimo Kisses by Basic Grey; Mistletoe Card Slice; Sprinkles Thickers by American Crafts; white mini ricrac; white embossing powder; Fancy Flourishes stamp set by Papertrey Ink; Marvy snowflake punch; shimmer white cardstock; sewing machine w/white thread

So I started another card using four little birds and I just was not liking it. I kept thinking as I went along that it would come together but it never did and I did a big 'ulgh!' and tossed it, lol. Then I started this card, which I really like but if I could change one thing I would have picked plain cardstock, that same pale aqua, for the background so that the bird would have more pop. The blue and green print just seems a little too busy for the style I was going for and I didn't realize that until after I had already sewn my base together. Anyway, I really like this idea with the numbers and one big cut out so I might be doing all the rest similar to this. We'll see ;) The card is for Sparkle's Christmas Card Challenge. This Sunday the challenge is no coloring which turned out easy for me since I haven't been coloring cards of late, lol. We've been having a lazy Sunday today. I've been reorganizing some of my crafting stuff again, mostly going through my scraps and tossing the ones that I probably won't use into the recycling bin then organizing them by brand into baggies instead of styles. I like to go through all my papers and scraps every couple months and sometimes switch up the way I have them organized. It helps me remember what I have and if I switch them around it gives me fresh eyes after I'm done. Anyway, thanks for visiting and have a lovely Sunday!

1.11.2010

The Second and Third Days of Christmas


Supplies : Paper by Basic Grey and My Minds Eye; Cardstock by Bazzil; Rhinestones by Kaiser; Button by Papertrey Ink; Slice and Mistletoe Card

I missed Sparkle's Christmas challenge last week so this week I did them both ;) The extra challenge this week is to use embossing and that worked perfectly with these little doves! A couple challenges ago I started with the little partridge image. I'm hoping to make an entire set of the 12 days of Christmas. We'll see how it goes. I used a bit of some border paper I had left of that My Minds Eye birdy set. The little cage was just what the card needed. It's really different trying to make cards with die cuts instead of stamped images, but so far I think I'm doing alright. Below is the card for last week. The extra challenge for week 5 was buttons. I tried to work more into the card but I wasn't loving it so I added just the one big button. I've started printing out the sentiments for these on the computer. I'm not sure how much I like them yet. Maybe if I print them on some colors next time instead of white cardstock.


This first week of school has been kind of hectic. New Years I was coming down with some sniffles and a couple days later I had the worst flu. Not the worst I've ever had, but definitely one of them. Luckily by this weekend it was back to simple congestion but I have to say that week was really a doozy. I'm so glad Mich and Paul helped out the first few days Caitlyn was back in school otherwise she might have ended up stuck at home. Then yesterday I was walking down the sidewalk to our apartment and I tripped and fell hard. I haven't fallen like that since I used to skate back before I had babies! Oh it hurt so bad, I have a huge palm size bruise below my knee now and my knee caps are still sore. No broken bones or anything, but still... ouch! I got to be a big baby all night and nurse my sore legs lazying on the couch with some tea, orange rolls, and the first episodes of Lost. Anyway, today has been much better so I'm hoping that's a good sign that the rest of the month will be too. I hope the New Year has been treating you all well ;) Enjoy the cards and have a lovely Monday!

12.23.2009

On the First Day...

Supplies : Paper - Eskimo Kisses by Basic Grey; Cardstock by Bazzil; Sans Small Lowercase stamp set and Ink in Cranberry and White Daisy by CTMH; Rhinestones and Pearls by Kaiser; Borders and Corners Circles stamp set by Papertrey Ink; Mistletoe Slice card by Making Memories; Stickles;

I've finally escaped my kitchen after baking too many cookies to count these past couple days (and eating far too many too!) Let's just say last night I wasn't able to make dinner since the kitchen was in such disarray and we all ended up snarfing down cookies anyway because you have to taste test each batch right? To make sure they are good enough to give away yes? Paul ended up trying to eat all the Scotchies. Anyway that's my excuse for having cookies for dinner. The girls however did make away with Panda noodles as well as cookies so at least they had something more than just sugar to eat before going to bed, even if we didn't! It's the holidays, we're allowed ;D This is my card for Sparkle's #3 Christmas Card challenge. The added challenge was to use a sketch and I thought it would be so cute to do a 12 days of Christmas set! So here's the first one - my partridge in a pear tree cut with the Mistletoe card on the Slice. I added some stickles, pearls, and a rhinestone for his eye to pretty him up ;)

And thank you for the birthday wishes! I had a really fun day. Paul took me to see Avatar in 3D and we got to hang out around town a whole 6 hours without kids!! Yay for very patient and loving sis-in-laws ;D And I'm sorry I didn't get to this sooner! On the recipe yes it's cups for the shortening and molasses and yes you can use plain shortening. I just think it tastes better with the butter flavored which is usually right next to the regular at the store ;) On my reading, I'm starting the second book to a fantasy series I began some months back called Winds of the Forelands by David B Coe. If you're a fantasy fan the first book was an awesome read. So much happening and a lot of mystery and twists all intertwined with royal assassinations, magic, and a foreboding and unknown enemy. I'm excited to see what the assassin does, him and Grinsa are my favs. Anyhoo, thanks for stopping by. I hope everyone is having a wonderful and safe season. I won't have any posts til after Christmas so have a very Merry Christmas everyone!

11.09.2009

Simple Things

Supplies : Paper by October Afternoon; Flower Stickers and Journal Prompt by October Afternoon; Enjoy and Animals Remarks Stickers from American Crafts; Brads Abbey Road by My Minds Eye and Lemonade by Basic Grey; Ribbon by Making Memories; Basics 2 and Handwritten Fonts Slice Cards by Making Memories; Chocolate Cardstock by CTMH

This week the challenge on Practical Scrappers is on using white core cardstock. I used my favorite method on this layout, scissor distressing on my title! I love the soft comfy look it gives to any paper and with white core cardstock the distressing can help make your items gain more presence on the page. For me distressing is the biggest benefit to white core cardstock. Emboss it then sand the embossed image to really make it pop out. You can even sand the paper itself for a more rustic or linen look. Try crumpling your paper up, then laying it out flat and sanding lightly on the creases for great texture. Hold open your scissors and lightly drag it across the edge of your cardstock for easy scissor distressing, lighter for a softer look and harder for a more rugged or torn look. Speaking of tearing, white core cardstock looks great torn, where it can reveal a bold white edge! Score a border around the edge of your base page then sand to create a simple frame. Have fun distressing your titles and shapes cut with your die cut machine or punches, add texture to them by embossing, crumpling, or scoring first! Remember that a little can go a long way so keep it simple; distress a few pumpkins on a page, a title, or the base but don't distress everything so that the elements you want to pop from your distressing/texturing don't get lost on the layout :D I hope you've gotten some fun inspiration on how to use your white core cardstock. Hop on over to Practical Scrappers for more samples and have a marvelous Monday!

11.07.2009

So Lucky

Supplies : Paper - Oh la la by My Minds Eye; Flowers by Prima; Thickers by American Crafts; Cardstock honey by CTMH; Brads Abbey Road by My Minds Eye; Big Kids Card (Slice)

This was a super quick layout to put together probably because it was mostly put together by the time I used it. The To the Rescue page had actually started with these papers because I really wanted to use these on something. But after looking at it for a while I just wasn't feeling it and when I found that rainbow paper I became totally inspired and went from there. Later I thought I had to have some pictures that worked with this layout and colors and I found these ones of Caitlyn. The colors just helped the pictures pop and the mood of the papers matched the mood of Caitlyn's expression in the photos. I used the title So Lucky to go with her shirt and then journaled about how lucky we are to have her. I think a great challenge for this month would be to create thankful layouts about people and things in our lives that we're grateful for. Thanks for popping on by and have a splendid weekend!

11.04.2009

To the Rescue

Supplies : Paper by Sassafras, My Minds Eye; Brads by Basic Grey; White Remarks letter stickers by American Crafts; Big Kid and Basic 1 Slice Cards;

Here is a completely non-traditional page, with not a bit of Halloweeny stuff in sight! I wanted to play with the blue, red, and gold that Caitlyn's costume is and I was drawn to this rainbow paper by Sassafrass so I pulled all the other papers and colors to coordinate with that pattern. The green background is also by Sassafras and looks a bit like linen which gives the layout some fun texture. With my Slice I cut the title using the font from Big Kids in some varied sizes and then cut some of the open stars from the Basics 1 card. Though neither of the girls were Cinderella last year, they both wore the dress quite a bit when the other was in their superhero outfit. It was so funny how whoever was the superhero had to 'rescue' Cinderella from nothing really in particular. Caitlyn would shout right away "Supergirl to the Rescue!" and after a while Audrey followed suit yelling "To the Rescue!" anytime she wore her batgirl costume. I hope you enjoy the layout! Thanks for visiting and have a super Wednesday!

10.27.2009

Scaredy Cat

Supplies : Paper - Eerie by Basic Grey, lined papers by Creative Imaginations; Tag by My Minds Eye; Big Brads by Imaginisce; Glazed brads Eerie by Basic Grey; Spider brads by Doodlebug; Jute by Papertrey Ink; Scallop and Circle punch by EK Success; Apron Lace Punch by Fiskars; Circle Nestabilities; Spellbound Card (Slice)

Here's another layout for the fun punches challenge on Practical Scrappers. I used the border punch again and the scallop punch. This time though the scallop mats a circle that I punched to use for a journaling spot. I also die cut another larger circle for more journaling and just flowed my story starting with the small circle then continuing on to the larger one. Use your punches to create journaling prompts by punching out lined pattern papers or by creating your own using a journal lines stamp set. Hearts, flowers, stars, any shape you want can add a quirky journal prompt or subtitle to your layout. Try using your punched shapes to hold individual letters on a title. Use a heart punch in place of the O in Love or You. Use smaller shaped punches to dot 'i's and 'j's in your titles or as the dots in exclamation or question marks. I hope I gave you some fun texty ideas for your punches. Hop on by Practical Scrappers for the challenge and more inspiration! Thanks for visiting and have a terrific Tuesday!