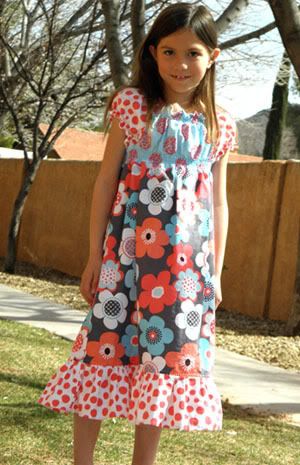
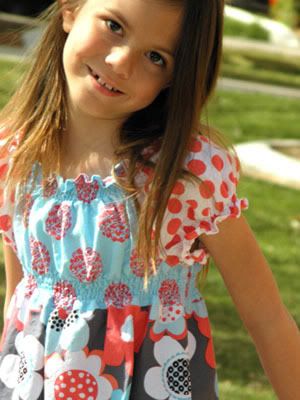
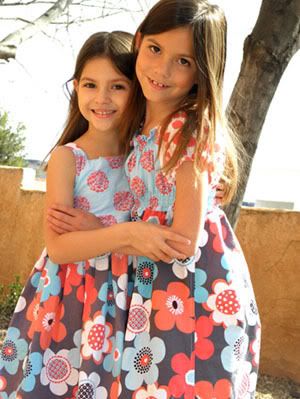
Since my summer classes are compressed (16 weeks of course material crammed into 8 weeks), it's become even harder for me to spend any real time with the girls. It basically makes my classes twice as long and homework twice as long, because I'm done twice as fast. Makes sense, right? Because of that I only took 7 credits, which is awful during the week with quizzes and homework each day and night, but quite nice during the weekends since everything is pretty much done during the week. Weekdays, I feel absolutely wracked with guilt because I don't have time to spend with my family, so much so that I can't even manage to cook dinner Mon - Thurs. But since the crazy study/homework/classes marathon really only runs Mon-Thurs, I'm able to try and make up for some of my lack of domestic participation on the weekends. This last weekend I decided to try a theme and that theme ended up being reptiles.

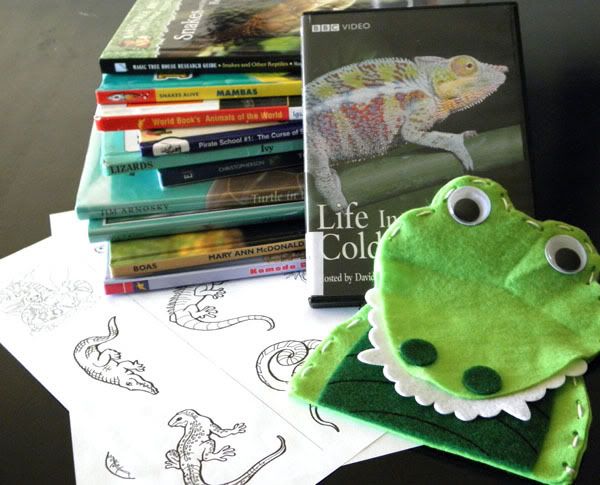
C loves reptiles. Her absolute favorite animal is the rattlesnake. So that was the inspiration the this last week's theme. We checked books out at the library, watched some documentaries, and best of all - created fun crafty reptile things from Fri-Sun. During the quiet times at home, after the hours at the pool, running errands, and sweating our buns off in the heat, it's been nice to have something entertaining for the girls to do indoors while I catch up on laundry, make a decent meal, or just collapse into my chair and surf the net. And just in case any of you other moms want some fun ideas to do with the kiddos, I'm posting our projects.
Supplies:
Construction Paper
Tape
Pipe Cleaners
Googly Eyes
Scissors
Glue, Glue Dots, or Double-sided tape
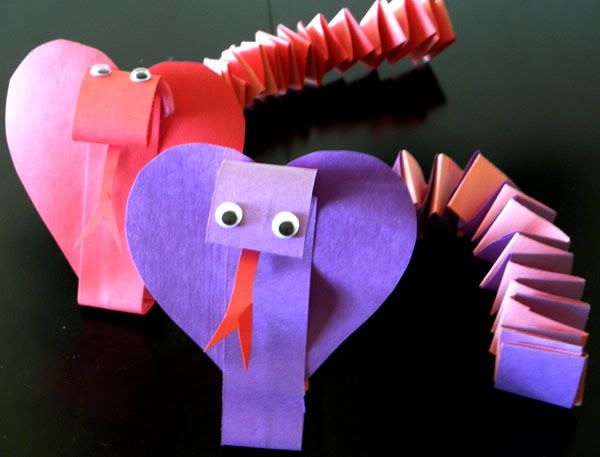
The first I'll share is the bouncy accordian snake adapted from this pattern. DLTK had a great tutorial that we changed up to look a little more 3D-snake like. Instead of a straw, I used a pipecleaner tucked into the last accordian fold and taped up the back head piece. Fold down backward the top 2.5"-3" of the pipe cleaner and then the paper over that to make the head loop and tape down the edge. This way the neck and head can be bent around. Then add the heart piece like in the tutorial. We used glue dots to stick on the googly eyes and double-sided tape to stick the tongue to the bottom of the loop for the face.
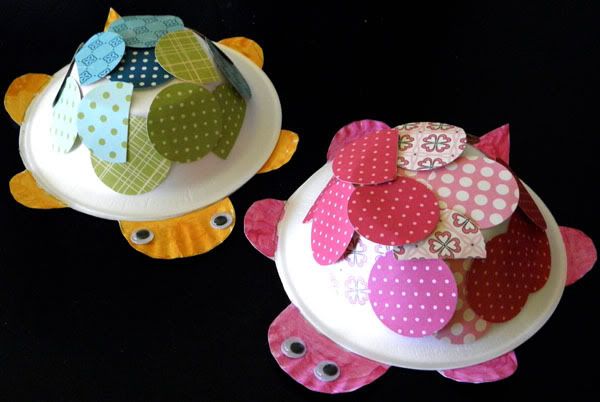 Shaker Turtle:
Supplies:
Paper Plate
Paper or Foam Bowl
Paper Scraps, Construction Paper, Foam Shapes, etc.
Paint and brushes or markers, crayons, etc.
Double Sided Tape or Glue
Googly Eyes
Dried Beans (optional)
Take the bowl and place it upside-down on the paper plate. Trace completely around the bowl and then remove bowl. Draw a head, legs, and tail, then cut out the template (should be all one big piece). Let the kiddos color the head, legs, and tail with paints, markers, or crayons. Don't worry about coloring the middle as it will be covered up by the bowl. If you use a paper bowl they can paint it instead of sticking the paper scraps. We took paper scraps and punched out circles, but you can try squares or other shapes as well (or just use any shape scraps!). Let them glue the shapes on the shell. Just a note, with foam bowls we found that double-sided tape or gluedots worked much better than gluesticks or even liquid elmers school glue. By now if the kids painted the paper plates they should be dry (as long as it wasn't gobbed on). Glue the eyes on then using glue or double-sided tape and the circle you drew as a guide for the shell on the plate, go all the way around the inside of the circle with adhesive. Place a small handful of the beans in the middle of the plate then add the bowl on top. If you're using glue, wait until the turtle is completely dry before using. If you used strong double-sided tape they can play with it right away. With paper bowls you can add a few staples on the edge to keep secure. Admire the turtle and let the kiddos have fun with him!
Other Activities:
Foam Habitat: Using the pre-cut foam stickers that were on sale at Joann's the kids made two snake habitats - one desert, one jungle. I urged them to draw the habitat but they just wanted to stick the foam stickers on. You could opt to letting them tear construction paper to create a landscape background and plants before added their reptiles. The only foam reptile I found in our sets were snakes so that's what we used.
Coloring and Naming: After reading about many different reptiles I found a bunch of free to color pages online and tiled 9 reptiles on the page - crocodile, rattlesnake, turtle, iguana, cobra, lizard, chameleon, komodo dragon, and a viper. The kids colored the pages and then named the reptiles. Older kids (1st grade and up) can write the names of the reptiles underneath them.
Felt Puppet: We picked up these fun croc felt puppets at Joann's on sale for less than $1. Paper bag or sock puppets would be great substitutions ;)
Outside Side-Walk Chalk Activities: Lizard Hopscotch - Draw the hopscotch squares to represent a lizard. Anaconda's New Skin - Draw a long snake and section off. Each child can color in their own pattern on the snake.
Other Activity Sources: DLTK Snake Projects, DLTK other Reptile Projects, Busy Bee Kid's Reptile Crafts, Child Fun Reptile Activity Theme Page, Tie-Rattle Snake, Pet Rocks, Pillowbox Alligator Valentine, First School Printables and Activities (where I got many of my reptile pictures to print for coloring), PDF of Spiral Snake, Turtle Dot-to-Dot, and Reptile Anagrams, Reptile and Amphibian Links Page
Documentaries we watched: In Cold Blood by BBC (5 episodes), Ultimate Crocodile by National Geographic, Lizard Kings by PBS
Books we read (bright green books are story books, the rest were informational books): The Mixed Up Chameleon by Eric Carle, A Color of His Own by Leo Lionni, Where Should Turtle Be? By Susan Ring, Slimy Scaly Deadly Reptiles and Amphibians: Lizards by Gareth Publishing, Nature’s Children: Crocodiles by Peter Carver, Magic Treehouse Research Guide: Snakes and Other Reptiles by Mary Pope Osborne, Snakes Alive: Mambas by Colleen Sexton, World Book’s Animals of the World: Iguanas and Other Lizards, Nature’s Children: Lizards by Bill Ivy, Reasons to Care About Marine Turtles by Sara Cohen Christopherson, Boas by Mary Ann McDonald, Komodo Dragons by Joanne Mattern, The Gum Chewing Rattler by Joe Hayes, Yertle the Turtle by Dr. Seuss
Book to try: The Lyle Books by Bernard Waber, The Yucky Reptile Alphabet Book by Jerry Pallotta, How to Hide a Crocodile and Other Reptiles by Ruth Heller, An Extraordinary Egg by Leo Lionni, Verdi by Janell Cannon (one of our favorites), Miles and Miles of Reptiles by Tish Rabe, Cornelius by Leo Lionni, Magic Treehouse #45: A Crazy Day with Cobras by Mary Pope Osborne (for 2nd grade chapter book readers)
Hope you're all having a great summer! Thanks for stopping by!
Construction Paper
Tape
Pipe Cleaners
Googly Eyes
Scissors
Glue, Glue Dots, or Double-sided tape
The first I'll share is the bouncy accordian snake adapted from this pattern. DLTK had a great tutorial that we changed up to look a little more 3D-snake like. Instead of a straw, I used a pipecleaner tucked into the last accordian fold and taped up the back head piece. Fold down backward the top 2.5"-3" of the pipe cleaner and then the paper over that to make the head loop and tape down the edge. This way the neck and head can be bent around. Then add the heart piece like in the tutorial. We used glue dots to stick on the googly eyes and double-sided tape to stick the tongue to the bottom of the loop for the face.
Supplies:
Paper Plate
Paper or Foam Bowl
Paper Scraps, Construction Paper, Foam Shapes, etc.
Paint and brushes or markers, crayons, etc.
Double Sided Tape or Glue
Googly Eyes
Dried Beans (optional)
Take the bowl and place it upside-down on the paper plate. Trace completely around the bowl and then remove bowl. Draw a head, legs, and tail, then cut out the template (should be all one big piece). Let the kiddos color the head, legs, and tail with paints, markers, or crayons. Don't worry about coloring the middle as it will be covered up by the bowl. If you use a paper bowl they can paint it instead of sticking the paper scraps. We took paper scraps and punched out circles, but you can try squares or other shapes as well (or just use any shape scraps!). Let them glue the shapes on the shell. Just a note, with foam bowls we found that double-sided tape or gluedots worked much better than gluesticks or even liquid elmers school glue. By now if the kids painted the paper plates they should be dry (as long as it wasn't gobbed on). Glue the eyes on then using glue or double-sided tape and the circle you drew as a guide for the shell on the plate, go all the way around the inside of the circle with adhesive. Place a small handful of the beans in the middle of the plate then add the bowl on top. If you're using glue, wait until the turtle is completely dry before using. If you used strong double-sided tape they can play with it right away. With paper bowls you can add a few staples on the edge to keep secure. Admire the turtle and let the kiddos have fun with him!
Other Activities:
Foam Habitat: Using the pre-cut foam stickers that were on sale at Joann's the kids made two snake habitats - one desert, one jungle. I urged them to draw the habitat but they just wanted to stick the foam stickers on. You could opt to letting them tear construction paper to create a landscape background and plants before added their reptiles. The only foam reptile I found in our sets were snakes so that's what we used.
Coloring and Naming: After reading about many different reptiles I found a bunch of free to color pages online and tiled 9 reptiles on the page - crocodile, rattlesnake, turtle, iguana, cobra, lizard, chameleon, komodo dragon, and a viper. The kids colored the pages and then named the reptiles. Older kids (1st grade and up) can write the names of the reptiles underneath them.
Felt Puppet: We picked up these fun croc felt puppets at Joann's on sale for less than $1. Paper bag or sock puppets would be great substitutions ;)
Outside Side-Walk Chalk Activities: Lizard Hopscotch - Draw the hopscotch squares to represent a lizard. Anaconda's New Skin - Draw a long snake and section off. Each child can color in their own pattern on the snake.
Other Activity Sources: DLTK Snake Projects, DLTK other Reptile Projects, Busy Bee Kid's Reptile Crafts, Child Fun Reptile Activity Theme Page, Tie-Rattle Snake, Pet Rocks, Pillowbox Alligator Valentine, First School Printables and Activities (where I got many of my reptile pictures to print for coloring), PDF of Spiral Snake, Turtle Dot-to-Dot, and Reptile Anagrams, Reptile and Amphibian Links Page
Documentaries we watched: In Cold Blood by BBC (5 episodes), Ultimate Crocodile by National Geographic, Lizard Kings by PBS
Books we read (bright green books are story books, the rest were informational books): The Mixed Up Chameleon by Eric Carle, A Color of His Own by Leo Lionni, Where Should Turtle Be? By Susan Ring, Slimy Scaly Deadly Reptiles and Amphibians: Lizards by Gareth Publishing, Nature’s Children: Crocodiles by Peter Carver, Magic Treehouse Research Guide: Snakes and Other Reptiles by Mary Pope Osborne, Snakes Alive: Mambas by Colleen Sexton, World Book’s Animals of the World: Iguanas and Other Lizards, Nature’s Children: Lizards by Bill Ivy, Reasons to Care About Marine Turtles by Sara Cohen Christopherson, Boas by Mary Ann McDonald, Komodo Dragons by Joanne Mattern, The Gum Chewing Rattler by Joe Hayes, Yertle the Turtle by Dr. Seuss
Book to try: The Lyle Books by Bernard Waber, The Yucky Reptile Alphabet Book by Jerry Pallotta, How to Hide a Crocodile and Other Reptiles by Ruth Heller, An Extraordinary Egg by Leo Lionni, Verdi by Janell Cannon (one of our favorites), Miles and Miles of Reptiles by Tish Rabe, Cornelius by Leo Lionni, Magic Treehouse #45: A Crazy Day with Cobras by Mary Pope Osborne (for 2nd grade chapter book readers)
Hope you're all having a great summer! Thanks for stopping by!