7.30.2011

Birdies and Cupcakes Quilt


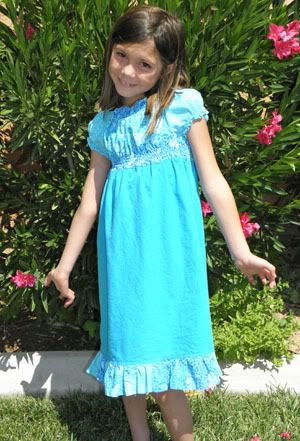
Like with the Central Park charm pack, I bought this Hoot charm pack it seems forever ago! I had been planning to make a little quilt with it. Since it was my first charm pack, I thought that simply sewing all the squares together would make a big enough kid size quilt. It would make a darling baby quilt, but my girls are bigger now and so I tried to devise a simple pattern that would use just the fabric I had on hand. This is the turn out, with the final measurements at 50x60 ;) The top is actually quilted with blue, pink, and green threads. They aren't super noticable when just looking casually, but up-close it's a fun detail.


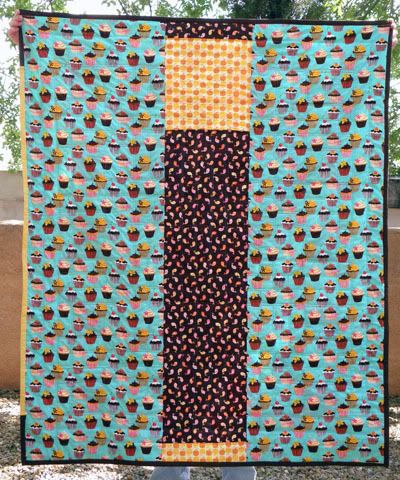
I think I love the back more than the front, lol. Even though I really like all the white space on the front of the quilt (plus it may give me the opportunity to embroider a few cute birdies and cupcakes in the corner squares later on), I really love all the bright fun colors and patterns on the back. In fact, these few patterns are some of my favorites that I've been hoarding. The cupcake fabric I bought a few years ago. It was just so cute that I had to get a bit of yardage. I still have nearly a yard in scraps left over even after the 3 aprons and this quilt. The little birds got completely used up in this and I have just enough apple fabric for something small and fun. My SIL saw the back and said it reminded her of one of our local cupcake shops. Their logo is a cute little bird with a cupcake ;) The sweet bit of yellow binding is left over from the aprons. It felt so good to finally use these fabrics up on such a cute project! Now I need to figure out what to make C since this quilt went to little A. Thanks for stopping by and I hope you all have a wonderful weekend!

7.25.2011

Non-Madras Madras Bag


Once I finished making the girls' library tote bags I really wanted to make my own tote bag out of some fabric I bought over a year ago and have just loved simply looking at. After seeing Noodlehead's Madras bag tutorial I figured that it would be perfect for what I was looking for and fit within the amount of fabric I had on hand. I call it my non-madras madras bag. I made the straps long enough to go across the chest for heavy lifting and I can tie them together to make it just the right length for a shoulder tote ;)  Gotta love versatility in your bags! It's been great for the summer and I've used it for everything from pool trips to museum outings to long shopping days and of course library visits. Love it!

7.23.2011

Library Book Bags


The semester is finished, yay! I've got some crafty plans - scrapping our zoo pictures, playing in some card challenges, and of course lots of sewing - and I've got some family plans - days at the pool, picnics and park visits, plus some light hiking. I'm excited for my next couple of weeks off ;) Earlier this year I had picked up a Central Park charm pack by Moda from my favorite quilt shop. I have loved just looking at all these little 5" fabric squares but it was time to use them on something and the girls and I decided that something would be library book bags! I'm simply separated 2 sets of 9 charms for each bag, focusing on a blues and oranges for A's and purples and yellows for C's. I lined the insides with solid fabric I had on hand (A's is pale blue, C's is deep purple) then used some fat quarters for the straps. I also added some interfacing to make the totes a bit more sturdy. The girls and I love how they turned out!


At the beginning of June the weekly reading activity started at the library. The goal is to read 10 books a week (for the younger kids). Being that we usually check out anywhere from 12-18 books and I end up carrying about 9-15 of those, I thought some cute book bags would help encourage my little readers to help carry at least a few more of their chosen stories. Though I'm just getting to post the bags now, they've been well loved the past couple months and I'm glad to say that the plan worked out great! Now each of them can carry at least 5 books. Anyway, thanks for popping by to see what we've been up to and have a spectacular Saturday!

7.21.2011

Summer Tier Dress and Leftovers Skirt


I promised A I'd make her a dress this summer. So I picked up some fabric on sale at Joann's (2 yards for $7) and went to work. I used another of Sandi's patterns, this one is the Gracie pattern that includes a Jumper, Tiered Dress, Tiered Top, and Tiered Skirt. Some people are probably talented enough to make these without a pattern, but I really need the extra guidance, instructions, and pattern pieces. Being the wimpy seamstress that I am, I still haven't gotten up the courage to figure out the button hole settings on my machine so instead of fussing with that I made the tiered top v-neck bodice piece for the tiered dress instead of the original yoke version. Audrey loves it ;)


I had a little bit of extra fabric so I made a simple elastic waistband skirt with a white ruffle for C. I was a least brave enough to do this one without a pattern, lol. I've read, saved, and ogled enough tutorials on simple elastic waist skirts and shorts that even though I was petrified to not have a pattern walking me step-by-step through the process, I was able pull this together. Now that I have the photos uploaded together, the colors look different. That's what I get for taking pics of A's dress in the afternoon one day and C's early one morning, lol. Anyway, $7 for a darling dress and skirt isn't too bad ;) Enjoy and thanks for stopping by!

7.18.2011

The Blue Remnant Dress


I made this dress a few months ago, about a week after making the butterfly blouse. The dress uses the same pattern and uses all remnant fabrics I picked up from Joann's. Awesome, right? I mean who gets a darling boutique blouse and a cute peasant dress for less than $10? I'm glowing with frugal momma pride right now, lol. Anyways, I hadn't set aside a morning to take photos before school started again so I ended up doing a lot of catch-up shots this last weekend since I've sewn a few other pieces of clothing for the girls since then as well. The peasant dress and blouse that I made come from Sandi Henderson's "Claire" Portobello Pixie Pattern. Right now here patterns page on her site is down due to maintenence, so I don't have a link to it. Claire comes with 4 designs - the Round Neck Apron Dress, Petal Knot Dress, Peasant Dress and Peasant Blouse. The Peasant Dress and Blouse are the ones I've made so far.


C has worn this dress more than a dozen times since I've made it. In fact, it's one of her go-to dresses and she wears it practically the moment it gets out of the dryer, lol. I'm glad she loves the clothes I make her so much. The one thing that makes me sad is that after size 8 I don't have anymore patterns for clothing that will fit her. Anyway, I hope you enjoy and thanks for popping on by!

7.15.2011

Our Store


I have to admit that even though I love the Echo Park's paper lines, I really have a hard time using them for some reason - unless it's for making goodies for the girls' room, lol. They currently have a new fun paper chain along one wall of their room. I used up all those papers that I adored, haven't been able to scrap with, probably won't scrap with, but love too much to simply give away. Now they decorate C and A's room and it looks so very cute! I get to see the designs all the time now ;) Anyway, I did keep a couple sheets that I knew I'd scrap with and the background paper was one of those. The sticker sets come in ultra handy too, which I also used here. Another Susan case, you should probably expect that of all my layouts until my next summer break when I have more time to fuss over my pages, lol. Anyway, just a silly layout of my silly girls. I couldn't figure out what they were doing two years ago until C saw the pictures while I was scrapping. She cuddled up to me while I started putting the page together and said, "Hey, that's our old store!" When I asked her about it she told me the whole story of how they were setting up a shop for their dolls and animals. So that's what they were doing, lol. Now I know ;)

7.12.2011

Pucker Up


Can you tell I'd been in an American Crafts kind of mood? This layout was another basic sketch case from another one of Susan's layouts. Casing or using a sketch helps me to just create when I'm lacking in time, that way I can just play with my papers and goodies - not worry about layout design ;) Anyway, I've adored this funny puckered up pic of C for quite a while and finally realized the colors go perfect with the lipstick print paper I got forever ago. Lately she's been big into The Little Mermaid again and everytime Sebastain says "You got to bat your eyes, like dis... You got to puck out your lips, like dis," she puckers up and says the lines right along, laughing while she's trying to say them like the crab. I miss being at home with them so much. I know right now I'm technically not missing out on anything since they are home all day, but I can't help but feel like I just don't have enough time with them. Since starting back to school, I've been even more grateful for the time I had as a stay-at-home mom, to be there every moment when my girls were babies and toddlers. Gosh they grow up so fast! Anyhoo, I hope you enjoy the layout ;) And have a wonderful day!

7.10.2011

Home Is Where You Are


I must say I've been patting myself on the back ever since I finished these adobe layouts because I used up practically all my adobe papers and stickers. Yay! I love that feeling of completion. I just used the scraps to put this layout together and picked a home theme so I could use up more of my adobe stickers. Quite cute, though in retrospect I think I was supposed to use trade-in this photo for an older one in a frame. Ah well, I can always reprint another and this time I can make it black and white since I've had a b&w kick with my displayed photos lately. Anyway, just a quickie post - hope you enjoy! Have a lovely Sunday!

7.08.2011

What's Cookin'?


A few weekends ago I managed to get a bit scrappy ;) I cased one of Susan's layouts. I love her clean-lined, kid-friendly style and her layouts make great sketches for jumping-off points. These two cooking layouts were actually done without the photos because I didn't have the photos printed (and was out of ink in my printer) so they didn't get completed until a week of so after I made the pages.


This page was perfect for using up all those stickers that I adored but had no idea what to really do with. Both C and A still love their aprons and wear them any time I bake so that they can help, which, trust me, is quite often, lol! C is getting old enough to start helping cook just a little bit. I have her mix the saute veggies or help brown meat to try to get her accustomed to what it's like to cook. It's hard sometimes since she gets scared of the heat on the stove. Ever since Audrey burned her hand on the stove, both girls have been very wary of the range and oven. That can be good though. Being careful while cooking definitely isn't a bad thing ;) Anyways, thanks for visiting and I hope you enjoyed the pages!

7.05.2011

Scrappy Art Garland


Despite the lack of posts these past summer months, I have been getting a little crafting time in. Mostly sewing. This weekend I had a little time to take pictures and type up a few posts. These are a few quickie photos of the art garland I made for the girls' room. They have been wanting someplace other than just the fridge door to display their art projects (especially the funny shaped stuff), so I thought I'd pick up some clothespins from the dollar store and find some string or something to hang them up laundry line style. But I had a hard time finding thick enough string that wasn't ugly, lol.


So this last week I came across this tutorial for a storage softie garland linked via One Pretty Thing and adapted it to an art garland. The main differences are that I cut my strips 2" wide by however long my scrap was and I sewed up the strips right sides together and pressed them open for a more polished look. When braiding I simply twisted the fabric so that the zigzag seem was hidden in the back. So cute!! I love how they turned out and it was the perfect project to really whittle down my fabric scraps pile! The purple/pink one is C's since purple is her favorite color and the blue/orange one is A's since blue is her favorite color now. I let them each paint their own set of clothespins as well. They love that they have a special place to hang their art and I love that it looks way cute in their room! Enjoy and I hope everyone had a happy 4th!