12.30.2010

Organized Art Totes, an Owl, and B-Day Gifts


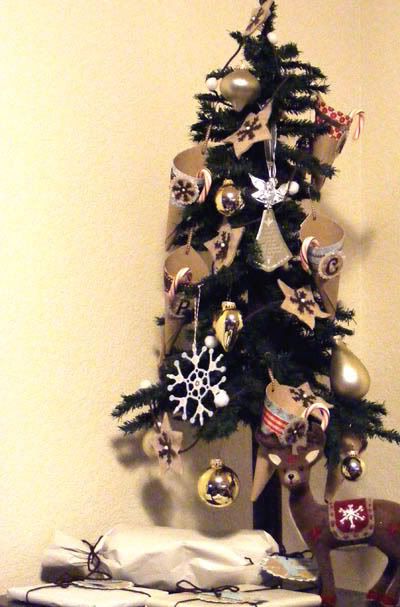
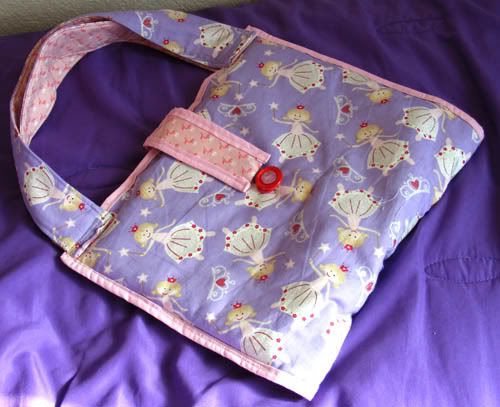
While in my crazy late-night-trying-to-be-sneaky sewing rush to make the last few Christmas presents, I didn't get pictures of a couple of the fun goodies I made for the girls this holiday - Organized Art Totes. They completely got me in the mood for my New Year's purge and organizing marathon ;) You know how much I love organizational goodies! This one is A's.


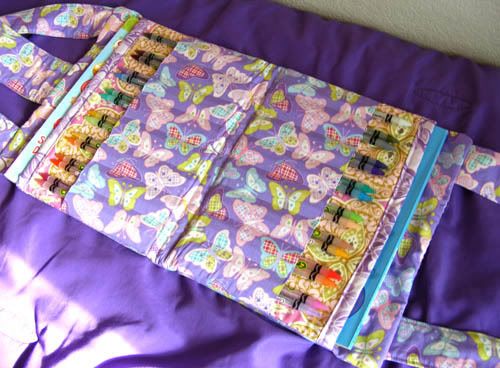
Here's the inside. I found working with crayons harder to design than pencils, but I think her tote came out alright. Because it was the first one I've ever made and I didn't have a pattern, there were a lot of mistakes, but of course she didn't notice one bit ;)


You can tell C's is more refined. A lot of my first time mistakes were remedied this time around and well, the pencils were much easier to design for. I love how professional looking hers turned out.


Of course I did still make a small boo-boo with hers as well - the books are a tight fit. They still slide in and out alright, but it is pretty snug. A half inch more would have been better. Other than that I only wished I put a big pocket on the outside of them both. They love them so much and carry them everywhere that it would have been nice to have an extra pocket for their dolls or special toys to take too ;)


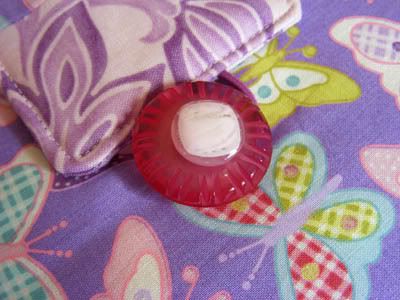
One of my favorite parts about these aside from the darling remnant fabrics the girls picked out, was my double stacked PTI buttons. They turned out so well I know I'll be using this on other projects! Overall I'm very happy with how both totes ended up turning out and even more so with the reception they got from the girls Christmas morning!


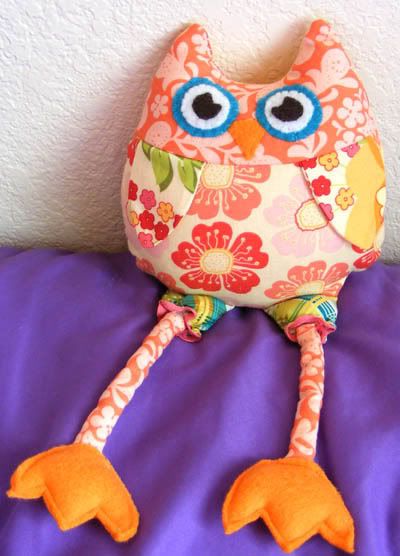
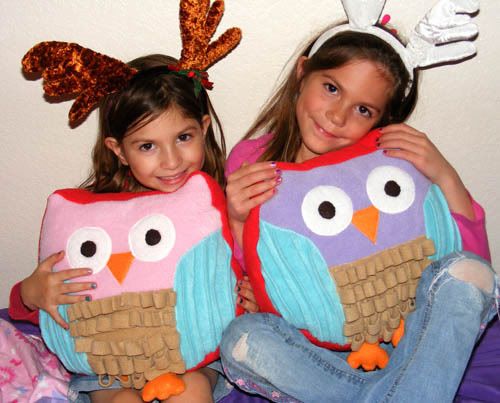
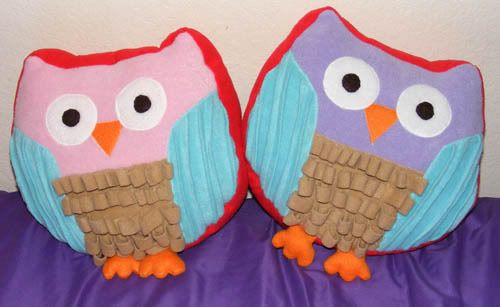
This little guy was one of A's Christmas prezzies. She loves owls and I bought the Hoot & Annie pattern back in the spring. I've been wanting to use it and thought now would be the perfect time to stitch it up! I think I'll be making more of these in the future, they are so easy to put together and are perfect for using up scraps!


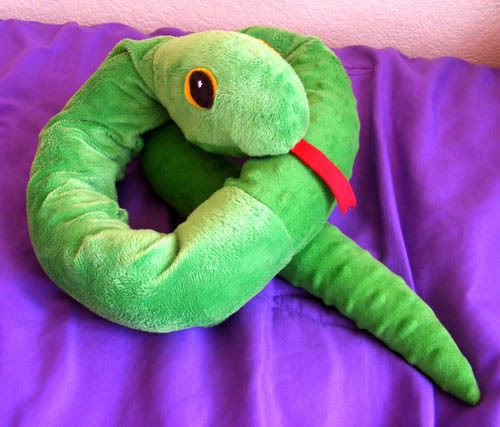
Next up is C's momma snake that I made for her birthday earlier this month ;) C is so into snakes, she just got another snake book this Christmas, this time it's one of those National Geographic ones with all the fun facts. She loves talking about all the cool stuff snakes can do!


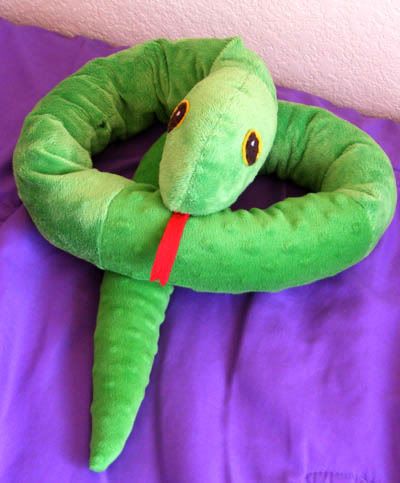
Momma snake is even taller than C!! C loves her big snake so much, it makes me so happy to see her play with it and cuddle it so often along with her lovie snake that she's had since she was a baby. The lovie has now been deemed 'baby snake'. So cute!


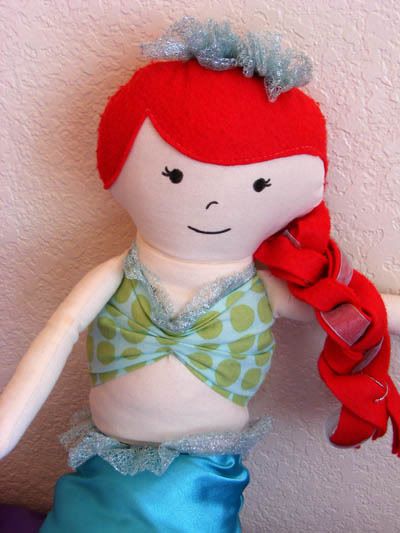
And last up is A's mermaid doll that I put together a couple months ago for her b-day. Her entire birthday was mermaid themed as she absolutely loves mermaid everything right now! I didn't have a pattern so she was very trial and error with the tail and swimsuit. I think she turned out darling though!


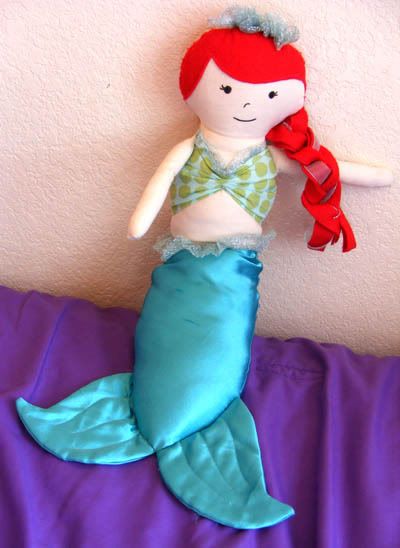
A's b-day just so happened to be right around mid-terms so I didn't take the time to snap shots of her mermaid doll until now. Of course A had to name her Ariel ;) Now that I have the Wee Wonderfuls book I have a lot more fun dolls to try making as well as a mini-mermaid! Anyway, just thought I'd share these fun sewn goodies while I've got the time ;) Thanks for stopping by!

12.29.2010

Cupcake Inspiration Challenge #91


Did everyone have a great Christmas? We had a fantastic one, the girls had a blast and Christmas dinner with Paul's family went wonderfully! Since then I've been on an organization marathon. Each day I tackle a new part of our apartment. Anyway, I thought I'd take a break and play along one of the Cupcake Inspiration Challenges now that all my scrappy stuff is all reorganized ;) The challenge cupcake is so pretty and the flower has lovely gold centers and edged petals. I don't have any gold ink so I used some stickles to add sparkle instead. It didn't show up very well in the photo so you'll have to imagine the fun glitter in the center. I used colored pencils on colored cardstock for the flowers and pencils on the green dot paper for the leaves, I love how pretty this came out! I hope you enjoy the card and have a great Thursday!

12.24.2010

Snuggly Owls


The girls are so excited for Christmas. I was going to make them wait to play with these until Christmas morning but it's hard to be sneaky when they know I'm sewing stuff up. These darling owls were made from this Snuggly Owls tutorial created by Ashley from Make-It and Love-It. So fun and easy! I made my owls all with fleece I had on hand, their fluffy front feathers are inspired by Target's Circo owl pillow. They have so much fun texture!


To make the front loops as well as the wing strip texture, I cut strips of fleece 3/4" wide. Since fleece doesn't fray there's no need to finish any edges. With the loops I simply pinned up each row of loops then sewed them down. The wing strips are really simple, just line them up straight, pin, and sew a line down the center. I added my textures before sewing the pieces onto the owl. Enjoy and I hope you're all having a Happy Christmas Eve!

12.23.2010

Christmas Cards - Pink, Blue, and Red


I've been sewing like crazy trying to get the last minute gifties all whipped up. There's a lot of fun projects for decor and gifts that I wanted to make, but didn't have the time to this year. Luckily, I got a lot of the fabric for these projects 50% off or more so I can work on them during the next year for next Christmas ;) With even just this bit of sewing I've been doing though, I'm sure I'll be wanting to make spring and summer projects before long, lol.


As for the cards I'm hoping to better play along with card challenges this next year. I really want to rebuild my stash of on hand cards which is currently at nil. And since I don't really have any art classes (technically I have 2D Design but all I have to do is 4 more projects since my Design class this last semester covered all the rest of it), I won't have anything at school using up all my creativity ;) Anyhoo, thanks for visiting and have a happy Thursday!

12.22.2010

Christmas Cards - Red and Pink


Hot cocoa is one of my favorite parts of winter and fall. It gets so hot here during the spring and summer, and well part of the fall here too, that most of the year I don't want to drink anything hot. No coffee or lattes, no tea or hot cocoa. For 8 months of the year I stick to iced chai lattes, ice tea, and icy water, so it's a welcome change when the weather gets cold and I crave the comfort of warm drinks and creamy soups.


My other favorite thing about the cooler weather is my fall/winter wardrobe. I always feel like it's so much cuter than my summer one, lol. I love layers and scarves and boots ;) And even though I like the cooler weather better than our super hot summers, I can't imagine living someplace that gets too much colder than it does here. I'd hate to shovel snow, drive in snow, or be stuck in snow, lol. Anyhoo, I hope you're all ready for Christmas ;) Our girls have been asking if it's Christmas yet every day since school got out, lol. Enjoy the cards and have a wonderful Wednesday!

12.21.2010

Christmas Cards - Pink and Plaid


The BG Eskimo Kisses paperpack is probably one of my favorite Christmas lines ever - the colors are so festive and the patterns can be fun or gorgeous. This plaid has been hard for me to use simply because I like it so much. The first cut is always the hardest. I'm not sure why, the finished product is always so much better than the paper by its lonesome ;)


Both images are from Stamping Bella. I heart this one so much because it reminds me of my girls ;) This year the girls attended their first symphony concert. I was so excited. They got tired about half way through and A fell asleep in my arms, but C was really good and patiently watched the whole thing, we were there about 2 hours. She was really excited to see all the instruments and asked me all about them. Thankfully I can tell them all apart and explain what each did since I was such a band geek ;) The second to last piece was her favorite because we got to sing along and because the Deck the Halls was one of the songs. She loved singing out Falala lala lalalala! Anyway, enjoy the cards and thanks for stopping by!

12.20.2010

Christmas Cards - Red, Green, and Pink


I finally got my cards mailed out Saturday. I only had a handful of super simple cards I made throughout the year, like 6 lol, so I had a few more I needed to make. Lucky for me, I read about Sparkle's method of coloring many images at once. She picks her papers, chooses her colors to match, then colors the batch! Sounds easy enough ;) Thursday I spent a couple hours coloring some images while watching a flick with Paul and then Friday I put together the cards. So Saturday they were mailed. Hopefully they'll get to their destinations by Christmas. If not, they'll be a post Christmas treat! I'm seriously making the resolution to add Christmas card making/writing/sending to my Thanksgiving weekend Christmas decorating tradition.


The first card is using Sparkle's Rin with Snowman stamp. It's also my card for the Cupcake Inspirations challenge. The inspiration cake is an amazing Santa Cake, you should check it out! This image is so fun to color and this card ended up one of my favorites that I made! The second one uses a fun hot cocoa cup from Stamping Bella, such a cute image and it's really fast and easy to color in. I really liked making my cards this way, it was fun to color them freely and also to see what papers ended up working out with my images the best. Anyway, enjoy and have a wonderful Monday!

12.19.2010

Cider Mini Gifties


It's my b-day today and all I can really think about is getting stuff ready for Christmas, lol. I do so enjoy making mini gifts. They're fun and easy to put together and who doesn't love a special little treat? Last year I did hot cocoa, and while I know I could probably do cocoa every year I thought it would be fun to try out ciders this year. These are the finished baggies, complete with tags, candy canes, and peppermint kisses.


And here's the little cider bags themselves. I kept to simply making enough mini gifts for the family we're mailing out to this year. Family close to us will get baked goodies with fun tags like these as well. And don't worry, I won't spend my whole birthday making gifts for other peeps ;) Have a lovely Sunday!

12.18.2010

A Little More Christmas


I've been having a bit of frugal fun with decorating for Christmas this year ;) Here's our medium sized Christmas tree in the corner.


I created treat cones for the tree a couple weeks back using cardstock, paper, and ribbon I had on hand. I used Thickers for simple monograms and then punched out snowflakes for a couple generic cones. Last year I made the fun star/pompom garland out of felt, paper, and leather string.


The chipboard snowflake is from BG's Eskimo Kisses set. Just punch a hole, add some baker's twine, and viola!


I also thought it would be fun to wrap our presents to match and I created monogramed tags from the same paper set, along with a few matching bits of October Afternoon. The wrapped prezzies on the piano from a couple posts ago used up the last bit of wrapping paper from last year. This year I delved into all the saved packing paper and paper bags I stashed away just for this sort of repurposing ;)


And I tried my hand at making a banner with that cute new flag style that's been going around ;) I think it came out so cute! Enjoy and thanks for visiting!

12.17.2010

Easy Fringe Fleece Scarves


Aren't these just so cute! I've had a stash of fleece remnants hanging out in one of my fabric bins for a while, so I thought it would be fun to see what kind of tutorials are out there for fleecey scarves. This Easy Fringe Fleece Scarf tutorial caught our eyes and I knew immediately that we needed to try it out. The girls picked their colors from the stuff I had on hand, which was super fun for them. Then they watched me whip them up!


I ended up making theirs 6" wide by about 45" long. I just cut selvage to selvage and then trimmed the selvages off. Right sides facing out (note that most fleece doesn't really have a 'right' side - mine had a fluffier and flatter side, so I used the fluffier side as the right side), sew a seam down the long side middle to hold your two or three colors of fleece then cut strips all the way down one side of the seam taking care not to cut through the seam itself. I gave myself a good inch away from the seam. Repeat on other side of the seam. Shake up your scarf, both to mix the fringes as well as shake off the extra fleece fluff ;) The fleece won't fray and these are super quick and easy to make! It took less than 30 minutes to whip them both up! These would make great handmade Christmas gifts for the little girls as well! If fringe isn't your style Grosgrain and One Pretty Thing have a wonderful list of different style scarves to DIY. I hope you're all warm and cozy this winter ;) Thanks for stopping by!

12.16.2010

Rin with Snowman


It's so nice to color a small image! The art projects for my design class had to be on 17x15 inch drawing paper, so coloring anything took a really long time! I made this card for Sparkle's challenge, this week it's stitching - faux or real. Rin is colored with pencils, the background is pencil with gamsol, the shading is with a copic, and highlights are done with a white gel pen. Anyhoo, I'm off to make some dinner - french toast, lol! Enjoy!

Holiday Greetings!


I just finished my last final today, YAY!! So now I have time to post the stuff I haven't had time to these past few weeks. Even though it's been hectic, I have been able to squeeze a tiny bit of crafting in here and there. These are some cute little paper ornaments I put together for the girls' mini Christmas trees. I love these little MME eskimos, they are so cute. And what's even better is that I got the fabric this week for 50% off!! It'll make such a cute Christmas quilt and pillow cases for the girls ;)


These are the mini tags I made from the little punch tags in the cutouts. They were all really quick and easy, just some 3D foam squares and a little added bling!


Here are the other two bigger ornaments, the little boy eskimo and polar bear.


This is the top of the piano decorated with the girls' Christmas trees. I thought it would be fun this season to put some fun holiday mats in place of our regular ones. These were so easy to put together, I simply punched snowflakes out of old BG Christmas paper, added PTI wooden buttons, and matted it all on kraft paper. A fifteen minute uplift for the holidays!


Here's a little closer look at the trees. This one is the one C mostly decorated. I added the tags after making them.


And here's the other side. A decorated this one. We're planning on either making more paper ornaments and/or dividing the ornaments between them again with all the colors and giving A some of the MME ones ;)


And sitting happily as well as matching nearly perfectly, is Sparkle's darling card! It's the first one to arrive this season. Isn't it so cute? Thank you so much hun! This reminds me that I need to get on the ball with sending out my Christmas cards this year too ;) That's it for today. I hope you're all having a wonderful holiday season!