12.30.2009

Baby Before the New Year


We've have a new addition to our extended family! Our little nephew was born yesterday morning ;) He's a premie at 4 weeks early but he was a good 5 lbs and 11 oz and they didn't need to put him in the ICU so we're really happy. Yesterday I went fabric shopping since I realized I don't have any boyish fabric. They want everything done in classic camo or with that type of theme so this is the quilt I made for them. It's a simple tied baby quilt with binding made from the scraps and even though the patterns aren't my style I think it turned out pretty cute ;D The white is actually a lighter beige plaid but the print is really tiny. I backed the quilt in the camo since that's the theme and I think I was lucky in finding a 100% cotton version since most all the rest of the camo fabric at the Joann's was that really rough stuff. I finished the quilt this morning and snapped some quick pics of it before they get it Saturday at the shower. Anyway, just thought I'd share. Have a happy hump day and thanks for stopping by!

12.29.2009

Snowy Cupcake Inspiration

Supplies : Rustic Snow, Signature Christmas, and Winter Swirls stamp sets by Papertrey Ink; Cardstock by Bazzil; Grid Paper by Scenic Route; Shimmer Cardstock from LSS; Rhinestones by Kaiser; White Embossing Powdery; Cocoa and White Daisy Ink by CTMH; Snowflake punch by Marvvy

Sparkle had such a yummilicious photo to use for inspiration for the Christmas Card Challenge this week! All I wanted to do was bake devils food cuppa cakes with cream cheese frosting after seeing it but I was a good girl and settled for some pumpkin swirl cheesecake. We have waaayyyyy too many goodies around the house from the holidays anyways. I feel like my new years resolution to get back in shape has already kicked the bucket and it isn't even 2010 yet, lol. Anyway, here's the card I came up with. I wanted to start making thank you cards for Christmas this year. While saying thank you works, I think it really makes such a difference to get a sweet note ;) Aren't these colors so gorgeous together! I wish I could catch that subtle shine on the white shimmer cardstock on camera, it is so pretty. I started out going for a cutesie card then before I knew it shimmer cardstock, white embossing and rhinestones entered the picture. I have to say though I really like this card better than the one I had in my mind. Things are slowly starting to settle down around here now. We had such a great holiday spending time with family and friends. I didn't get many pictures this year. Of course I'm also starting to believe that Christmas day produces the worst possible pictures because every year it seems all I get are badly lit, partial, blurred, or weird faces shots and not the cute weird faces either, lol. I might be staging a few shots before we take down the trees to attempt to get some nice ones to represent better the wonderful Christmas we had ;) Paul and I feel so blessed to have such amazing friends and family to make this Christmas extra special! And I'm so thankful to have such wonderful readers too! All of you have added so much cheer to my life year round! I hope everyone is having a fabulous holiday season. Thanks for visiting and I'll see you in the new year!

12.23.2009

On the First Day...

Supplies : Paper - Eskimo Kisses by Basic Grey; Cardstock by Bazzil; Sans Small Lowercase stamp set and Ink in Cranberry and White Daisy by CTMH; Rhinestones and Pearls by Kaiser; Borders and Corners Circles stamp set by Papertrey Ink; Mistletoe Slice card by Making Memories; Stickles;

I've finally escaped my kitchen after baking too many cookies to count these past couple days (and eating far too many too!) Let's just say last night I wasn't able to make dinner since the kitchen was in such disarray and we all ended up snarfing down cookies anyway because you have to taste test each batch right? To make sure they are good enough to give away yes? Paul ended up trying to eat all the Scotchies. Anyway that's my excuse for having cookies for dinner. The girls however did make away with Panda noodles as well as cookies so at least they had something more than just sugar to eat before going to bed, even if we didn't! It's the holidays, we're allowed ;D This is my card for Sparkle's #3 Christmas Card challenge. The added challenge was to use a sketch and I thought it would be so cute to do a 12 days of Christmas set! So here's the first one - my partridge in a pear tree cut with the Mistletoe card on the Slice. I added some stickles, pearls, and a rhinestone for his eye to pretty him up ;)

And thank you for the birthday wishes! I had a really fun day. Paul took me to see Avatar in 3D and we got to hang out around town a whole 6 hours without kids!! Yay for very patient and loving sis-in-laws ;D And I'm sorry I didn't get to this sooner! On the recipe yes it's cups for the shortening and molasses and yes you can use plain shortening. I just think it tastes better with the butter flavored which is usually right next to the regular at the store ;) On my reading, I'm starting the second book to a fantasy series I began some months back called Winds of the Forelands by David B Coe. If you're a fantasy fan the first book was an awesome read. So much happening and a lot of mystery and twists all intertwined with royal assassinations, magic, and a foreboding and unknown enemy. I'm excited to see what the assassin does, him and Grinsa are my favs. Anyhoo, thanks for stopping by. I hope everyone is having a wonderful and safe season. I won't have any posts til after Christmas so have a very Merry Christmas everyone!

12.19.2009

First of the Holiday Baking

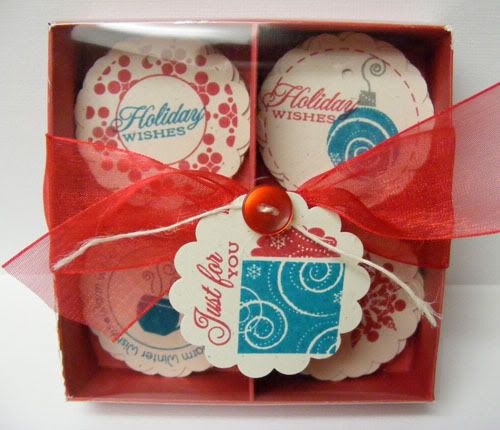
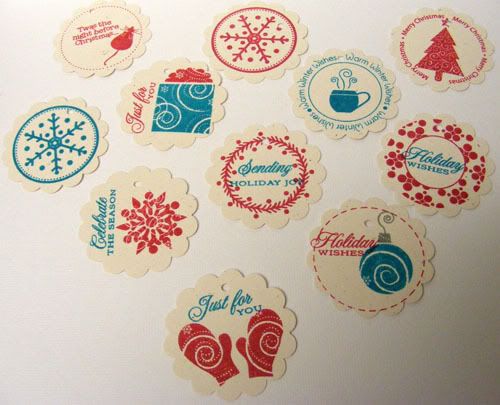
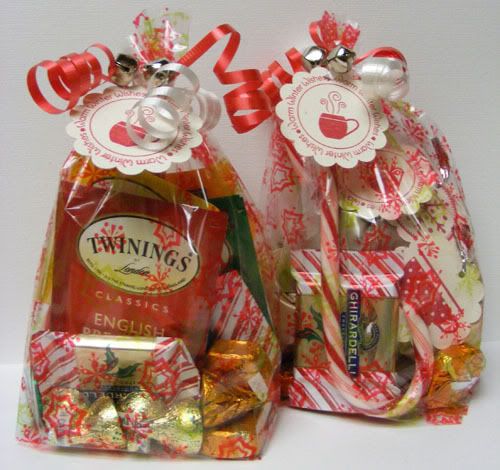
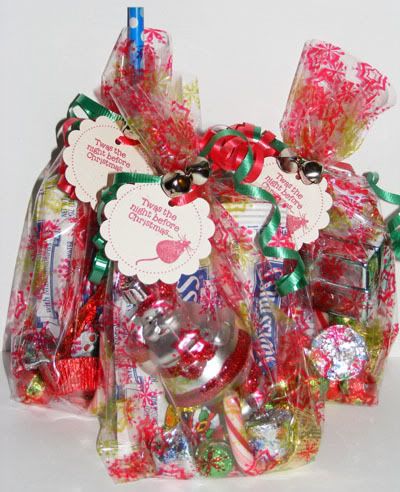
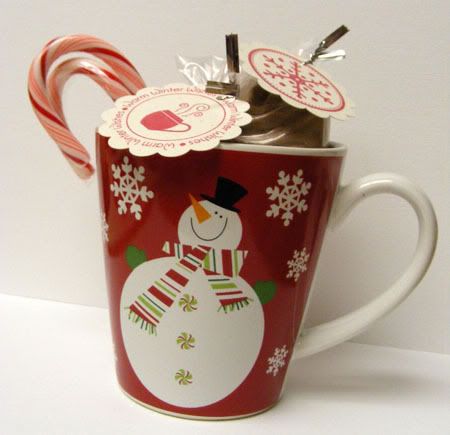
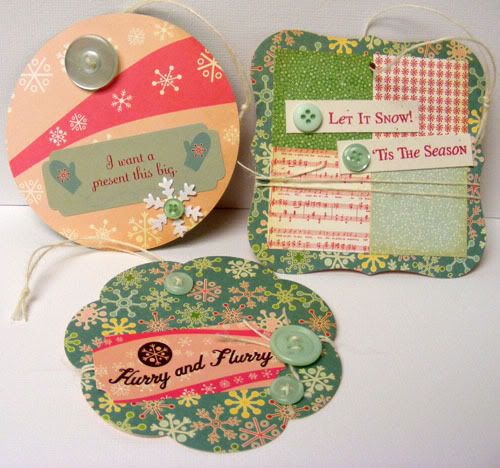
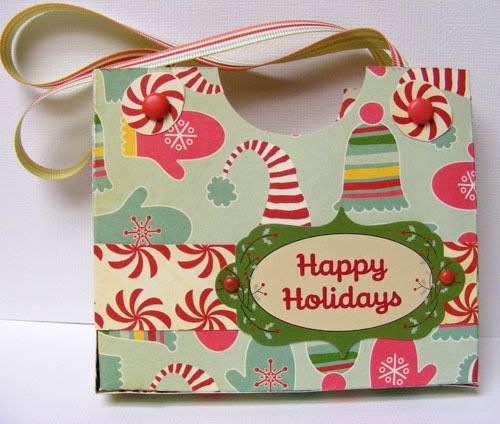
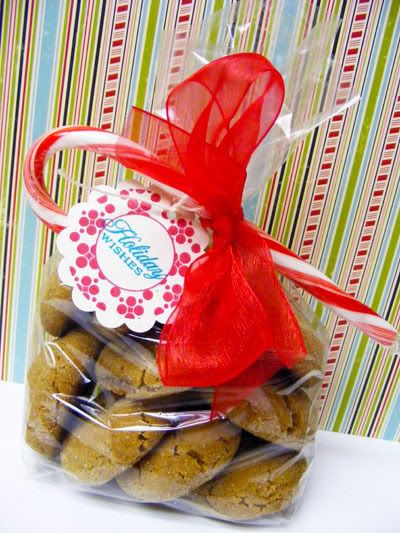
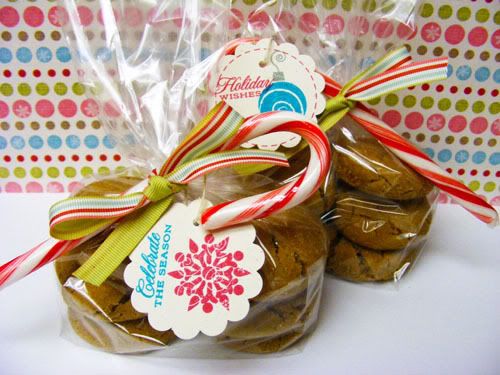
Paul had his last final Thursday - Yay! We invited a friend over for an easy going hang-out-to-celebrate eve and it was about midnight that night when I realized I hadn't baked the cookies I was planning to for Caitlyn's teacher yet. Tomorrow (or rather later that day) was the last day of school before Winter Break and I knew I wouldn't be up early enough in the morning to do the baking before school. Paul and Mark were still up for entertainment so they popped in a funny mocumentary called the Mighty Wind (same guy that did Spinal Tap and Best in Show). Inbetween the laughs (I absolutely LOVED Eugene Levy's character, he was too hilarious!) I baked up some of our favorite holiday ginger cookies because they are so easy to make, because they are delish, and because Cait's teacher is just too awesome to not bake cookies for. So at one in the morning I was finishing up baking a batch of these babies and after the movie I wrapped them up cute ;D For her teacher I used the last of my repurposing ribbon and one of the new tags I made a couple days ago. A simple candy dresses the plain cello bag up to look more holidayish since I ran out of the snowflake ones. I also wrapped up a couple more mini cookie bags for a couple of neighbors, one for Caitlyn's friend that comes over all the time. They don't go to the same school and she's actually in fifth grade which I suppose means she could be babysitting for me, lol. This is the first of much Holiday Baking to come. Most of it is planned for Monday and Tuesday because today is my B-day and I'm spending it out and about with my hubby and then being completely lazy ;) Hopefully lazy with a book because I've really been wanting some time to settle down and read.


And I can't remember if I shared it last year, but in case you missed it or you just want to try them here is the recipe for these Ginger Cuties.


Softy Ginger Cookies

Ingredients:
3/4 C butter flavored shortening
1 C brown sugar
1 egg
1/4 C molasses
2 1/4 C flour
2 tsp baking soda
1 tsp ground ginger
1 tsp ground cinnamon
1/2 tsp cloves
1/4 C sugar in a small shallow bowl or dish

Directions: Cream together shortening, brown sugar, egg and molasses until well blended. Add in flour and spices. Mix until combined with spoon. Now it's time to get your hands dirty ;) Knead the cookie dough until everything is well blended. Roll dough into 1 1/2"- 2" balls then roll in sugar and place on an ungreased cookie sheet. Bake at 350 for 8-10 minutes, just until the cookies crack on the top. Cool on cookie sheet 10 minutes before removing. Enjoy and have a fantastic weekend!

12.18.2009

Tag Box + Tags

Supplies : Rustic Cream Cardstock; twine; 2008 Holiday Tags, Winter Swirls, and Borders and Corners Circle stamp sets by Papertrey Ink; Cranberry Button, Tulip Cardstock, Tulip and Ocean Ink by CTMH; 2" Scallop Circle Punch by EK Success; repurposed organdy ribbon; acetate

I don't know about anyone else, but I've been using tags like crazy this year! It's a good thing I've had so much fun making them ;) So I came across this tutorial for a tag box on Splitcoast and thought it would be perfect for all my tags, plus I would get to make more! I used one of my favorite color combos of red, blue, and cream; and my go to tag stamp set as well as the Winter Swirls which I hadn't really played with yet. On the back I stamped To and From and made a total of 40 tags with 10 quick and easy different designs. I made the box first, it came together a bit quicker than I thought it would, and then I worked on the tags. I punched out 2 sheets of 8 1/2" x 11 inch cardstock, you get 20 2" circles for each sheet. Then I stamped each design on 4 tags. You could make just 4 different tags or all one style tag. Wouldn't this make a cute gift too? To finish off the box I used more repurposed organdy ribbon. Caitlyn's class had done a fundraiser with a local baking mix company. One of the sets I ordered for us was actually a gift set so I've been using the ribbon for other stuff since I'm planning on making those particular goodies for us - pecan pie bars and apple crumb cake - yum! Below are the tags just for fun ;D Enjoy and have a fabulous Friday!

12.17.2009

Mini Paper Stockings


Supplies : Paper by Basic Grey; Buttons and Twine by Papertrey Ink; Thickers Letter Stickers by American Crafts; Ornament Stickers by Crate Paper; Bird Tag Sticker by Cosmo Cricket; White Velour Ricrac by May Arts; Brown Gingham Ribbon by CTMH; Pink Gingham Ribbon by Pebbles Inc.

This week on Practical Scrappers the designers were challenged to make paper crafted decor items. I love stockings but have yet to buy or make some for our family. I think I must be too picky because I never see any premade ones at the stores that I really like. So for now I used some of that darling Eskimo Kisses paper to create these mini 4" x 8" paper stockings, perfect for slipping in a few holiday treats, pencils, bookmarks, etc. I could totally go for these patterns in fabric ;) To make them was quite simple I drew a stocking shape and then cut out 2 pieces for each. Then I paper pieced the soles and cuff of the sock before sewing the whole thing together. I picked a different set of Thickers for each of our names and then embellished the stockings with stickers, ribbon, and buttons.


I wanted to keep Paul's stocking a bit more maculine so I stuck with the deeper reds and the green, both favorite colors of his. Instead of adding ribbon I used the twine to string the buttons together. I love the rustic look it gave his stocking. The dot paper is actually one of my last sheets of Figgy Pudding paper and it coordinated quite well with the new set. For my stocking I picked my favorite patterns then added just a trim of the ricrac and some buttons to finish it off. The velour ricrac is so fun and fuzzy, when I actually get around to making or altering some fabric stockings I'll have to find more of this stuff ;)


With the girls stockings I used some of the pinker patterns, especially on Audrey's and of course I had to use some glitter Thickers. I had actually tried putting Caitlyn's name across the cuff but it didn't fit and when I moved the letters some of the paper ripped. So to fix my mistake I added some of these fun stickers. And after adding stickers on Cait's I couldn't not put a little sticker on Audrey's. This little bird tag fit her so perfectly. Enjoy the stockings and stop by Practical Scrappers to see the other decor items! Have a terrific Thursday!

12.16.2009

Fa la la

Supplies : Paper, Elements, and Stickers by Cosmo Cricket; Rustic Cream cardstock, Jute, and Buttons by Papertrey Ink

Oh what fun it is to snuggle with your Christmas morning goodies! The girls got the most adorable stuffed ponies first thing Christmas morning last year. We had them waiting for them out in the livingroom and I think if that's all they had gotten they would have still loved Christmas more than any other holiday! Little kids are so precious that way. It reminded me of old Christmas stories when the children only got one or two gifts and they were always simple toys - a doll, a wooden pull toy, a small ball - yet they were so overjoyed. I loved the vintage toy element because it brought to mind that same thing and I knew I had to use it with the girls playing with their ponies that morning. They didn't ask about opening presents at all after getting them and we had to prompt the whole unwrapping gift fest, lol. I love that Christmas is so easy right now for them! Anyway, about the layout, I used the #36 sketch from Inspired Blueprints. I haven't really kept up with the layouts in the past few months but I still love visiting them for inspiration. Thanks for stopping by and enjoy the layout!

12.15.2009

Red and Green Christmas

Supplies : Paper - Figgy Pudding by Basic Grey; Tree Trimming Trio, 2008 Holiday Tags, and Signature Christmas stamps by Papertrey Ink; Cocoa, Olive, Bamboo, and Cranberry Ink by CTMH; Nestabilities Labels 1; EK 2" scallop punch; Epoxy Circles by EK Success; Diamond Scallop Edge Punch by EK Success;

Sparkle's extra Christmas Card Challenge this week was to use the classic red and green colors. I must confess that I don't use those colors often for Christmas! I broke out my Tree Trimming Trio and some Figgy Pudding scraps to put together this card. I finally used some of my clear circle epoxy stickers too. I cannot tell you how many times I've lost these things, lol. They and my 3D squares keep disappearing just when I want to use them! Anyway, this card was made for a set of cards that our friend wanted me to make for him to give to his family. The others are the blue flat bulk cards I made when I first got this set since he wanted flat ones for mailing to the rest of brothers and sisters. This particular card is for his mom since he wanted something more special for her. Below is the little stack all tied together. I included some envelopes for the cards since he's a single guy and probably doesn't think of that kind of stuff, lol. Enjoy and thanks for stopping by!


12.14.2009

A Christmas Story and a Stocking Stuffer

In Caitlyn's class they are doing a Christmas Story each day until Winter Break. Our room mothers set it up so that one parent comes in and reads a Christmas Story. Then they add something to each of the childrens' stockings that they made from yarn and paper the week before. It's so fun for the kids. I volunteer Thursdays and Fridays so I've heard plenty about it and how excited the kiddos have been since they started this last Monday. My day is today and this is what I put together for them. In case you're wondering, the story is about a little Mouse without a name who on Christmas Eve suddenly wonders if anyone ever thinks to give Santa a present. So he gets out his best cheese, the one he's been saving and wraps it up to give to Santa. The little mouse wakes up to Santa holding him and thanking him for such a thoughtful gift. He asks the mouse's name but the mouse confesses that he doesn't have one. Santa decides that he needs such a generous helper and gives him a suit, boots, even a beard and calls him Santa Mouse. It's a cute short story and I loved how it focused on the mouse giving to others. Our stuffers don't have to match the story but when I brought the book home I realized my little mouse stamp would go perfectly with it. The stuffer I made is simply a mini cello bag with a couple chocolate treats. I made sure each baggie got a figure treat whether it was Santa or a snowman and then tied it with some simple curling ribbon. I punched out the tags and stamped them all with the mouse stamp from the 2008 Holiday Tags collection by Papertrey Ink. It's my go-to stamp set for Christmas goodies and present tags if you couldn't tell ;D I added a single jingle bell and then curled the ribbon up. They look so cute all together! I know the kids will probably only care about the candy, but I can hope that when they pull these out of their stockings they'll remember the Santa Mouse story. Thanks for visiting and have a marvelous Monday!

12.12.2009

Cozy Campy Cocoa

Supplies: Rustic White Cardstock, Ocean Tides Ribbon, Jute, Warm Happiness and 2008 Holiday Tags stamp sets by Papertrey Ink; Mini Cello Bags; Twilight Ink by CTMH; 2" Scallop Punch by EK Success; Mug from Pier 1;

Here's another take on the mug gift set I posted a couple days ago. I remembered seeing some chocolate dipped marshmallows on Nicole Heady's blog a while back and thought it would be so fun to try. I got this fun Monogram mug from Pier 1 and the colors instantly made me think of camping, roasting marshmallows in the fire and making s'mores. I made more of the fun cocoa samplers and then added the marshmallows dipped in melted chocolate to the set instead of candy canes. In fact I had a little extra chocolate so I got to taste test some other marshmallows and boy are those little guys yummy! Marshmallows like to get stale in the air so if you aren't giving the gift right away to you can wrap them really easily with some of the mini cello bags and some twine or ribbon like I did here on the bottom post. Wouldn't you love to get a fun gift like this! This one is for Paul's brother. He's so outdoorsy and into camping that when I saw the mug I knew it would be perfect and the dipped marshmallows seem to just complete the campy s'more theme ;D I hope you enjoy and have a wonderful weekend!

12.11.2009

Tea or Cocoa

Supplies : Rustic White cardstock, Warm Happiness, 2008 Holiday Tags, and Everyday Classics stamp sets by PTI; Winter Cello Bags; Twirling Ribbon; Jingle Bells;

We have a pretty large extended family on Paul's side so instead of buying gifts for each person we do a Secret Santa where we each draw a name of someone else in the family. While that works wonderfully for us I like to try and make a little something for everyone that is inexpensive but still a fun treat to receive. I usually bake goodies but there are some instances where that isn't really feasible, like when mailing gifts (this is only because I'm ultra picky and want my treats to be received no later than a day after I bake them so they are as fresh and tasty as possible ;D ). So I made some fun gifty bags full of little goodies for the family members we mail out to. Using the same concept as the darling mug I posted yesterday I created a couple samplers, one tea and one hot cocoa. Each baggie has various flavors of tea or cocoa and then a bunch of fun chocolates like Irish Creme Kisses and Ghiradelli Peppermint Bark along with some candy canes to complete the set. One of those simple tags with the name of the recipient on the back along with a couple jingle bells finishes off the gift. I love making these because I get to share some of the little things I enjoy and they are easy to mass produce!


For all our nieces and nephews I made little stocking stuffer gifty bags whether they live near or far. I know the girls always feel extra special when another relative sends something just for them, so I wanted to do that for the kiddos in our family. Each baggie comes with a single serve pack of hot cocoa with marshmallows, a candy cane for stirring, and lots of fun chocolate goodies like the crispy rice santas and the funny chocolate christmas balls, all goodies my own kids love. This year I added one non-edible item that would be fun for them to use, the kiddos in school or starting school next year all got winter themed pencils with an eraser and the littler ones got a non-shatterable ornament to hang on their tree. One of my girls' favorite things to do is hang and rehang the ornaments on their trees so I thought that would be a fun thing for them to share with their cousins. And you'd be surprised just how much easier having a fun pencil makes convincing your Kindergartener to do their homework! I made ten of these little baggies and Caitlyn was so excited, especially since they are also doing stockings in her class right now. Everyday this week she has been asking about the stockings and the stocking gifts and when I'm doing the Christmas story and stockings in her class. This coming Monday I keep telling her but still she keeps asking, lol. So there's a little of what I'm doing this holiday season en masse for our big family ;D Thanks for visiting and have a fab Friday!

12.10.2009

Simply Sip and Enjoy

Supplies : 2008 Holiday Tags stamp set and Rustic Cream Cardstock by Papertrey Ink; Mini Cello bags; 2" scallop punch by EK Success

The Practical Scrappers challenge this week is Christmas gifts or wrappings and I thought how fun would it be to create a cute quick gift that costs less than $3? This darling mug is from Wal-Mart for just $1 with some sampler hot cocoa mixes I packaged in 4 mini cello bags and a couple of candy canes. We always keep various flavors of hot cocoa on hand in our house so I thought it would be fun to create my own single serve cocoa sampler with some of my favorite flavors as a fun gift that would also be easy on the pocket book. The flavors include Pumpkin Spice, Cinnamon Chocolate, Mint Truffle, and Belgian Dark chocolate. Each has a stamped tag with the flavor written on the back. Cute and cost efficient, I'm sure we could use a lot more of that during these rough economical times! The tags were also very easy and inexpensive to make. Simply punch out the circle, stamp, then punch a hole for attaching. I've made over 50 of these little tags for presents, bags, and little gifts like this all with just 3 sheets of 8 1/2 x 11, one stamp set, and one ink pad - all items I already had on hand. It doesn't get much easier than that! I hope you find a little inspiration from this little gift :D For more crafty gift ideas head on over to Practical Scrappers. We've been posting projects every day this week! Enjoy and have a terrific Thursday!

12.09.2009

Ornament Tags

Supplies : Paper, stickers, and elements by Cosmo Cricket; Buttons, Jute, and stamps by Papertrey Ink; Ink by CTMH; Marvy Snowflake Punch; Nestebilities; Shimmer Cardstock;

Tagaments or Ornatags? I made these out of some of the scraps with first the thought to make them tags but they morphed a little into paper ornaments. They were so fun to make whatever they are. I simply took the scraps and cut out various nestie shapes and sizes then added buttons, jute, stamping or stickers/elements to complete the little tag/ornament. They also fit perfectly in that little card purse I posted on Saturday. I can see now why making ornaments has so much appeal. You could get lost in creating these, each one different yet quick and so easy to put together! I don't know that I'll be putting these on a tree or if I'll be using them to go with gifts, but I can definitely say I'll be making them again next year! Enjoy and have a happy Wednesday!


12.07.2009

All Bundled Up

Supplies : Paper, Elements, and Stickers by Cosmo Cricket; Flair Button by American Crafts; Heavenly Blue Brads by CTMH

Here's one of the layouts I made with the Cosmo Cricket packet. I used one of the November Pagemaps layouts for this one. Audrey loved that hot pink jacket she got last year. I have pictures of her wearing it in July out in 110 degree weather! She would say she was cold just to wear it. Both of us were so distraught this year since she had to give it away because she had outgrown it by the time fall rolled around. Audrey because it was her favorite jacket of all time and me because she looked so stinkin' cute in it! Her little cousin will hopefully get as much use and love out of it as Audrey did. They are just over a year apart so she ends up getting all of Audrey's cute clothes ;D Both the girls had their cozy jammies on and were so cute all bundled and snuggled together Christmas morning and I loved how well their pjs matched the paper. Well, enjoy the layout and have a marvelous Monday!

12.06.2009

Wintertime

Supplies : Paper, Sticker, and Elementes by Cosmo Cricket; Rhinestones by Kaiser

Another simple card, this time for Sparkle's Christmas Card Challenge! Even though I didn't play in all of them, I am so glad I played in many weeks this year. I had more than enough Christmas cards made and even a few extras just in case. I love the colors in this, that radish red, eggnog cream, and crayon green. Hot cocoa with marshmallows and standing under mistletoe is what this color combo reminds me of. This was all made from scraps too which is an added bonus since you all know how much I love to use my papers on layouts first ;D Winter here is one of my favorite seasons. It doesn't get terribly cold, enough for sweaters and scarves maybe but you rarely need many layers with fluffy jackets. If we're really lucky we might get a day or two of snow in January or February, but for the most part we have mild winters compared to most places. And since my favorite clothes happen to be fallish, it's perfect that I can wear them all through the winter as well since it's not too terribly cold. Just cold enough to enjoy being chilled and appreciating pink noses and mittens, hot cocoa and quilts. Thanks for stopping by and don't forget to visit Sparkle's site for her Christmas card. Have a lovely Sunday!

12.05.2009

Holiday Purse and Tags

Supplies : Paper and Elements by Cosmo Cricket; Buttons, Jute, Rustic Cream Cardstock and 2008 Holiday Tags stamp set by Papertrey Ink; Ribbon by We R Memory Keepers; Marvy Snowflake Punch; Shimmer white CS from Pebbles; Tulip Ink and Brads in Holiday Red and Cranberry from CTMH; 2" scallop punch from EK Success

I used more of the Cosmo Cricket sampler I used to make the card yesterday to make some simple and quick tags. I'm loving the fun colors in this paper kit. They look like scrumptious Christmas candy! The tags were very simple, I just punched out some scallop circles from the rustic cream cardstock by PTI and then stamped some of the holiday tag images in Tulip on them. Then I added some ribbon and buttons since the patterns were already striped! Easy peasy, yes? Splitcoast Stampers had this fun template up for a little holiday card purse and I thought it would be fun to make with some of the scraps from my holiday layouts to put the tags in. My purse is actually shorter since I was using scraps and I housed some tags rather than the A2 size cards the template was for. This was so easy to make and pretty quick as well. I'm going to be putting together some little stocking stuffers for Caitlyn's class today. We're doing a Christmas story each day now with a stocking stuffer to go in their little paper stockings each day until Winter Break and mine is on the 14th. Very fun for the kiddos and I think the hardest part for me will be picking out a book to read. I want to find one that is fun, but not one that will have already been read. I'll be hitting the book store today as well to see what I can find ;D Have a great weekend and thanks for visiting!

12.04.2009

Home Sweet Holidays

Supplies : Paper and Elements by Cosmo Cricket; Ribbon by We R Memory Keepers; Buttons and Twine by Papertrey Ink; stickles and liquid glass

Simple and sweet, that's how I'm feeling about the season this year. With our family growing so fast, this last year we gained 2 nieces and a nephew and are expecting two more (one for sure a nephew) this next year I'm finding myself drawn to keeping my crafting more simple especially when it comes to the holidays! Time to create is so difficult to carve out no matter how much I want to right now so when I do create I want to be able to finish a project in lickety-split time. Practical Scrappers is doing all Christmas goodies this month so I took 5 minutes to whip together this card. Cute, sweet, and simple! I added some stickles to the snow and liquid glass to the window to add just a little something special. An added shortcut was to use part of the sample sheet from the Cosmo Cricket craft pack as the card base. All the patterns were already striped and all I had to add was embellishments! The girls and I have been having a lot of fun getting our home and gifts ready for Christmas. So much so that when Mich popped on by the other day she said it looked like our place had 'exploded with Christmas'. You can tell you're having fun with the holidays when your house has exploded with it, lol! Enjoy the card and have a fabulous Friday!

12.01.2009

Holiday Hair

Supplies : Paper and Elements by Cosmo Cricket; Flair Button and Thickers Letter Stickers by American Crafts

A simple layout to start off the holiday season. These were some silly photos of the girls with Christmas bows on their head from Christmas morning and I just had to include the one of Paul when Caitlyn had put her hairband on him so she could wear the tiara she got from her Aunt at our family Christmas party last year. I loved the little element that said "The season just isn't complete without a few ding-dongs" It matched the goofy photos so well! I had ordered the Cosmo Cricket craft pack right before I got sick earlier this month and am finally getting around to play with it. November has been pretty batty with all of us getting sick with colds, the flu, even a stomach bug and to top it off some vandal completely shattered one of our backseat car windows. Thankfully we were able to get the window fixed that next morning and we are all getting better finally :D I'm keeping my fingers crossed that none of us catch anything else for a while. While Caitlyn and Paul get over those things quickly, Audrey and I tend to have a much harder time. We have higher fevers, worse symptoms, and feels like it takes forever for us to get better. You can tell who got who's genes, lol. I hope everyone had a fantastic Thanksgiving though. We definitely had a great one. The meal was wonderful and the girls had such a blast playing with their cousins. With all the flu going around and the holiday craze our family hasn't gotten together since early October and it was so nice to see and chat with everyone. Hopefully I'll have at least a couple posts for you each week as I've got lots of Christmas goodies and such to make. So to get in the holiday mood this weekend we listened to Christmas music, put up the tree and decor, and I scrapped a quick and simple page to get my crafting mojo going. Enjoy and have a terrific Tuesday!