10.31.2009

Happy Halloween!

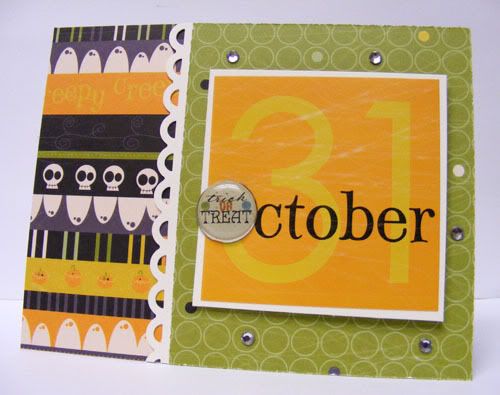
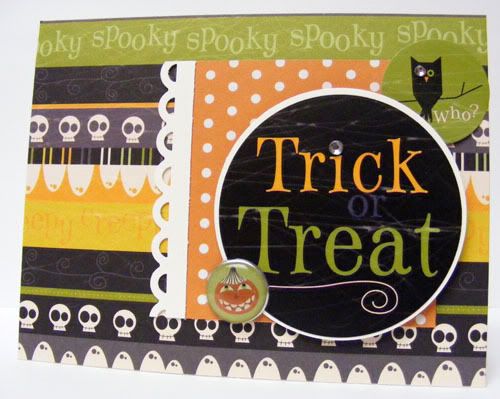
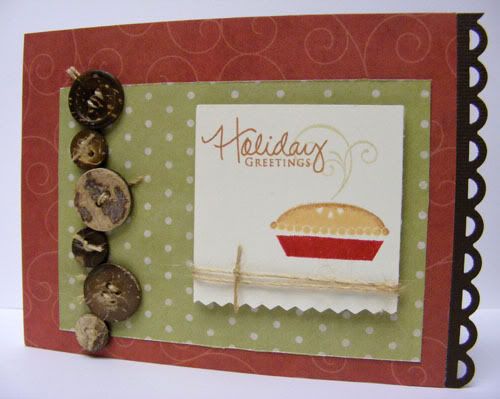
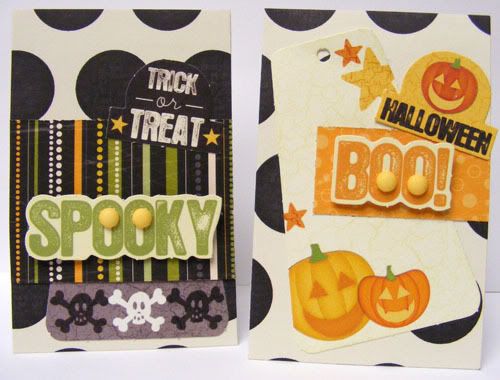
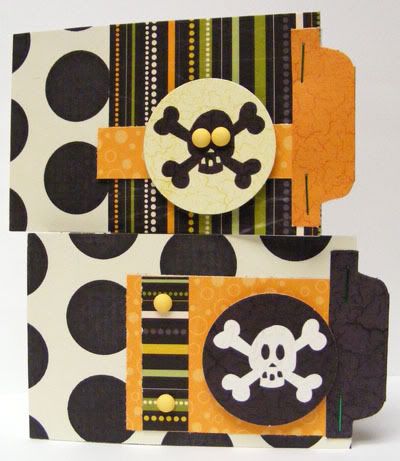
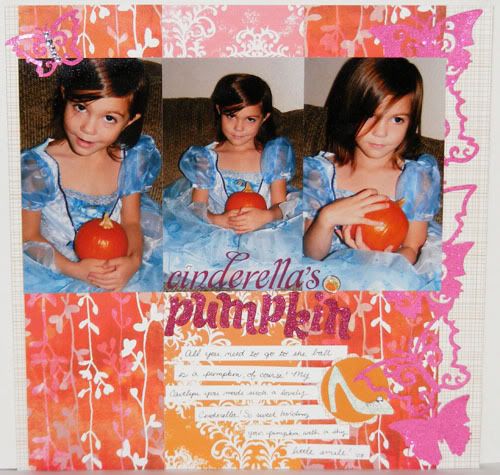
Supplies : Paper by Pebbles Inc., My Minds Eye, and Creative Imaginations; Stickers by Pebbles Inc; Bat Ribbon by Making Memories; Glazed Brads Eerie by Basic Grey;

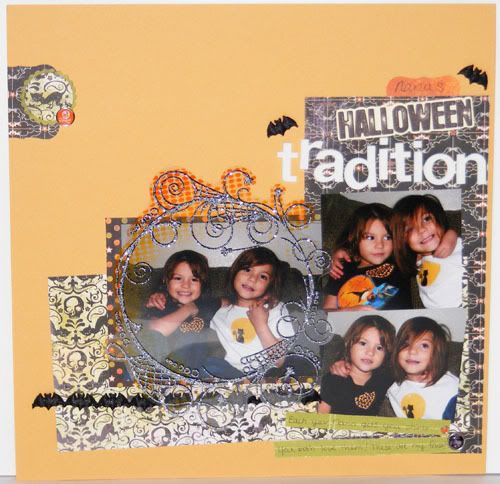
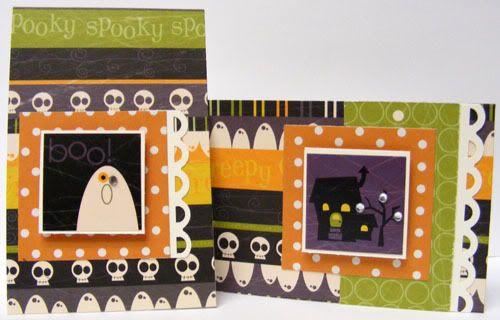
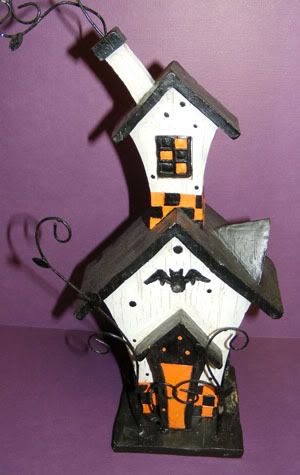
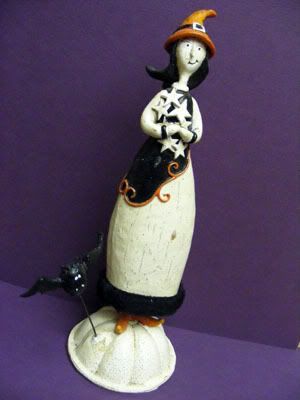
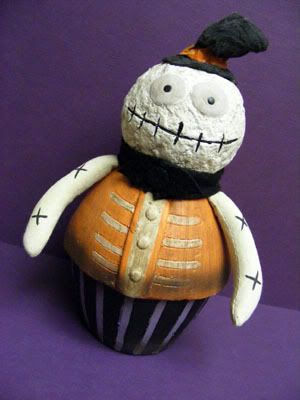
Happy Halloween! We have a fun day ahead for us with the festival at Tuachan and then a little Trick or Treating with their Aunt Mich. Everything is family friendly so no scary stuff allowed, my kind of Halloween festival! I love whimsical holiday decor. Most of our Halloween decor is black, orange, and white and the pieces are usually witchy. I did pick up a fun zombie thing this year and a darling vampire ornament from Pier 1 (links will take you to pictures of some of my favorite Halloween pieces of ours). Since the girls have gotten older decorating for holidays has become a bigger thing for us so I've enjoyed shopping for fun Halloween pieces to add to our little collection. This is a very simple layout of the girls last year. It's a very Pebbles style layout using some fun Pebbles paper and stickers! If you've seen their kits you know what I mean. The style is simple, blocked, and cutesy. The journaling is about how last year was the first year the girls ever picked matching costumes. I know they aren't from the same movie or comic but the fact that they were both superheroes is close enough for me! Since they are superheroes again this year I'm hoping we've started a trend of them matching for Halloween, at least for a little while! It's just so cute to see their costumes be all matchy :D


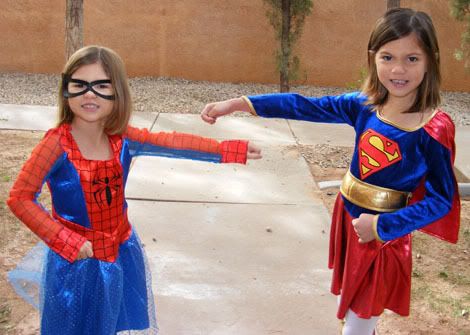
By the way both the girls did great at the Halloween party in class. Cait didn't melt down at all going through the older kids classrooms and seeing their scary costumes for the costume parade. She was even able to give some of them high fives. I think it really helped that the big kids were so encourging of all the Kindergarteners rather than trying to scare them :) They also got to go to a Halloween birthday party as well as our neighborhood party later that evening. All Friday they got to party! Here's a picture of them before class. I'm a bit sad that Audrey lost her mask someplace so she won't have it for Trick or Treating or the Festival today but oh well, at least I got some pictures of her before it happened. Maybe I can draw/paint one on her tonight. We'll see if she lets me :D Anyway enjoy and have a Hauntingly Happy Halloween!

10.30.2009

October 31st

Supplies : Paper and Stickers by Pebbles Inc; Brad by Imaginescence; Rhinestones by Kaiser; White Cardstock; Apron Lace punch by Fiskars; 3D foam squares

I have been loving this Pebbles sticker sheet. It's only about 6x12 but boy all those images sure do go a long way! I used basically the same style for this card as I was with the sticker minis, matting the sticker on cardstock and using 3D foam squares to pop it up. I added more rhinestones for some fun bling in the background and then substituted the O in October with a circle Trick or Treat brad. A very quick and simple card, can you tell I've been so in to those lately!
We'll be having Caitlyn's class party today. She's done SO much better this year. Last year I couldn't even take her to the grocery stores it was that bad! Carrying an ASD child whose having a major meltdown out of a crowded store while still keeping track of your other toddler is totally no fun. I was dreading when everyone would start putting out the Halloween stuff this year but Caitlyn hasn't seemed to be affected like she was last year. So we'll see how she handles the kids wearing their costumes in class. Audrey and I will be there to help if anything crops up but I'm hoping she'll be able to just have fun like the other kids ^_~ Thanks for popping on by and have a Freaky Friday! I'm pretty sure mine is going to be a least a little freaky with all those dressed up Kindergarteners!

10.29.2009

Nana's Halloween Tradition

Supplies : Papers Eerie by Basic Grey; Cardstock by Bazzil; Glazed Brads Eerie by Basic Grey; Bat Ribbon by Making Memories; Transparency by Fancy Pants; Halloween tag by My Minds Eye; Paper for journal strips by Creative Imaginations; Thickers letter stickers by American Crafts; Scallop, Labels 1, and Circle Nestabilities

Every year Paul's mom gets all the kids Halloween tees for Halloween. Last years were my favorite tees for Cait and Audrey. The girls love all of them of course. I think it's so fun for them to get a surprise the beginning of October like that. They love wearing them any chance they get, even when it gets close to Christmas time! I took basically the same style I had been playing with on my Practical Scrappers layouts but used some colored cardstock for the background and more photos. The transparency totally takes center stage, isn't it gorgeous! Trying to decide what I was going to use it on was tough so I just figured this layout right now. It highlights my favorite picture out the bunch. Last year I had that very photo as my desktop wallpaper for quite a while (until I took a new favorite sister picture). I just love Audrey's cheeser and Caitlyn's sweet look. Enjoy the layout and have an Eerie Thursday!

10.28.2009

Trick or Treat

Supplies : Paper and Stickers by Pebbles Inc; White Cardstock; Rhinestones by Kaiser; Brad by Imaginescence; 3D foam squares; Apron Lace punch by Fiskars

How about a regular sized card! The girls have really been into the Halloween treat thing and I have been more than happy to give away some of the huge stash of candy we have in our house! My downfall is the candy corns and those pumpkins. The girls, Paul and I all love them and though I try to use them more as decoration in my pretty glass pumpkin, they end up being snuck out as snacks by all of us! I probably should just not buy them but I cave every time. It's practically a tradition to have the pumpkin filled with candy pumpkins! Anyway, I hope everyone is having a blast getting ready for Halloween. Enjoy the card and have a Wicked Wednesday!

10.27.2009

Scaredy Cat

Supplies : Paper - Eerie by Basic Grey, lined papers by Creative Imaginations; Tag by My Minds Eye; Big Brads by Imaginisce; Glazed brads Eerie by Basic Grey; Spider brads by Doodlebug; Jute by Papertrey Ink; Scallop and Circle punch by EK Success; Apron Lace Punch by Fiskars; Circle Nestabilities; Spellbound Card (Slice)

Here's another layout for the fun punches challenge on Practical Scrappers. I used the border punch again and the scallop punch. This time though the scallop mats a circle that I punched to use for a journaling spot. I also die cut another larger circle for more journaling and just flowed my story starting with the small circle then continuing on to the larger one. Use your punches to create journaling prompts by punching out lined pattern papers or by creating your own using a journal lines stamp set. Hearts, flowers, stars, any shape you want can add a quirky journal prompt or subtitle to your layout. Try using your punched shapes to hold individual letters on a title. Use a heart punch in place of the O in Love or You. Use smaller shaped punches to dot 'i's and 'j's in your titles or as the dots in exclamation or question marks. I hope I gave you some fun texty ideas for your punches. Hop on by Practical Scrappers for the challenge and more inspiration! Thanks for visiting and have a terrific Tuesday!

10.26.2009

So Cute it's Spooky

Supplies : Paper - Eerie by Basic Grey and Creative Imaginations; Tag by My Minds Eye; Brads Eerie by Basic Grey; Bat Ribbon by Making Memories; 2" scallop punch by EK Success; Apron Lace border punch by Fiskars; Kraft Cardstock; Transparency by Fancy Pants

The challenge this week at Practical Scrappers is on using fun punches and I was so relieved when Christie said that border punches worked as well on this challenge because I really don't have many punches at all! Here I added some fun border detailing with the Apron Lace punch by Fiskars on the left side of the photo mat layer. Then I used part of a scallop punched circle as a tag for the beginning of the title. These little additions simply add a bit more fun to the layout. Use your border punches to add whimsy and don't stop at cardstock! Use pattern paper, or edge your journaling block or multiple journaling strips. Add a fun border to a photo mat or to the photo itself. Border punches are terrific for adding a shot of detail to a layout without having to add papers or embellishments! Stop by Practical Scrappers for more samples on what to do with fun punches and have a great Monday!

Holiday Pie

Supplies : Paper by Creative Imaginations; My Punny Valentine, Fancy Flourishes, and Signature Christmas stamp set, wood buttons and jute by Papertrey Ink; Creme Brulee, Bamboo, and Cranberry Ink by CTMH; Apron Lace punch and pinking scissors by Fiskars

Sparkle's Christmas Card Challenge this Sunday was to make a card that involved cooked/baked holiday goodies. What a fun challenge! Okay I know I probably say that about all of them, but yes they are all fun! I have been wanting to use this pie for a while and it's just one of the many things I hadn't gotten around to trying yet so I broke out my Punny Valentine set and made a simple homespun card. The crust is stamped in creme brulee the top rolled in brown bag so that it came out a little more 'golden' on the top ^_~ I used Fancy Flourishes for the steam in bamboo and then stamped both the sentiment and pie tin in cranberry for some pop. Wood buttons make a fun statement on the side of the card. A trick I learned was to turn some of them backwards to get that lighter color. Some of the buttons are less polished on the back too so it gives them a more woodsy feeling. A simple quick stamping card, I'm really loving quick cards lately! Don't forget to visit Sparkle's post for the challenge and her yummilicious Sarah Kay card (it's got cookies!) Have a lovely late Sunday night/very early Monday morning!

10.24.2009

Meowie Pumpkin Minis

Supplies : Paper and Stickers by Pebbles Inc; White Cardstock; Apron Lace Fiskars Punch; Rhinestones by Kaiser; 3D foam squares

More of these fun stickers on the minis! Rhinestones add a little bling again, I love how the tiny ones fit perfect on the odd eyes both on the cat and the pumpkins. These were the last two of the smaller square stickers and they rounded out my set of 8 minis just right for the girls' cousins. This weekend I'll be getting the Halloween goodies out to our family since we aren't doing a family get together this year for Halloween which actually works out better for us since Caitlyn has a class party, our complex is having a party, we have the ward trunk or treat party, and then both Paul and I are judging at Tuachan for Halloween contests as well! This year will definitely be the craziest Halloween season we've had! Thanks for stopping by and have a great weekend!

10.23.2009

Haunted Minis

Supplies : Paper and Stickers by Pebbles Inc; White Cardstock; Rhinestones by Kaiser; 3D Foam Squares; Apron Lace Punch by Fiskars

Aren't these stickers just so adorable! I saved the circle ones for my layouts and used the bitty square ones on these mini cards. That haunted house is too cute to be creepy. I added some non-halloween scraps to mat the stickers and give them more attention on the card instead of getting lost on that busy but darling background paper. I kept it simple with just a few rhinestones to accent. These Pebbles papers are double sided so even though I only had 2 different scraps on hand, I still had 4 different patterns to work with on these cards and I wanted to make sure that I made some with the spooky stripe. Two cards for one, it's hard to not get addicted to these mini cards! Enjoy and have a fabulous Friday!

For some regular life stuff Paul's appointment went well. His MRI results were good news, he has no new lesions since his last MRI which is wonderful since the previous 2 MRIs he had showed new lesions each time. Paul's symptoms have gotten worse in the past 2 months though, bad enough for us to assume he was having a relapse, and the neurologist thinks that might be attributed to stress and depression/anxiety exasperating his MS symptoms. There really isn't anything more they can do to help with the symptoms except try out some other medications. The important part is that his MS isn't actively destroying more nerves and that's the best news we've had with his MS in two years. The hopeful news about him not having a flare up is that it may mean he's headed toward some stable years. Out of the 9 years since he's been diagnosed he's had less than 4 stable years, so I'm praying that he gets some of them soon! Thanks for visiting!

10.22.2009

Halloween Class Treats


Supplies : Paper by My Minds Eye; White Cardstock; Journaling Lines, Around About Sentiments, and 2008 Holiday Tags Stamp sets by Papertrey Ink; Sans Alpha stamp set and ink by CTMH;

This year I thought it would be fun for the girls to give out more special treats than just a piece of candy. Caitlyn loves to give out paper crafted things and this was another simple way I could use up more Halloween paper that I'm not going to be scrapping with. These giftie bags also solved the problem of making sure each kid in her class got 2 of the super hero candy boxes. I cut my papers 2 1/2 x 4 for 20 kids and used up one full 12x12 sheet plus some scraps. I kept all of Caitlyn's papers black and white and you'll see why in a moment. For the tags I punched out 20 white 1 3/4 circles with my EK punch, then stamped the journal lines across each circle in sunflower. The stars are from the Around About Sentiments set and the From is from last years Holiday tags set, both Papertrey Ink. Last I used CTMH's sans alpha set to spell out Caitlyn's name and stamped it on all the tags. Easy peasy!


Since I volunteer in Caitlyn's class every Friday and I always have Audrey with me I thought it would be appropriate to make sure Audrey had treats to hand out to the class as well at the Halloween party. She has rainbow twizzlers to hand out which match Caitlyns Marvel Heroes candies even though it's Audrey who will be from the Marvel Universe. I kept Caitlyn's black and white and then did Audrey's with the orange and orange scraps just to help me keep better track of how many treats I was making and to give the girls something different from each other even if I made the same type of tags for them. I made the tags the same way just switching up the color scheme a little with my stamping. Both the girls are so excited. Caitlyn is going to be Supergirl again and Audrey is going as Spidergirl. They look so cute in their costumes! Caitlyn has actually gone back and forth between a Rocker Girl (like Hanna Montana she says) and Supergirl but I think when it comes to the party she'll pick Supergirl. Thanks for popping on by and have a terrific Thursday!

10.21.2009

Boo and Spooky Minis

Supplies : Paper by My Minds Eye and Pebbles Inc; Diecuts by My Minds Eye; Candy Dots by Pebbles Inc; 3D foam squares

With these minis I used up some of those big tags that I can't ever figure out how to get on layouts in a way that I like. On cards they were pretty easy though! I popped up the Boo and Spooky sentiments with 3D foam tape and added some candy dots in the Os for embellishment. More folder tabs add sentiments for a fun text filled card. All of the diecuts are from the same sheet that the skeletons were on in yesterdays post. It made putting these two sets of minis go by in a flash. All these mini cards that I'll be showing are inside the treat bags I made with the big pennant tags. The girls had so much fun signing the cards and getting the baggies ready for their cousins. Enjoy and have a wonderful Wednesday!

10.20.2009

Skull Minis

Supplies : Paper My Minds Eye and Pebbles Inc; Die Cuts by My Minds Eye; Candy Dots by Pebbles Inc.;

I made a discovery that I am totally going to be using again and again - Mini Cards. A regular A2 card just cut in half. 2 3/4 x 4 1/4 is the size of each of these minis and they are just the right size for kids! They were also the perfect size to use up these diecuts I got last year that I know I won't be using on layouts. I used scraps from the pennants and other Halloween layouts to create these minis for the nephews. I thought the big buggy eyes on the top were so funny and so did Caitlyn. She laughed so hard when she saw that card! The diecuts come from a cardstock sheet which included the skeletons and the file folder tabs. I thought the tabs made a fun and simple addition to the cards. Paul and I will be heading up north bright and early this morning for his MRI and Neurology appointment. Hopefully the doctor will have some positive news for us. Thanks for stopping by and have a great Tuesday!

10.19.2009

Halloween Goodie Bags

Supplies : Paper by My Minds Eye and Pebbles Inc.; Journaling Lines and Around and About Sentiments stamp sets by Papertrey Ink; Say It In Style stamp set and inks by CTMH; Cello gift bags; Black Organdy; 1 3/4" circle punch and 2" scallop punch by EK Success

If you noticed on my second banner in Saturday's post there were some triangles that had text on them. Being picky about making sure my text is right side up that meant I ended up with 2 spare pennant triangles. I also had a couple odd number triangles from the banners as well. I couldn't just toss them out so I put them to use on these little gift bags. I don't have any Halloween stamp sets, though I loved this years release by PTI. I had to choose between Christmas and Halloween.... Christmas stamps won out :) So I got creative. I used the stars from the Around and About Sentiments stamp set and gave the tags a notebook feeling with the Journaling Lines stamp set. Then I added the simple sentiment from Say it in Style by CTMH. After putting the tag sets together I realized the upsidedown pennant looked a little like a witch hat! Perfect for halloween. Each baggy comes with goodies and a mini card from Caitlyn and Audrey, one baggie for each of their cousins. I ended up with 8 baggies though the others are the same as these designs. So there's an idea on what to do with your extra pennant triangles if you have them. Enjoy and have a marvelous Monday!

10.18.2009

Cozy Up for Christmas

Supplies : Paper by Imaginisce; Snowfall and Signature Christmas stamp sets and button twine by Papertrey ink; Twilight Ink and organdy ribbon in white and col white by CTMH; Button by My Minds Eye; Apron Lace punch by Fiskars; Embroidery Floss; kalidescope glitter embossing powder

It's been a few weeks since I've played in Sparkle's Christmas Card Challenge. I miss getting to sit down and craft every Sunday. Today I got a chance to so I logged online to see if there was an added challenge this week and there was - to use winter clothing. This was the perfect challenge to break out my favorite winter set from last year : Snowfall by Papertrey. I did something fun with the mittens that I haven't done before. I glitter embossed the image on pattern paper for a fun shimmery mitten. You can use glitter embossing powder or make your own by mixing a little bit of prisma glitter with clear embossing powder half and half. I stitched some simple snowflakes with white embroidery floss and then sewed a little more detail on the wrists of the mittens since the clear embossing didn't really show that stamping detail very well over the pattern paper. One large button adds to the cozy theme. I love the fall and winter, the cooler weather, warmer clothes and colors, and that cozy feeling where you just want to snuggle at home under a warm quilt and watch a fun flick or read a good book. It's still fairly warm here (it got up to 90 this weekend) and I really can't wait for it to start cooling off! Don't forget to visit Sparkle's blog for the challenge and her darling hanging winter clothes card. Have a lovely Sunday!

10.17.2009

Halloween Banners


Supplies : Paper by My Minds Eye and Pebbles Inc.; Ribbon by Pebbles Inc.; Cardstock scraps - LSS and CTMH; Die cut Patterns from Spellbound - Slice

This was such a fun project! I had seen these pennant banners here and there and since Halloween has become a rather large holiday for us I figured it would be fun to try out making one. The instructions are at Splitcoast but for a quick overview you will need a 12x12 sheet of paper for every 6 triangles you want to make. Cut your 12x12 sheet in half so that you have two 6 x 12 pieces. Across the top of each piece use a ruler to make a mark at 1", 6", and 11". Then across the botton of each piece mark it at 3 1/2" and 8 1/2". Draw a line to connect or do like I did and just line up the diagonal marks and cut. I trimmed my pennants with edging scraps cut with my mini scallops and pinking deco scissors. I then cut the 2 1/2" letters with my Slice from various scratch papers and then did the same with the fun pumpkin, date, and bat elements. Using my 1/8" hole punch I punched two holes in each top corner and thread a long bit of hemp to hold the banner together, then tied loops for hanging at the ends. Buttons on the pumpkins and some ribbon finish it off. Because I didn't have any single pattern of ribbon long enough for the entire banner I used 4 different patterns trimmed to size which did double duty as embellishment and hiding the punched holes and strung hemp. This was such an easy and fun project to make!


Here are a couple closeups of the pumpkin ends on the large banner.


This is a smaller banner I made using other My Minds Eye papers. I had acquired quite a stash of Halloween papers and many of them I realized I probably won't get around to using on pages. I've been trying to use things up as I buy them and use up my stash as well since it's getting larger than I like. These pennant banners were a great solution and I ended up using 6 full 12x12 sheets and many scraps.


Another closeup, this one of the bats by the moon. I really like the simple shape silhouettes offered by the Slice. I use it mainly for alphas but I'm finding the images are really fun too! Enjoy and I hope you all have a wonderful weekend!

10.16.2009

Cinderella's Pumpkin

Supplies : Paper by Basic Grey, Making Memories, and My Minds Eye; Lace Butterfly Cardstock by KI; Shoe Abbey Road by My Minds Eye; Rhinestones by Kaiser; Remarks Letter Stickers and Thickers Letters by American Crafts; Pumpkin Brad by Basic Grey;

I love the rich colors in the new Basic Grey fall set. Sparkle sent me a card earlier this month and her card actually sent me in search of the paper here in town it was so pretty! I was lucky to find that my favorite LSS had some of the patterns and picked up a few of my favorite sheets. The paper I used here was so gorgeous, I was falling all over it when I saw the blend of pink and orange with that bleach like effect of the bloom stems. When I got home I knew I had to use it for my layout for the Practical Scrappers Challenge on lace cardstock. If you visit/follow the Practical Scrappers site you've already seen this since it posted Monday. The lace cardstock was a bit of a challenge since the stores here don't carry much of it and so our choices are quite limited. I found this glitter butterfly cardstock by KI at Michaels and thought it would be so pretty as just a bit of border and diecuts. Don't be afraid to cut your lace cardstock as borders, diecuts, detailing, etc. Old school style it with plain scissors and simply follow the shape of the object your cutting. Another thing to get you out of the box is don't be afraid to use non-traditional colors or papers when scrapping your Halloween photos. I used pink and orange for this layout and I love how it brings out the pumpkin in her lap and lets her blue dress really pop from the page. The 'glass slipper' is a die cut from My Minds Eye in white and pale blue. I added some rhinestones for some shoe bling and to reinforce the Cinderella theme. A fun and gorgeous Halloween page with not a bit of black in sight!

October has been such a fun month for the girls and just all over a busy month for us which is why I've had a lack of posts half the month. We had Audrey's birthday on the 5th and we celebrated our extended families birthdays and Audrey's again at their Nana's house on the 8th. Sparkle sent me a gorgeous fall Ketto card along with some Greeting Farm images (thank you so much!) which was such a treat for me and really made day! The busy stuff has been doctor appointments. Audrey had her well-child and was such a trooper with her shots. She cried but didn't try to get away, I'm so proud of her. She had a Speech Evaluation and was such a shy cutie. She's been having difficulties telling us what she wants and using general terms like 'that one' and 'doing' for everything so we had her tested. She has normal receptive (what she hears and understands) but has a mild - moderate delay in her expressive (what she can put into words). She also has a bit of echolalia - repeating the end of a question instead of answering it. Part of it could be Caitlyn's modeling but the therapist thinks it might Audrey's own delay with Caitlyn's language difficulties simply not helping her work past it. So now I am working on helping Audrey with her speech as well though she was kind of getting it already since I did Caitlyn's speech homework with both of them. The good new is Audrey isn't delayed in anything else or showing any warning signs that would lead to us to think she has any disorder.

For the more worrisome stuff this month we think Paul has been having another relapse, one of his legs feel strange and tingly plus he hasn't been doing well at all this past month. He's already had one appointment up in Salt Lake for a total body scan which they had to cut short because of a panic attack. They will finish when we go up again Tuesday and we'll also get to see the results of the first scan and that should tell us if he's having a relapse. As I look back over the past two years his relapses have happened April, October, and April again with each one lasting about 2 1/2 - 3 months, so the timing fits. Also if it follows the same pattern this time that would mean by around Christmas Paul could be back in remission, and that is something to hope for. So it's been a little crazy around here. But amidst the craziness I've gotten to craft a bit of fun Halloween goodies, I just haven't had the time to take pictures and post them until now. So I have some fun future posts sets up now ^_~ Thanks for stopping by and have a fabulous Friday!