7.31.2009

Easter Dresses

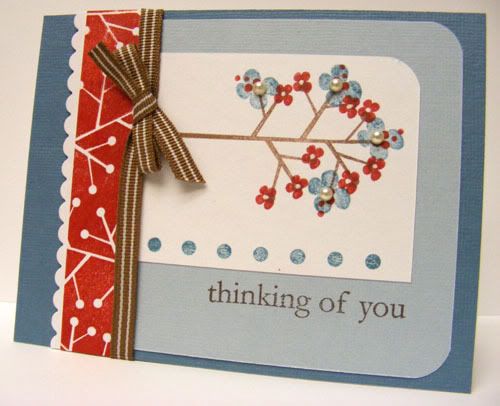
Supplies : Porcelien Paper by Basic Grey; Cardstock, Inks, and Discovery Paper by CTMH; Retro Backgrounds stamp and Buttons by Papertrey Ink; Flowers by Prima; Felt ribbon by We R Memory Keepers; Pearls by Kaiser; Blossom Brad by Imaginescence; Sequin Ribbon by My Minds Eye; Remarks letters by American Crafts; Embroidery Floss

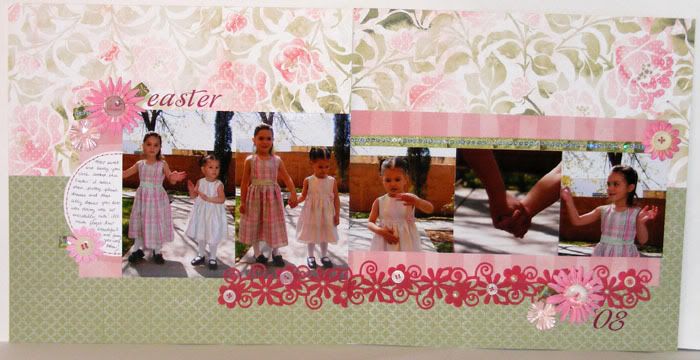
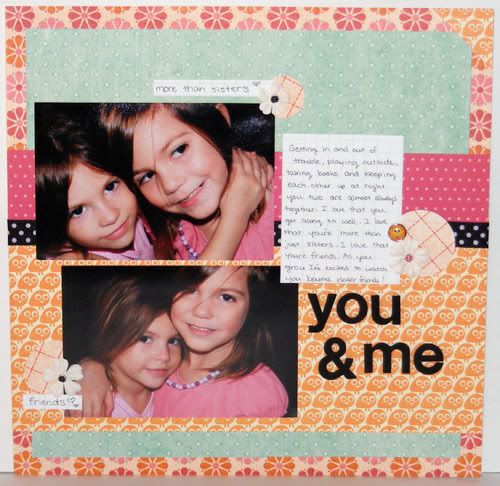
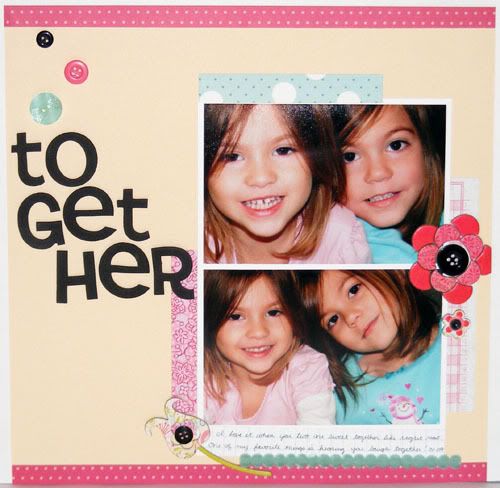
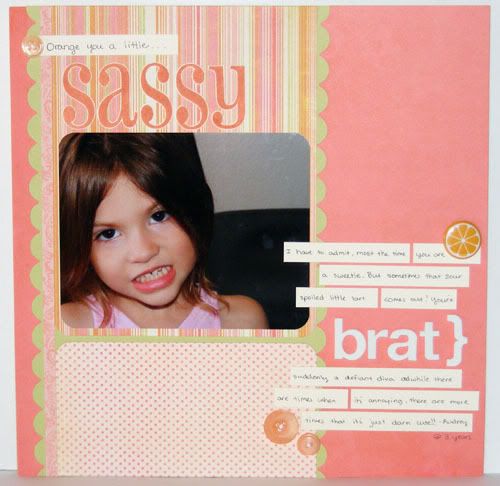
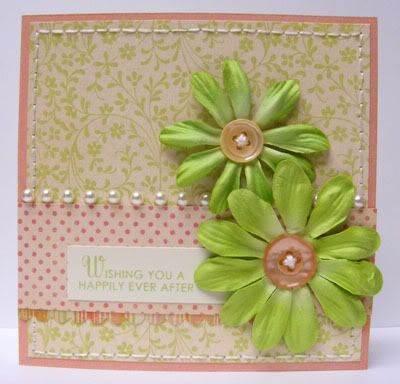
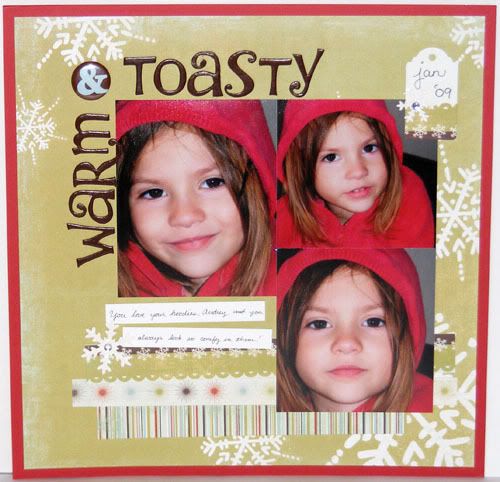
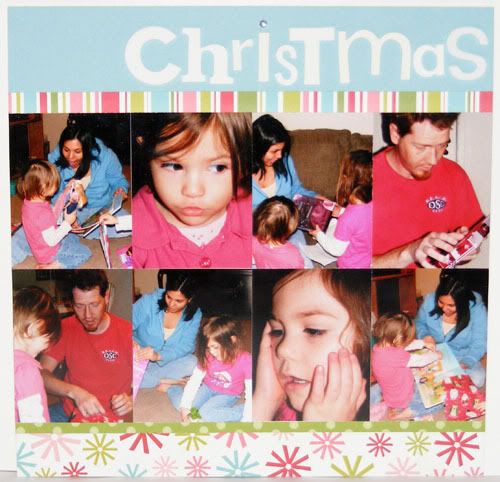
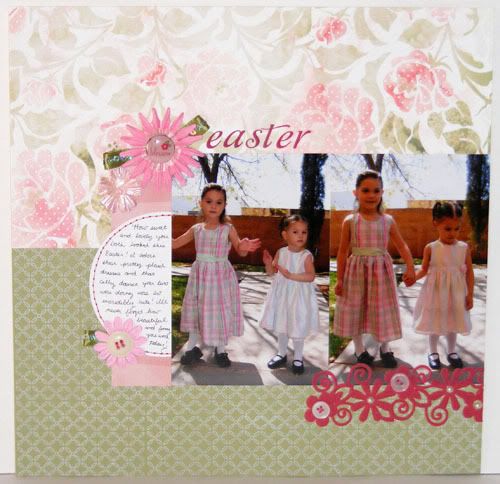
Sometimes I have such a hard time with pretty paper like this but not this time! I started with the Basic Grey paper and a sketch I jotted down from a layout I'd seen a couple weeks ago online. I didn't have any green pattern paper that went with the basic grey so I created some with garden green cardstock, white ink, and Papertrey's Retro backgrounds stamp set. I didn't want to cover up too much of that gorgeous paper and this layout was perfect for letting both the pictures and paper really show off. Both pictures are 4" x 6" and the pink strip paper is 1.5" x 6". You'll see how it pulls together the second page in a sec here.


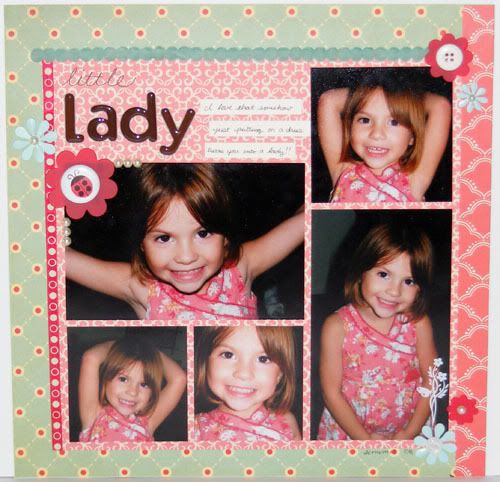
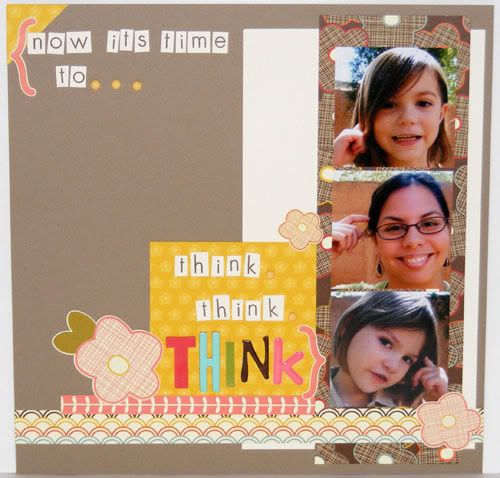
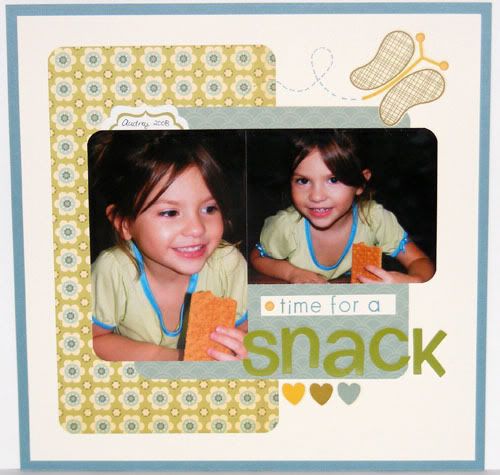
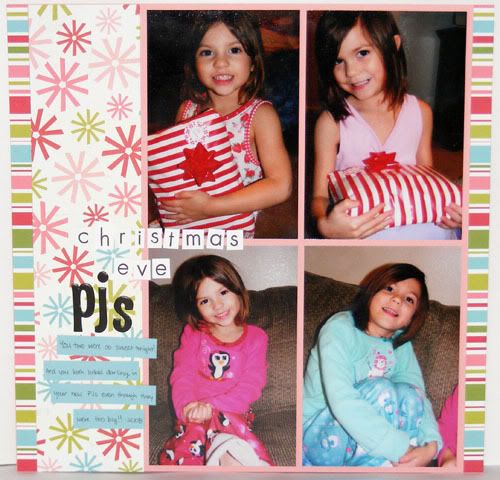
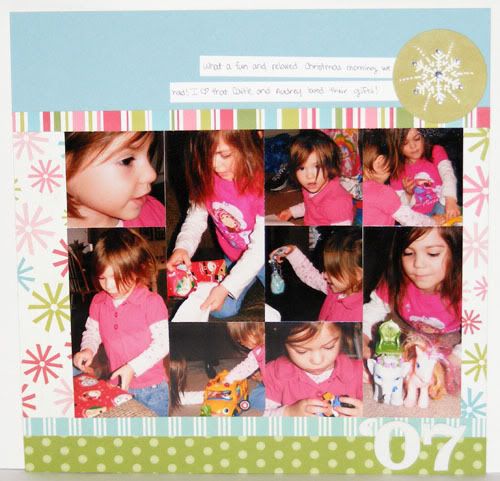
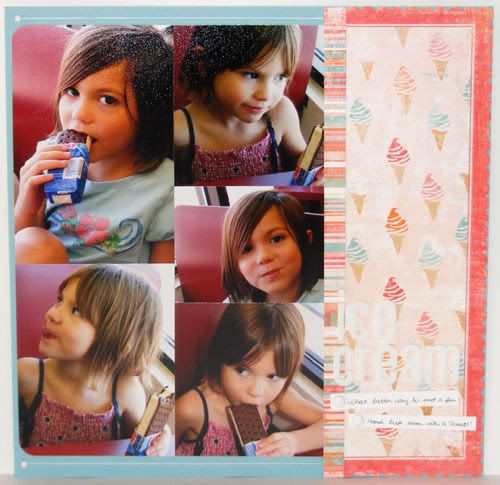
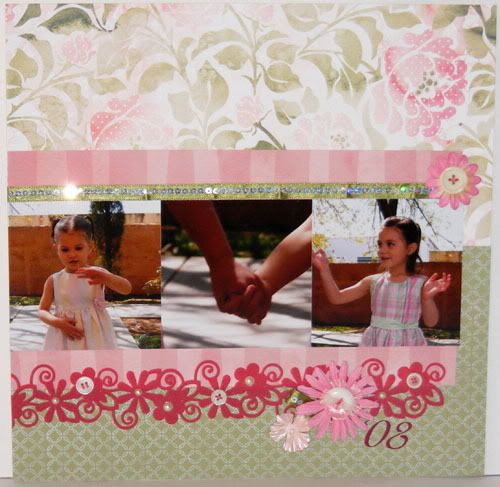
Here is the right side of the layout. These smaller photos are 3.75" x 3.75". The bottom paper strip is an easy 1" x 11.25" and the top is 1.25" x 11.25" to make the 6 inch height the photos have on the left side. So pretty! I love these dresses too. Audrey has outgrown that cute rainbow plaid but Cait still fits in that pretty pink and green dress even now. I remember how funny they were that day, dancing while I was trying to take pictures. Caitlyn started it, doing a kind of luau dance and soon Audrey followed. I got them to hold hands for few seconds so I could snap a few sweet shots of them, but they didn't care much for posing more than that on that day. Anyway, thanks for stopping by and have a fabulous Friday!


7.30.2009

Triple Card Thursday - In Bloom

Supplies : In Bloom, Text Style Backgrounds and Retro Background stamps and Scarlet Ribbon by Papertrey Ink; Colored Cardstock and Ink by CTMH; Kraft from LSS; Pearls by Kaiser

Another Triple Card Thursday! This might become habit since I have so many layouts that they are taking up all the rest of the week's posts. In Bloom is the set I played with this week and the first card I made with it was this. After seeing all those pretty cards with the layered flower I just had to do it myself. The colors (CTMH) are Petal, Vineyard Berry, and Garden Green with Kraft. On the bottom half of the card I stamped one of the Retro Borders in Vineyard Berry then added the pretty script from the Text Style Backgrounds in bamboo for a little more interest. The flower and leaves were pretty easy to cut out and pearls finish off the bloom.


Supplies : In Bloom and Everyday Classics stamps and Buttons by Papertrey Ink; Cardstock and Ink by CTMH; Embroidery Floss

This card I took a completely different direction and went bold and bright. I random stamped the flowers starting with the big flower first. A simple sentiment strip with some sewing and buttons embellish the card and I rounded the corners for a little more interest. This was the fastest card and it was so easy to make. I took the inspiration from Nicole's simple white on dark cardstock cards for the reveal of this set.


Supplies : In Bloom, Polka Dot Basics II, and Beyond Basic Borders stamps and Spring Moss Ribbon by Papertrey Ink; Ink and Cardstock by CTMH

I went simple and quick again with this card. First I stamped the big bloom by using Breeze ink then rolling it in Ocean, then I did the smaller flower the same way and the leaves as well using sweet leaf and topiary. I remember seeing one of the reveal cards use the polka dot basics over the flower for an almost distant cross-stitched look. I lightened and brighted my stamping version and added just a bit of ribbon with a bow to embellish. Since I haven't been using colored images on my cards I've felt like I'm trying to rediscover my own card making style and I've been experimenting with different card lifts to try to find my own. Anyway, enjoy the cards and have a terrific Thursday!

7.29.2009

You & Me

Supplies : Paper by My Minds Eye; Sassyfras, Cosmo Cricket, and Scenic Route; Flowers by Prima; Glazed Brads by Basic Grey; Thickers by American Crafts; Red polka-dot brad by Queen Co.; Ribbon from LSS

I finally got around to doing the #24 Inspired Blueprints sketch, and aside from the base paper, all the pattern papers were from scraps so I was really happy with continuing to shrink my scrap pile! This layout was pretty simple and I didn't do too much with it since there is so much pattern going on already with the papers. The colors are so fun and cheerful, just like the girls that I really didn't need much embellishment anyway. The main thing I left out on my page from the sketch was the arrows. The looked cute on the sketch but I just couldn't get them to look right on my page so I left them off. I'm hoping to catch up on the rest of the sketches here soon. Just a quickie post today. Have a marvelous Wednesday!

7.28.2009

Little Lady and a Toot!

Supplies : Paper by Cosmo Cricket, Scenic Route, and Pebbles; Ribbon from LSS; Thickers, Flair button, and Acrylic flowers by American Crafts; Buttons by Papertrey Ink; Pearls by Kaiser; Rubon by Bo Bunny;

I tried working with only pattern scraps again, but couldn't quite get into the mode. I did however use at least 2 scraps in this and then cut into my newer cosmo cricket paper for this layout. It's always fun to mix up layout styles, this one was softer than the swim suit layout and a bit more block style. I just love the colors and there was a lot of pulling out and putting back papers as I searched for a combination that complimented Audrey's dress. I've been using ribbon again too, I had forgotten how fun it is to put on layouts and it feels great to use up some of my stash supplies. And for a fun Toot I am now a Design Team member of Practical Scrappers! It's casual enough to fit my schedule and plus the main theme is to use up your supply stash, just what I need! Enjoy and have a lovely Tuesday!

7.27.2009

Merry & Bright & Sticky

Supplies : Paper and Sticker by Pebbles; Cardstock and Ribbon by CTMH; Buttons and Jute by Papertrey Ink; Scallop Scissors by Fiskars; Snowflake Punches by Marvy; Rhinestone by Kaiser

I finally made my card for Sparkle's Christmas Card Challenge. The extra challenge was to use a sticker on the card and even though the card isn't sticky, the sticker sure was! Early Sunday afternoon we left to go spend the day with friends and were gone until late so I didn't get around to making it until today. I also cheated a little and bought some clearance sentiment stickers from Pebbles since the only stickers I have are thickers letters and some girly pebbles ones that I won. They are way cute and I scored the last sheet of double sided matching paper as well. You know you're a scrapping nerd when you buy the supplies just so you can do the extra challenge! Stop by Sparkle's blog for the link to the rest of the cards and have a nice evening!

Swimsuit Thief

Supplies : Paper - My Minds Eye, Scenic Route, and unknown (RAKed 6x6 piece); cardstock and white ricrac by CTMH; Flowers by Prima; glazed brads by Imaginescence and Basic Grey; Other ribbon from LSS; glitter flower centers unknown from craft store; remarks letter stickers by American Crafts; glitter letter stickers by Urban Bling;

This last week I thought I might do some scrap purging. When I make layouts I tend to cut into full papers, then I plan on using the scraps for cards. Some of the bigger pieces end up in other layouts but most of the time the scrap pile just keeps getting larger and larger. So I thought maybe I could match up some scrap pieces then find some pictures to go with them, you know to whittle down my ever growing Mount Scrap. The green dot and blue flourish paper I paired together on some breeze cardstock and then I searched for some pictures to go with it. Once I found the pictures I flipped through my scraps again to see if there were any more coordinating papers to help complete the layout and this bird scrap fit perfectly with the colors. I didn't even have to cut any of the scraps, just position them on the layout. These pics are of Audrey stealing Cait's swimsuit while hers was in the washer. That girl seriously lived in her 'soup' (what she called her swim suit) last year. And when she couldn't have hers, she got Cait's! Enjoy and have a fun Monday!

7.25.2009

It's Art!

Supplies : Paper - Sassyfrass, Imaginese, My Minds Eye, Cosmo Cricket and Scenic Route; Flair buttons and Thickers by American Crafts; Tree sticker by Pebbles

My layouts just keep getting busier and busier this week don't they. This one I did on purpose though. I wanted a lot going on to go with the feeling of being surrounded by chalk art. Caitlyn is so funny when you get her going on a creative project. Even if it doesn't start out messy she'll find a way to make it so, though I do admit that sidewalk chalk is messy on it's own. I remember last year how excited she was when she discovered the cool effect of using water with the chalk, which made it even more messy! All summer our sidewalk was a permanent art canvas, albeit an ever changing one. And I am everly grateful that sidewalk chalk doesn't stain! Most days ended like these photos with her covered head to toe in chalk. I love that she's so artsy! Have a fantastic weekend!

7.24.2009

Face It

Supplies : Paper - Pebbles Inc., Sassyfras, and My Minds Eye; Yellow candy dots by Pebbles Inc; Thickers by American Crafts; Buttercup CS by CTMH;

I have to admit that my girls are hilarious. They make me laugh everyday with all their shenanigans! Audrey kept insisting that I help her tape potato head's bottom to her face since all she managed to do was ruin a bunch of tape trying to do it herself. It was so out of the blue and so funny that I was laughing the whole time. After we got her set, Audrey was SO happy. She was giggling like crazy and I had to take pictures of this. We still aren't sure where she got the idea, if it was from seeing a doctor in a surgical mask, or maybe storm troopers from star wars, or soldiers in desert warfare. I suppose it doesn't matter where the idea initially came from, it's darling how imaginative she is no matter what. It kept sliding down but she didn't mind and she wore that thing for over a half an hour until the tape completely gave away. Then she wanted us to tape it back on again! I definitely have some goofy girls! Enjoy and have a fab Friday!!

7.23.2009

Practical Scrappers Design Team Call

Check out what I found via Laurel's Blog :

Practical Scrappers : Using Up Our Supplies

Design Team Needed
Every serious scrapper has a massive stash of supplies. This blog will focus on encouraging you to use those supplies and tools in new creative ways. Each week there will be a new focus and our design team will be show off how they used it.

Design team requirements:
1) Willingness to have work prepared at least every other week-more if you can.
2) Willingness to try out new supplies (not major purchases-things like lace cardstock, color core cardstock, etc.)--I won't ever make you purchase something because part of the purpose of this is to show people how to use things they already have. Having said that, one week may focus on something that you would like to purchase anyway this will give you the opportunity to keep up with trends.

How to Apply:
Become a follower of their site
Leave a comment with a link to your blog or your gallery there
Send an e-mail at practicalscrappers@gmail.com that includes your name, where you live, and pictures of at least 3 layouts showcasing the following products. If you'd like to send more feel free.
Eyelets
Punches
Die Cut Machine
Lace Cardstock
Ribbon
Glitter
Stamps
Chipboard
Transparency
Stickers
Brads

Deadline to apply is July 26th. Choices will be announced on the Practical Scrappers Blog Wednesday July 28th.

Triple Card Thursday!

Supplies : Beyond Basic Borders and Forest Friends by Papertrey Ink; Ink, Cardstock, and Ribbon by CTMH; Pearls by Kaiser; White Gel Pen

I have been wanting to take more time playing with my stamps lately. So this last week I pulled out Beyond Basic Borders and got creative. This first card is inspired by one of my starbucks mugs. I love pretty mugs and have a cute little collection so far. I'm very picky about them, but that makes each mug I do have one that I really love! The mug of inspiration was in the armoire on my scrap space pictures. And I was doing a little happy dance in my mind when Sparkle commented on my mug with that post since I thought it had been a bit lost in the pictures. In fact those pics were taken just before I started making these cards, tea ready and everything ^_~. I love this little branch and thought instead of using it alone I'd pair it with the tiny flowers from the Forest Friends set to make some sweet blooms. The white gel pen was used for the small flower middles to brighten up the flowers.


Supplies : Beyond Basic Borders and Faux Ribbon by Papertrey Ink; Markers, Ink, Cardstock, and Grosgrain Ribbon by CTMH; Gingham ribbon by May Arts; Candy Dots by Pebbles;

This card was just something bright and fun. I used Faux Ribbon to create the striped background paper and then used my markers to fill in some of the dots on the border piece for some added color. To make things easier I used the same design for this card as I did on the first card, I just flipped it vertically. The colors remind me of candy during the summer like starbursts. It probably reminds me of candy also because I used Pebble's candy dots on the cute branch. The hardest part on this card was making the background. I didn't measure out the stripes or anything but making sure I was getting them straight and at least somewhat even was pretty tough for me. I also had to be careful since I tend to accidently get ink on my hands and there were a couple of spots that I ended up smudging the paper ink. Luckily I was able to cover up most of those spots with the mats and ribbon.


Supplies : Tea Leaves paper, Buttons, and Beyond Basic Borders by Papertrey Ink; Ink, Olive and White Cardstock by CTMH; Kraft from LSS; Embroidery floss

The last card is inspired by Heather Nichols, who designed Beyond Basic Borders if I remember correctly. I love her rustic chic style and tried to incorporate that same look in my card. I even broke out my sewing maching just to get that little stitching on the side there! I had so much fun creating different cards with this set and I hope to do it more often with my other stamps! Using my stamps like this also helps get me thinking more out my comfort zone too, I try more techniques and styles which is something I like to play around with but I tend to do that more with scrapping than with cards. Anyway, I hope you all enjoy the cards and have a terrific Thursday!

7.22.2009

Bloom

Supplies : Paper - Piggy tales and Scenic Route; Cardstock - Tulip from CTMH, Kraft from LSS; Chipboard Flowers, Acrylic Flowers, and Thickers by American Crafts; paper flowers by Prima; Buttons by Papertrey Ink;

I put this one together via collage style. These pictures crack me up so much. One day out of the blue Caitlyn came running down the hall just giggling like crazy and shouted "Mom, look!! Look at me!!" The second I saw her in her funny hair accessory get up I busted up and then told her she HAD to have pictures. She had her two combs holstered in her skirt, a flower hair band on each elbow and then one on her left knee, then a head band and her 2 last working clips in her hair. Where she got the idea to do this, I haven't a clue and when I asked her she simply said that she's funny! Well, she sure got that right! :D Have a wonderful Wednesday and thanks for stopping by!

7.21.2009

My Crafty Cubby

Last week when I said my scrap space was a mess I wasn't kidding and I decided to do more than just tidy up. That next day I made a plan to completely reorganize my paper crafting supplies. I got 2 white foam boards and decided to get organizationally crafty. Three hours (with many interruptions from my kidlets) and $3 got me this awesome little ink organizational system. I had seen so many different ink holders I thought I could probably come up with something that works for me. The best part is that while the system is stable, it's not permanent. So if I ever want my armoire back for computer or some other use, I won't ruin anything taking out the little ink system. It was really simple to put together. I used a craft knife, a tape measure, pencil and my 6"x24" acrylic quilting thingie. Just measure, line up, and slice. I used simple glue dots to keep the sections in their spots. The bottom holds my PTI stamps with room to grow, then next is my inks separated by color, markers, then ribbon spools. Most ribbon I buy by the yard so I don't need a lot of spool space. Also up there for now is a tube of stickles, the last of my white flowers, and then a repurposed prima tin filled with ribbon scraps.


Here is the entire inside of my armoire. Yes this is all of my paper crafting supplies. The photo boxes on the bottom are labeled as Photos, Buttons, Punches, and Embossing Tools though the embossing box holds other things like my brayer, glitters, paints, etc. There is space behind those boxes that hold my other stamps and other tools I don't use very often like my cropadile. The papers on the left are all patterned and then the ones in the paper organizers are all cardstock. On the second shelf I have two 13 inch deep cubby drawers. The top one is all flowers separated by color and then the bottom is embellishments and chipboard. Next to that is more chipboard in plastic, my coluzzle system, my E size CTMH stamps, embellishment organizer, cuttlebug plates and the cuttlebug. The craft cases contain embroidery floss and ribbon and then there is my box of CTMH stamps. The keyboard tray holds my paper cutter and those 12x12 bags are all holding scrap paper (yikes!). Everything else you can pretty much see, my pen holder with pens, adhesive, and scissors (extras behind), stamping blocks, cleaner and other occassionally used tools, and then the top is my stack of thickers stickers. The best part is I have a laptop now instead of a desktop and guess what? Yup, it fits perfectly in the remaining space where my desktop monitor used to be! I usually craft on the dining table or the floor so I don't need a lot of 'counter space'. Just space to store everything. My favorite part is that I can just close the doors and viola, clean! Even if it isn't ^_~ I hope you enjoyed this peek into my little craft cubby. Have a wonderful Tuesday!

7.20.2009

Together

Supplies: Paper - Cosmo Cricket, Making Memories, Basic Grey, Scenic Route, and Creative Imaginations; Chipboard Flowers (Urban Prairie) by Basic Grey; Cardstock by CTMH; Buttons by Papertrey Ink; Thickers by American Crafts; Ribbon from LSS;

I pretty much lifted this layout right out of the May/June 09 issue of Scrapbooks Etc. The inspiration layout is on page 122. It was a lot of fun to make even though it took me a while to get going. I had such a difficult time picking out which papers to use and I ended up using all scraps which made me feel good about whittling down my ever growing scrap paper pile. My page is definitely busier than the inspiration one, I added more flowers, the ribbon, and my title is bigger. After finishing it I realized my title could be read two ways though - together and to get her! I guess since they are both girls it still fits no matter which way you read it :D Enjoy and have a happy Monday!

7.19.2009

Christmas Birds

Supplies : Stripe and Bird Paper, Sentiement tag, and button by My Minds Eye; Other paper by Basic Grey; Ribbon by May Arts; Embroidery Floss; 3D foam tape

Sparkle's challenge this week for our Christmas cards is to use strips of paper. I copied her idea of using 3 strips of the same paper next to a broader strip of paper since I loved the look so much! Instead of stamping I challenged myself to use some of my paper more creatively and cut the birdcage in a 3x3 square for my 'image'. Then I cut out the bird from the same paper and pop dotted her onto the image mat. I have been loving the non-stamping cards I've made with this paper line. The sentiment finished off the card with some fuzzy ricrac and a pretty little button. The embroidery floss is one strand of the red and one of white. I remember back in my cross stitch days that you could make some really pretty varigated designs by mixing threads so I tried it out on the simple stitching in this card. Stop by Sparkle's blog for the challenges and links to the other cards and have a lovely Sunday!

7.18.2009

Orangey Good Luck Wishes

Supplies : Paper - Tres Jolie by My Minds eye; Buttons and Fruitful and Wishing You stamp sets by Papertrey Ink; Blush, Sorbet, Creme Brulee, and Taffy Ink by CTMH; White Embroidery Floss;

I used another splitcoast sketch for this card - SC235. The citrus in this stamp set has been beckoning me to play. I was trying to figure out how to put it on the layout I posted yesterday, but wasn't liking the outcome so I took those oranges, made a few more and put it to a card. The sketch was literally perfect for them since it's 9 circles (or whatever your shape preference). It ended up making a 5 1/2 inch square card which is a little bigger than I'm used to but I think it was well worth it. The dotted paper and colors were such a yummy combo and I think some of my oranges look more like grapefruits. Enjoy and have a fantastic weekend!

7.17.2009

Sassy Brat

Supplies : Paper Tres Jolie and Confetti by My Minds Eye; Cardstock, Ink, and Friendship Alpha stamp set by CTMH; Buttons by PTI; Thickers and Orange Flair button by American Crafts; White Embroidery Floss

"I have to admit most the time you are a sweetie. But sometimes that sour spoiled little tart comes out. You're suddenly a defiant diva and while there are times when it's annoying there are more times when it's just darn cute! Audrey @ 3 years" - journaling. I used a new page maps sketch from July '09. It was one of the 8x11s that I altered to fit my 12x12 page since I had such a large picture. Some of you may remember this picture from earlier this year. This wasn't one of Audrey's snotty moments, she was actually just making funny faces for the camera and this one came out so spoiled and cute I had to keep it for a page like this. She purses her brow a bit more when she's being bratty ^_~. In fact her diva moments are more often funny than anything else. She's so dramatic and has the craziest facial expressions. Audrey also loves to shout. It cracks me up when she starts yelling something like "NO MOM-MOM! I don't like to have my hair brush! No Mom! Go Away!!" and literally 3 seconds later "I want my hair brushed MOM-MOM!!" in that same mad little voice! It cracks me up every time and it makes it hard to stay serious around her, even when I need to! I don't think I've done a page about how my girls call me mom-mom yet but that's what both of them call me instead of mommy. Audrey began saying it around 18 months and I think it was because she thought that's what Caitlyn was saying when she said Mama. Sometimes Cait would call me Mom, other times it was Mama. So Audrey started calling me Mom-Mom, then a couple weeks later Cait did too and it's stuck ever since. Enjoy and have a fabulous Friday!

7.16.2009

Take time for Tea

Supplies : Paper Tres Jolie by My Minds Eye; Button and Tea for Two stamp set by PTI; White Embroidery Floss; Inks and markers by CMTH; white gel pen

I made this card using the SC234 sketch on the splitcoast sketch challenge forums. After stamping the tea pot a few times I realized I need to start getting reinkers. I've had my stamp pads for 2-3 years now and I only have 2 reinkers, yikes. I tried to improve my sorry little pot by stamping the outline in sorbet and then coloring in the design with markers and putting some highlights with my white gel pen. It looked a lot better after that and even though my image didn't come out crisp I think it turned out pretty cute. Anyway, have a terrific Thursday!

7.15.2009

Think, Think, Think!

Supplies : Paper, Stickers, Borders, and Candy Dots by Pebbles Inc.; Cardstock from LSS; Col White cardstock, ink, and classmates stamp set by CTMH; Thickers by American Crafts

Here's the layout that I really broke my set into. I started off with the #6 Inspired Blueprints sketch for the left hand page. All the papers are from the Lil' Miss set. I remember how tough and fun it was to get these pictures. For Father's Day last year I framed Paul's AS Degree and then we took another quartet frame and took these thinking pictures to go along with the quote "Now it's time to think, think, think!" from my friends Tigger and Pooh. Paul knows the song since he's seen the show about as much as I have and it's so funny because whenever he has to leave to go write a paper or read more for class I would sing that part of the song. We hung the pictures by his computer so he'd have them to look up at and smile while he's working. I printed the ones in his frame in black and white, but I also got color copies to scrap with. I love the rainbow of colors and think the page turned out so cute!

This is the right side of the layout. I ended up winging it when it came to the design, just placing down scraps and what not to try and make something that looked like it coordinated with the sketch page. I put a quick bit of journaling about our Father's day gift and paired it with these cute foul ups that we had during the picture taking process. We had a lot of pictures that didn't take, mostly of Audrey since she wanted to run off after the first couple shots! Thanks for stopping by and have a great Wednesday :D

7.14.2009

Green Flowers

Supplies : Paper Tres Jolie by My Minds Eye; Flowers by Prima; Buttons and Wishing You stamp set by PTI; Pearls by Kaiser; White Embrodiery Floss

This was such a fun card to make. I needed to make a really pretty card for my SIL and am so happy with the way this came out. I started with the green flourish paper and then just went from there. I know I wanted the flowers to be the focal since she loves green and that made the rest of the card easy and quick. The line of pearls is something I've been wanting to try on a card for a while and I finally took the leap and did it. It's amazing how much quicker non-coloring cards come together. Just having the sentiment to stamp and then paper to paste together makes a card fly by! Hope you all have a grand Tuesday!

7.13.2009

Time for a Snack

Supplies : Paper by Scenic Route and Pebbles Inc; file tag by My Minds Eye; Butterfly, hearts, and yellow candy dots by Pebbles Inc; Cardstock, ink, and Classmates alpha stamp set by CTMH; Thickers by American Crafts

This was a very simple layout that I made to break into the Lil' Miss set I got as blog candy from the Pebbles Inc Blog. The colors are pulled from Audrey's jammies, I love the green and blue :D I debated back and forth on doing this softer page or a much brighter page. The softer version won out and I love how sweet this layout is. I realized while scrapping that I need more things like these stickers. You know, fun detail pieces that really help make a layout have more personality. I was looking through my stash and found I don't have much of that kind of stuff. Anyway, the little stickers were perfect for adding in that extra something to the page. Enjoy and have a happy Monday!!

7.12.2009

Happy Winter

Supplies : paper by Basic Grey; ink and cardstock by CTMH; Snowfall stamp set and button by Papertrey Ink; Silver Embroidery Floss by DMC; Ribbon from LSS

It's week 32 for Sparkle's Christmas Card Challenge and this week there were 2 added challenges to the card. The first was the sketch. The second part is what made the challenge a bit harder, at least for me. Use one colored cardstock, 2 stamps, 2 embellishments, and 5 pieces of paper. Counting my sentiment I got in the 5 papers, the button and then ribbon were my 2 embellies and I stamped 2 mittens and 2 snowflake circles for the mittens. I stitched some silver embroidery floss to highlight the snowflakes and then used it to stitch on the button as well as wrap around the ribbon. Today I'll be reorganizing my craft stuff, it's become such a mess! Don't forget to visit Sparkle's Post for the challenge and links to the other cards. Thanks for visiting and have a lovely Sunday!

7.11.2009

Hot Cocoa

Supplies : Papers and Tag by My Minds Eye; Cardstock and Classmates stamp set by CTMH; Thickers by American Crafts; Red Candy Dots by Pebbles Inc.; Glitter paper by Doodlebug;

Another winter layout, I hope you guys aren't sick of them! This one was a quickie. I simply did a 9x9 photo collage matted on a 9.5 x 9.5 piece of blue CS and filled in the empty spaces with some fun stripedy paper. The 'O's in my cocoa title are actually upside down 'Q's that I cut the tail off of. I think they look even better than the regular 'o's in the set :D A couple glitter snowflakes and a simple tag to put the girls names and the date on and viola! A 30 minute page! That is super fast for me. If you remember my warm and toasty layout from Monday, that one took me almost 3 hours and it was way simple! I think I average about 2.5-3 hours a page normally. Lately it's been less especially on my 'cheater' layouts. Anyway, have a happy Saturday!

7.10.2009

Warm & Toasty

Supplies : Paper - My Minds Eye (Snowed In); Cardstock - Bazzil; Thickers and Flair button by American Crafts; Glitter paper by Doodlebug; Tag by My minds Eye; Rhinestones; Marvy Snowflake punch

Audrey and her hoodies, I love it! Most of the time she has to have the hood on, even with her short sleeved ones in the summer, lol. I remember during the winter how warm and snuggly she looked all the time in her hoodie sweaters and I loved how her hair peeked out with her hood on. I actually didn't have any idea what I was doing with these pictures when I started, I just knew that I wanted to scrap them. In fact I tried starting out using the #24 IB sketch but it didn't fit the photos the way I wanted it to. This was a simple layout that took forever because everything from the design to picking out the papers was trial and error. I ended up going with what I have been doing a lot of lately and that's been to kind of collage the photos together tightly, and I really like the look of it especially with these big pictures. I hope you all haven't minded seeing a bunch of wintery layouts during the summer :D Thanks for stopping by and have a fabulous Friday!

7.09.2009

Missy Match Ketto

Supplies : Miss Match Ketto from Stampingbella; Paper & cardstock from CTMH; Flower by Prima; Center unknown; markers by CTMH, sharpie, and copic; sentiment printed from computer; white gel pen; stickles

Another fun ketto card. Her hair is so much like Cait's and I love the dancing pose which is totally Audrey. She's just cute all around :D I used the same colors in this one as with Rollanda and I ended up letting the girls have the cards. I wrote a short sweet message in each and read it to them. Caitlyn was jumping up and down she was so excited and she carried it around with her all day. Audrey stared at hers for a while, but after that it was just another goodie to go next to her bed. They love getting cards and I think the last time I made some for them was for Valentines so this was a treat! Have a great Thursday!

7.08.2009

The Night Before Christmas

Supplies : Paper - Scenic Route and My Minds Eye; Cardstock and Classmate stamp set by CTMH; Thickers by American Crafts; Rhinestones; Marvy Snowflake punch

I used the #10 Inspired Blueprints sketch to start me off on this layout since I had this great 5x7 of the girls. This is actually the right page of the layout. I loved that they posed for pictures this last Christmas eve and I hope they continue to do so :D The faces they made on the bottom right picture crack me up and it's become the norm for them to make silly faces for the camera before I can get smiling ones. For the title I did something fun that I haven't done in quite a while but have been seeing more of lately. First I stamped the letters I needed and then I simply cut them out and arranged them on the layout. You can also print your letters with your computer if you like using different fonts. I haven't seen it on layouts in a while but I have been seeing this more and more on cards. It's a great way to create a longer title without having to use stickers or risk stamping directly on the layout which I tend to always mess up on.

Here is the left page. I wanted to make a page that showed the girls with their presents and then wearing their presents so I put the pictures of them holding their wrapped jammies on the top half of the photo collage and then put the pictures of them wearing their jammies right below each girl for the bottom half. I started the title just above the pajama pictures to help the layout with that before and after separation. We started that tradition this last year, but I'm pretty sure it's one we are going to keep and I'm hoping to extend it to both Paul and I this year. Caitlyn actually wears the hot pink penguin jammies now and Audrey has another pair of light pink penguin jammies we bought her after the holiday since we had gotten the sizes too big. Their penguin jammies are both their favorites and it's funny to me that even though these are winter pjs, the girls still wear them more than any others even in this summer weather. Anyway, have a wonderful Wednesday and thanks for stopping by!

7.07.2009

You Go Girl

Supplies : Rollanda Ketto - Stampingbella; Paper - CTMH; Cardstock - CTMH; Flower - Prima; sparkle disc unknown from crafts; stickles; white gel pen; markers from CTMH, sharpie, and copic; sentiment printed from computer

I was able to get a few kettos this last month and this one reminded me of both my girls. The hair is so Audrey yet the skates are so Caitie. And both pull that cute little stance naturally all the time, lol. I knew right away that I wanted to play with bright colors on this image. There are sparklies on the wings too, I've been loving that on all the other cards lately :D I also colored a little eyeshadow on her, I'm still deciding if I like the look or not. It's been so much fun getting back into making cards, I had forgotten how nice it is compared to scrapbooking sometimes. Making a card doesn't take me nearly as long and it's often easier too so I get that sense of accomplishment sooner or more often since I can make a few cards in the same time it takes to make a single page. Not that I don't absolutely love to scrap. I get to keep the pages I make ^_~ Anyway, have a terrific Tuesday!

7.06.2009

Christmas in July

Supplies : Paper - Scenic Route; Cardstock - CTMH; Thickers - American Crafts; Rhinestones; Snowflake Circle Accessory - My Minds Eye; Stickles

I caught a bug to do some winter layouts early last week which is great because I have a ton of Christmas and winter pictures and I have a whole lot of winter paper to boot. These pictures are from 2007 and I realized after pulling them out that I am terrible when it comes to holiday pictures. Not only do I have a hard time getting good pictures but I also take and print a ton! I really need to learn to streamline my printing better. Anyway, since I had all these pictures I thought I may as well try to scrap them and I choose to do a couple tight collages to fit all these photos. There are 17 pictures between the two pages, this one holding the bigger portion of 9. This is also the right side of the 2 page layout but I put it up first since the collage is a little more interesting. I mixed the up picture sizes between 2.5 x 2.5 and 2.5 x 5 which gave me more leeway with some of the photos. While most of them aren't great I didn't want to chop them all up into tiny pics.

Here is the left side of the layout, a much simpler and quicker page. I cut all the photos to 3x4 and fit them in two neat rows with some pattern paper to top it off. This page went together in minutes and was perfect for a simple showcase of some of the closer shots we got. I was really surprised that we had more than one picture of me. Usually I forget to have my picture taken and end up with none of me especially on holidays. I'm really happy that Paul got a few of me in there :D Now if I can just remember to have him take pictures more often, lol. Anyway, I hope you enjoy the pages and have a happy Monday!

7.05.2009

Winter Wonder Quickie

Supplies : My Minds Eye Snowed In paper and accessory sheet; Dot paper - Making Memories; Cardstock by CTMH; Rhinestones by Kaiser

Five minute card made in a flash! I literally got home an hour ago (by the time I finish typing I'm sure I'll have used up the last 5 minutes!) and thought 'hey, I still have time to whip up a card for Sparkle's Christmas Card Challenge.' The sketch has been off and on in my head, we spent most the day at our friends and I forgot to bring my Christmas papers to make a card while I was there so I just scrapped :D Anyway, back to the getting home. We're home and Paul and I rush the kiddos to bed which takes 40 minutes instead of the 10 like we had hoped. Then I'm speeding to the table and pulling/tossing my Christmas packet (I keep all my Christmas paper scraps and goodies for cards in one big 12x12 baggie) on the table and think of what can I make really fast. This card was it and I love how simple and pretty it is! So, I know it's practically Monday already, but at least you night owls can enjoy my card before my early morning scheduled post for tomorrow. Don't forget to visit Sparkle's Blog for the challenge and the links to the other cards. Have a lovely Sunday night!

7.04.2009

Windswept

Supplies : Pattern paper by Making Memories; Cardstock and buttons by CTMH; Sizzle button by Queen Co.; Scalloped cardstock by Bazzil; Thickers by American Crafts

Happy Independence Day! I made this layout for the #23 Inspired Blueprints sketch last month. Last year white space was something I really had a hard time with but now it's something I really love having on my pages. I'm sure it'll change again soon, lol. I feel like just when I think I start getting a set scrapping style I change again. Anyway, I just got this double sided paper the day before I made the layout. I was so excited when I found this photo to use on the sketch that I knew I had to use some of the new paper I found. This is one of those photos that isn't perfect, but I couldn't bear to not keep it either. It's a little blurry, there are deep shadows, but for some reason I still really like it. In fact I think it was taken close to around this same time last year. I remember it being early July. Anyway, enjoy and have a fabulous 4th!

7.03.2009

Ice Cream

Supplies : Paper by My Minds Eye; Cardstock and brads by CTMH; Thickers by American Crafts, White gel pen by Sakura

This layout was the last of the bunch that I made simply to accommodate these fun pictures of the girls eating ice cream sandwiches at the gas station we stopped at before coming home. Usually I don't like eating at rest stops but I forget how fun it was when we were kids to eat out anywhere. They had so much fun sitting in the booth, watching the cars outside refuel and drive off. I simply collaged the photos together so that I could showcase that icecream paper I picked up. It is so cute and I didn't want it to get lost by setting the pictures on top. I also wanted to keep the pics pretty large, so this is what I came up with. I think it turned out just right for the last page of this quintet of pages. That's all for today. Thanks for visiting and have a fabulous Friday!!

7.02.2009

Happy Birthday Monsters

Supplies : Stamp by Stamping Bella; Paper - Basic Grey, My Minds Eye, Scenic Route; Cardstock - Bazzil; Thickers - American Crafts; Sharpies, copics, and CTMH markers; white gel pen

The second bella birthday challenge was a sketch challenge and this is the card I made for Shannan's sketch. I mixed up a lot of different scraps and love how fun and bright it came out. I really liked my coloring on this much better and I've noticed that I have to keep relearning that I don't always have to completely match the colors in my creations for them to look good. These monsters are so cute and Cait immediately loved it saying they were birthday monsters and that the balloon was for her birthday, lol. Enjoy and thanks for stopping by!

7.01.2009

The Shoe Tree

Supplies : Paper and Elements by My Minds Eye; Cardstock and brads by CTMH; Remarks and Thickers by American Crafts; Flowers by Prima

This first page is almost a direct lift from the layout in the magazine only I put it all on one page instead of two. What drew me to the inspiration layout was the almost slideshow like presentation of the photos. It went perfectly with the photos I have since they seem like a modge podge of pictures that don't really make sense or tell a story. Most of the photos weren't great either so this gave me a chance to think about what to keep in each photo since the cropped size is 2 x 3.25, about a quarter of the picture. It allowed me to show the better part of all the pictures I wanted without making the layout look terribly busy. The pictures themselves seem busy enough. I did notice that there weren't any pictures of me, something I need to work on. Despite the fact that I don't like to have my picture taken, I need to get Paul or whoever is around at the time to take some pics of me with our family so that I can be in our scrapbooks too.


On this second page I did another quick and easy photo pocket sheet protector style page, this time with horizontal photos. It was important to me that I not crop these particular photos very much and this double page layout was actually the first one I made to set the feeling for the other pages. We don't actually know the story behind the shoe tree, but we do know that it goes through phases. I'm not sure who it is that cleans up the shoes, but there are seasons when the tree is full or close to empty. Paul's brother was the one who told us about it and suggested we take a little excursion out there to shoot some photos since at that time it was full of shoes and also just to see this fun landmark about an hour away from where we live. Directly across the street from the tree are some horses which Cait found way more interesting than the tree, lol. It was a fun little detour from the everyday. Friday I'll have the final page posted. Until then have a great week!